HOW TO: Fix power steering column that will not move up and down

 07-12-2007, 05:31 AM
#1
MBWorld Fanatic!
Thread Starter

Join Date: Jul 2005
Location: Sydney, Australia
Posts: 3,220
Likes: 0
Received 9 Likes
on
6 Posts
W203 slightly modified
HOW TO: Fix power steering column that will not move up and down
SYMPTOM: Steering column no longer travels up and down, sound of motor spinning, no movement. This repair is labour intensive but the part is worth only a few dollars.
VALID FOR: Memory steering column with motorized control.
MODELS: R171, W203, W204, W209, W211, W219, R230, W240.
WORK STEPS AS SHOWN IN W203:
1/ Remove centre console (6 screws)
2/ Remove dashboard end cover (unclip)
3/ Remove light switch (1 screw)
4/ Loosen ignition switch (ring)
5/ Remove cluster (2 hooks)
6/ Loosen under dash panel drivers side (3 screws)
7/ Remove head unit / radio (4 screws for COMAND, 2 for radio)
8/ Remove lower half of dashboard (drivers side)
- 3 screws radio area
- 1 screw near knee - bottom side
- 1 screw near outer vent
- 1 screw near bottom of fuse holder (W203)
Other work steps as shown in photos.
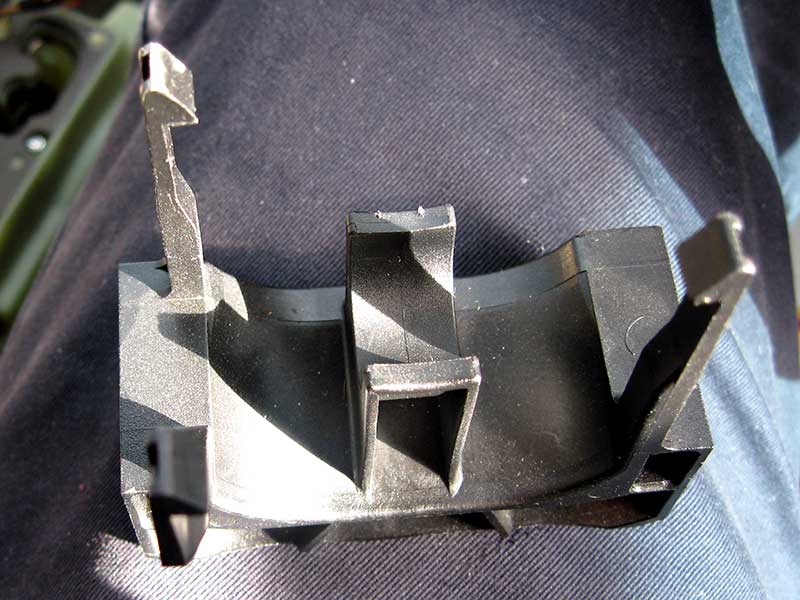
The broken part and new part side-by-side.
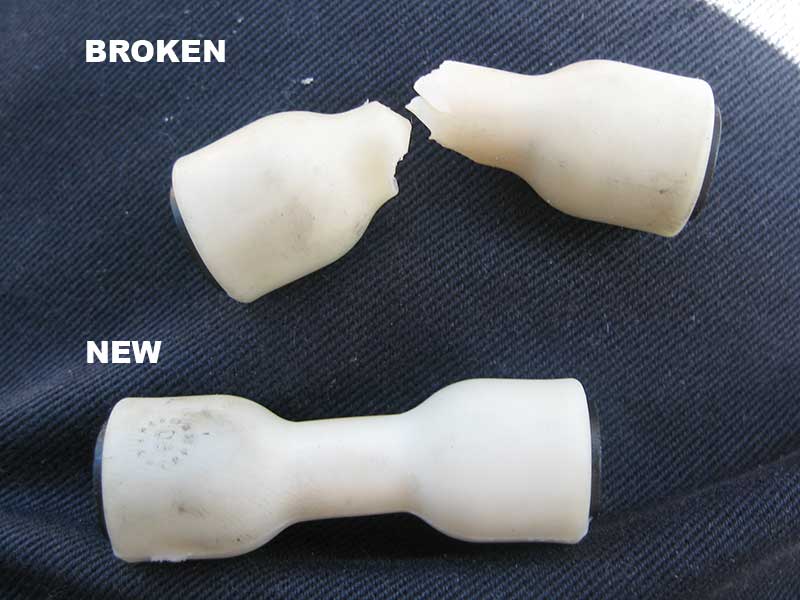
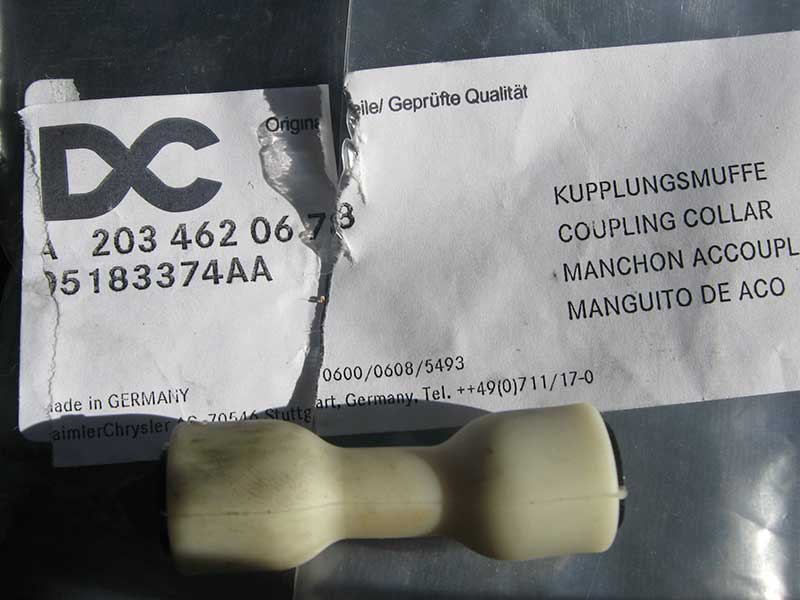
Part number: A203 462 06 78
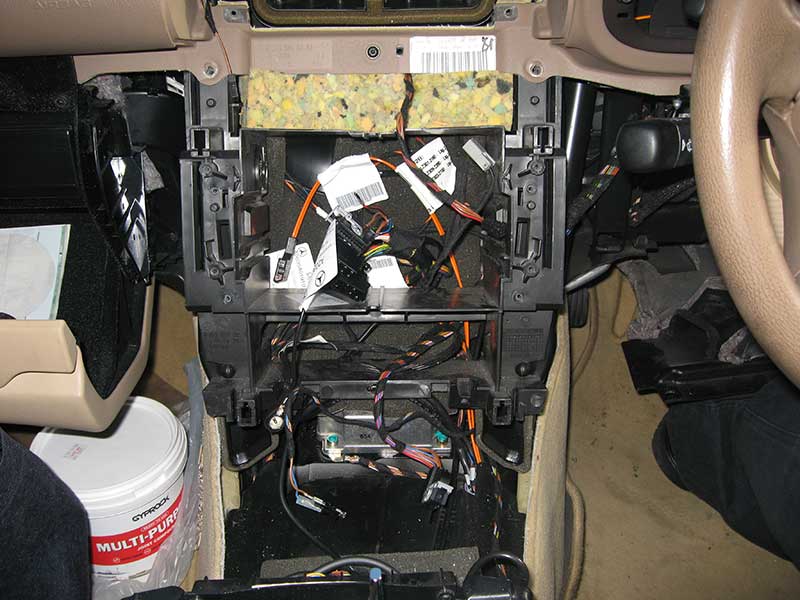
Dashboard trim parts removed. Also removed passenger side so that I could repair the footwell flaps levers on heater box (best time to replace those fragile levers)
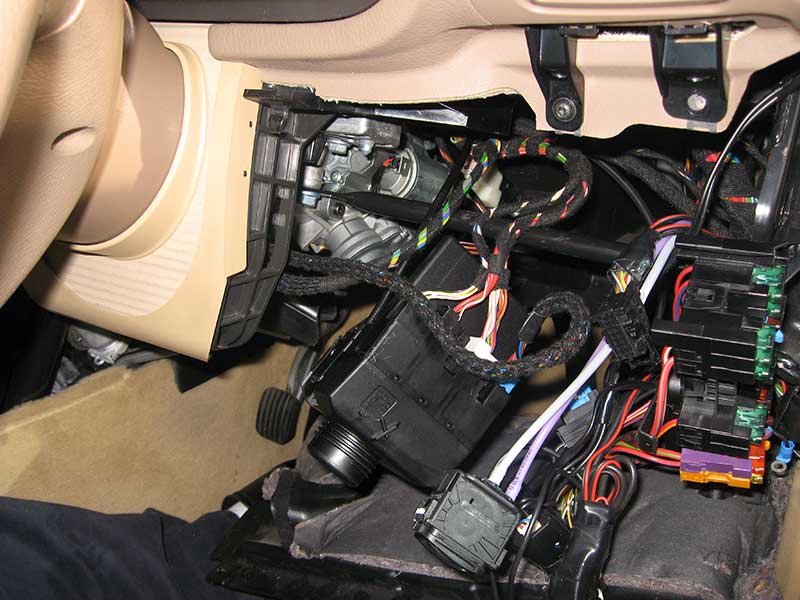
Ignition switch and light switch hang down. Also shown is European vacuum switch not used in USA.
Cover panel removed from area where parts will be removed
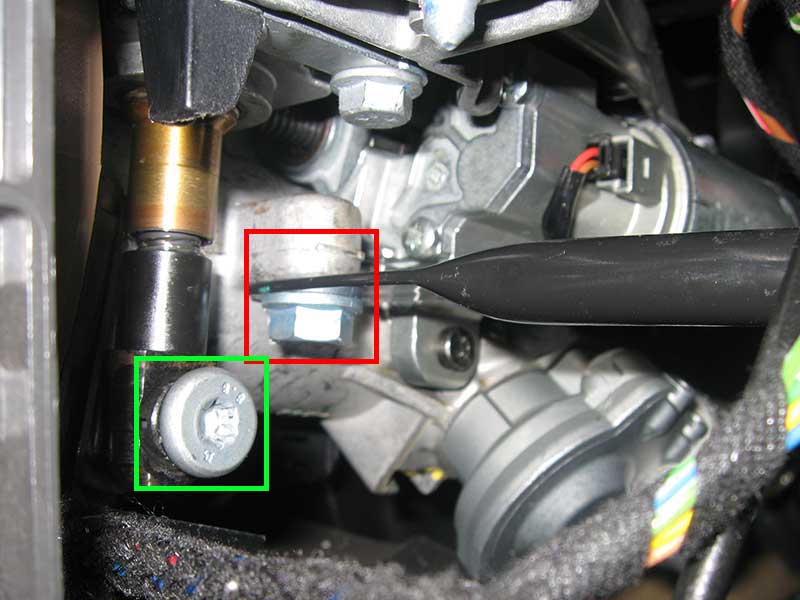
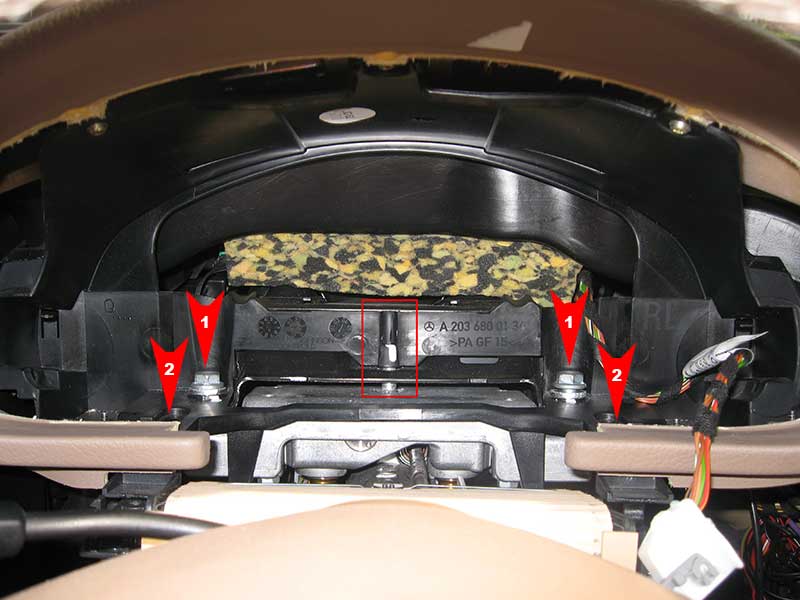
Stability bar bolt shown in red, cross-bolt from vertical adjustment shown in green.
Stability bar removed (2 bolts)
Vertical adjustment assembly + steering column
Remove 6 screws from the cluster area. Part in red rectangle is the alignment pin
Disengage vertical adjustment assembly from main plate (4 screws)

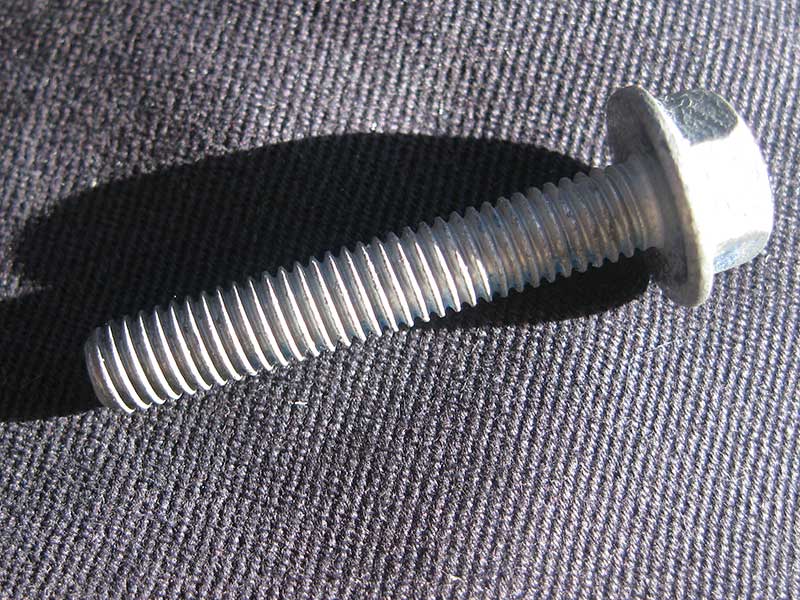
Main plate bolt (x4)
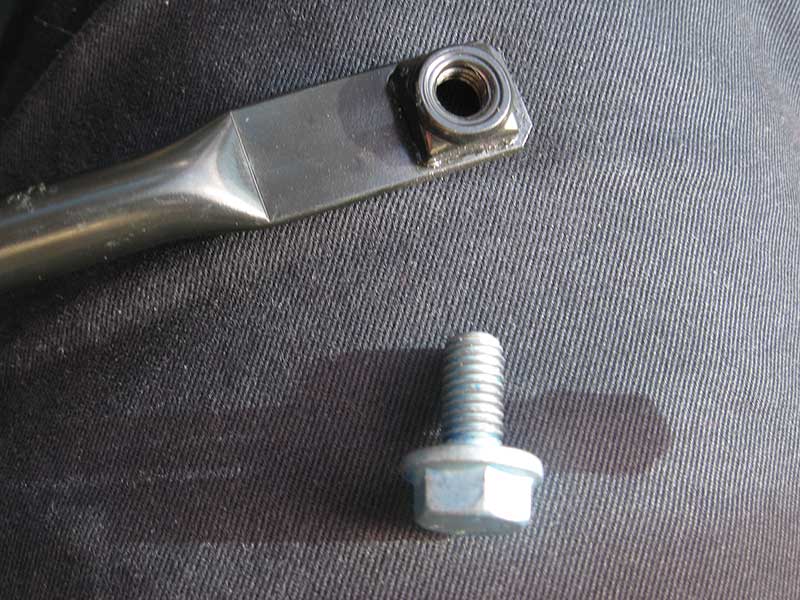
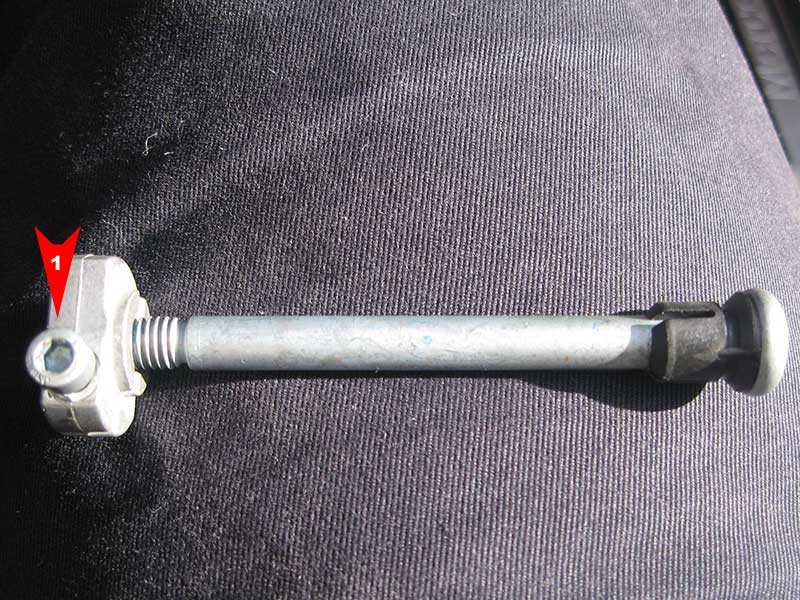
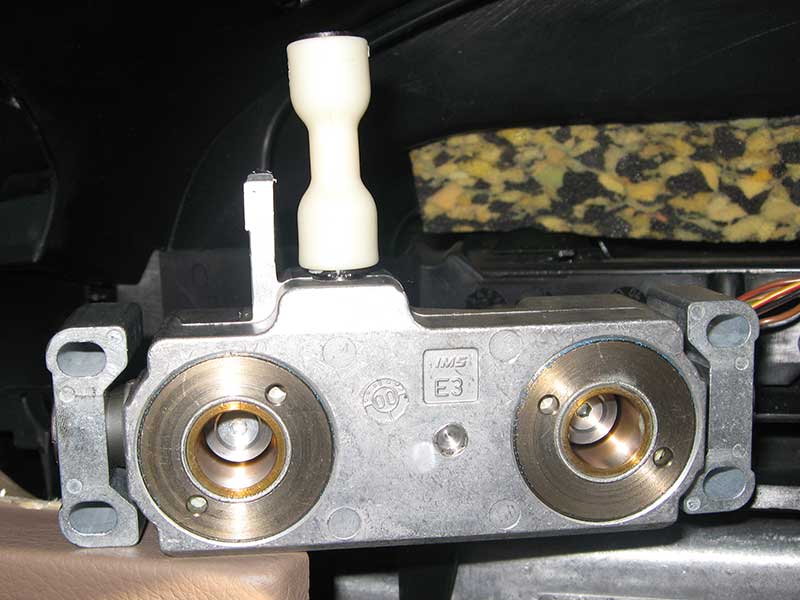
Loosen bolt clamp (1 hex screw) and unwind from main bolt. Remove vertical adjustment bolt from assembly. There are two black spacers on the bolt (one shown).
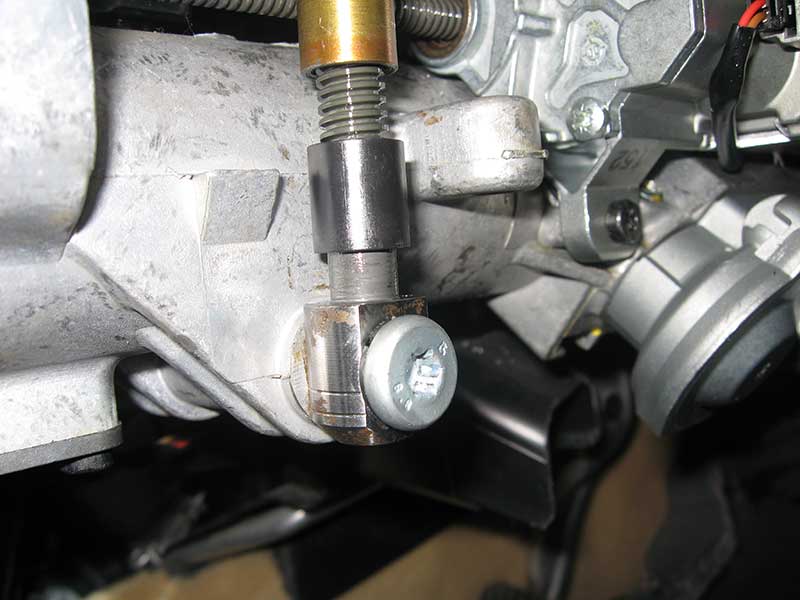
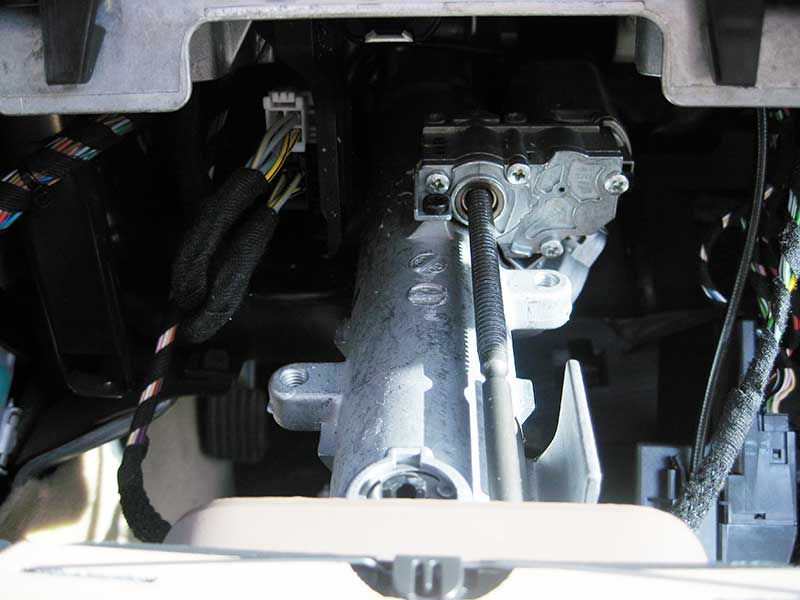
How your steering colum will appear at this point
Vertical adjustment assembly with new collar in place (spline). Test the thread by spinning the adjustment arms to see if one of the arms has locked. Loosen with gentle pressure.
Push assembly back into place and mate collar with drive motor. Install all parts back into place.
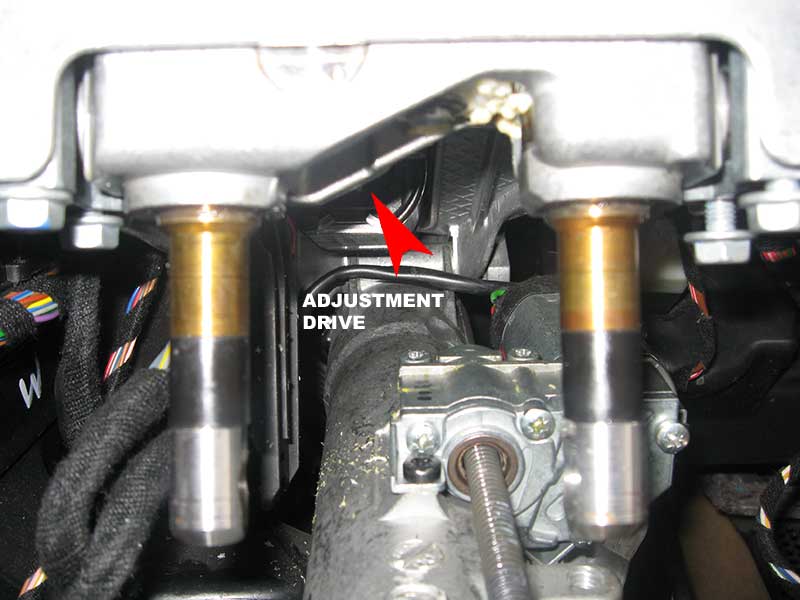
Your steering column now goes up and down again. Work steps may vary for other models.
VALID FOR: Memory steering column with motorized control.
MODELS: R171, W203, W204, W209, W211, W219, R230, W240.
WORK STEPS AS SHOWN IN W203:
1/ Remove centre console (6 screws)
2/ Remove dashboard end cover (unclip)
3/ Remove light switch (1 screw)
4/ Loosen ignition switch (ring)
5/ Remove cluster (2 hooks)
6/ Loosen under dash panel drivers side (3 screws)
7/ Remove head unit / radio (4 screws for COMAND, 2 for radio)
8/ Remove lower half of dashboard (drivers side)
- 3 screws radio area
- 1 screw near knee - bottom side
- 1 screw near outer vent
- 1 screw near bottom of fuse holder (W203)
Other work steps as shown in photos.
The broken part and new part side-by-side.
Part number: A203 462 06 78
Dashboard trim parts removed. Also removed passenger side so that I could repair the footwell flaps levers on heater box (best time to replace those fragile levers)
Ignition switch and light switch hang down. Also shown is European vacuum switch not used in USA.
Cover panel removed from area where parts will be removed
Stability bar bolt shown in red, cross-bolt from vertical adjustment shown in green.
Stability bar removed (2 bolts)
Vertical adjustment assembly + steering column
Remove 6 screws from the cluster area. Part in red rectangle is the alignment pin
Disengage vertical adjustment assembly from main plate (4 screws)
Main plate bolt (x4)
Loosen bolt clamp (1 hex screw) and unwind from main bolt. Remove vertical adjustment bolt from assembly. There are two black spacers on the bolt (one shown).
How your steering colum will appear at this point
Vertical adjustment assembly with new collar in place (spline). Test the thread by spinning the adjustment arms to see if one of the arms has locked. Loosen with gentle pressure.
Push assembly back into place and mate collar with drive motor. Install all parts back into place.
Your steering column now goes up and down again. Work steps may vary for other models.

The following 4 users liked this post by benzmodz:
07-12-2007, 11:26 PM
#2

Fantastic Post
My congratulations on putting all the time and effort into an outstanding post for anyone doing a similar repair. More posts like yours and the stealerships would be losing money for sure.
Glenn
Glenn
The following users liked this post:
Skoolboy (02-04-2020)
 07-16-2007, 01:16 AM
#4
MBWorld Fanatic!
Thread Starter
Join Date: Jul 2005
Location: Sydney, Australia
Posts: 3,220
Likes: 0
Received 9 Likes
on
6 Posts
W203 slightly modified
I was also fixing the COMAND unit and footwell flaps on code 581 blower box.
I am sure that there is a 5 minute fix but someone needs to document it. Given that the joint is lame I would prefer not to flex it.
I am sure that there is a 5 minute fix but someone needs to document it. Given that the joint is lame I would prefer not to flex it.
10-25-2010, 01:43 PM
#5
Junior Member

Join Date: Oct 2010
Location: USA
Posts: 43
Likes: 0
Received 0 Likes
on
0 Posts
C240
replacing coupling column of power tilt-steering without removing all center console
Trending Topics
10-26-2010, 11:25 PM
#8
Junior Member
Join Date: Oct 2010
Location: USA
Posts: 43
Likes: 0
Received 0 Likes
on
0 Posts
C240

 The dealer want $1,500 to repair this. I will I will be doing this repair myself. but their must be a better way.
 I just did this on my 2005 E-500 and it only cost mt $7.50 and two hours of my time. Thanks for the instructions
 08-12-2012, 09:52 PM
#13
Newbie
Join Date: May 2012
Posts: 6
Likes: 0
Received 0 Likes
on
0 Posts
2005 E500 Appearance Package
The following users liked this post:
GreenDog (05-30-2020)
 01-01-2013, 10:52 PM
#19
Junior Member

Join Date: Aug 2012
Location: Portland, Oregon
Posts: 54
Likes: 0
Received 1 Like
on
1 Post
W203 C320, W208 CLK 320, w209 CLK 500
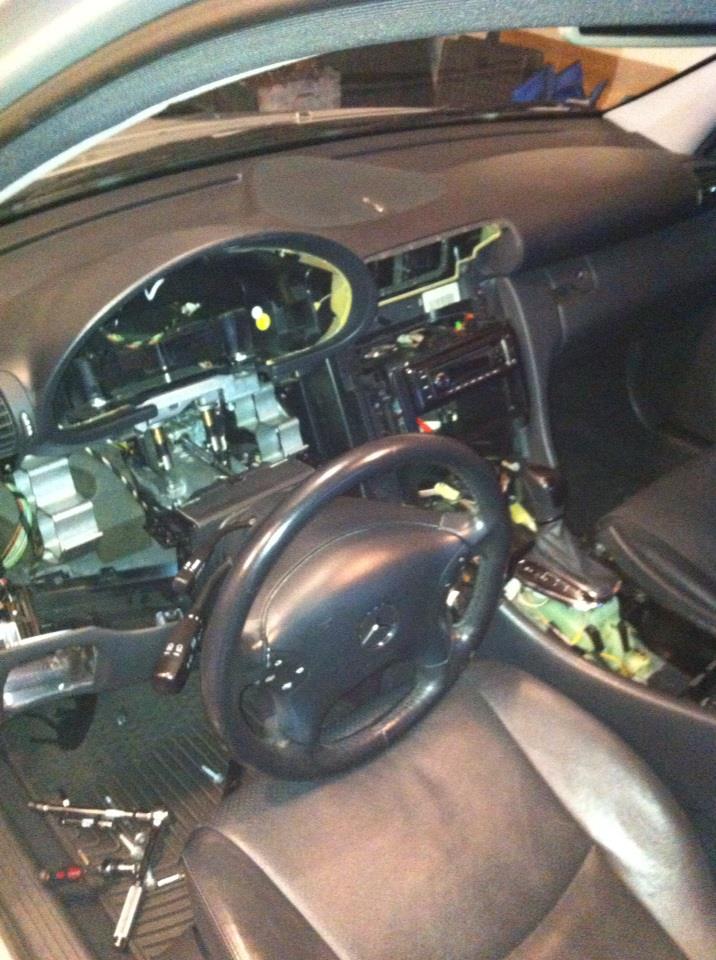
Just did this on my c320 after finally having enough of having the steering wheel stuck at the highest possible setting from when we bought the car half a year ago and I wanted to say thanks for the instructions, probably would have never gotten to it without them.
Here's a crappy cell phone pic of the massive pita I went through to get the steering wheel to come down a few inches.
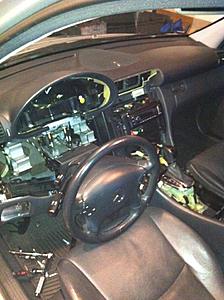
Here's a crappy cell phone pic of the massive pita I went through to get the steering wheel to come down a few inches.
 03-05-2013, 07:53 PM
#20

Oh man, I was just in about that deep into the dash for the heater box stepper motor linkages. I left one unplugged since I cannot reach it from underneath. It requires bolt removal from the engine side of the firewall. It controls the left windshield defrost.
I guess I have to go in again. I am amazed at how many $20 parts/$1000+ labor issues my 2003 C320 has had in the last year or two.
Frustrated.
And now I get a little clunk around the rear differential when I transition from reverse to drive when rolling too fast... and also at takeoff from a light under certain circumstances.
06-10-2013, 02:15 PM
#22
MBWorld Fanatic!

I have yet to tackle the dog bone, but disassembling the center stack is fairly easy once you've done it before, I can have it down to firewall within 10 minutes.
06-10-2013, 02:40 PM
#23
Member

Join Date: Aug 2008
Location: Tejas
Posts: 197
Received 27 Likes
on
23 Posts
2016 C450 AMG, 2005 C230 Kompressor
I've yet to do the center piece...I'll just have to look up another DIY for that part. I just ordered the coupling (11$ shipped)...NOT looking forward to the labor but I installed my a/c compressor myself instead of paying the quoted 1,500-2K$ stealership gesture. THAT was a PITA and I felt it the day after.
06-10-2013, 02:48 PM
#24
MBWorld Fanatic!
I've yet to do the center piece...I'll just have to look up another DIY for that part. I just ordered the coupling (11$ shipped)...NOT looking forward to the labor but I installed my a/c compressor myself instead of paying the quoted 1,500-2K$ stealership gesture. THAT was a PITA and I felt it the day after.
Last edited by alboogiee; 06-10-2013 at 03:12 PM.


