Mercedes-Benz E-Class and E-Class AMG: How to Replace Front Shocks
Worn front shocks on your Mercedes-Benz E-Class could mean a bouncy front end, and a bouncy front end means less control. Here's how to replace the front shocks and save yourself some money.
This article applies to the Mercedes-Benz E-Class and E-Class AMG (2002-2009).
When it's time for new shocks on your Mercedes-Benz E-Class, you don't have take it to a pro unless you do not mind spending the money. Even the most non-mechanically inclined novice can swap the front shocks on their Benz. This is especially true if you are not planning on lowering the car. Even if you purchase the Bilstein sports, (which requires a lowering package), this job is not too tough to tackle. There are many options available to you, such as Bilstein, K-Sport, KYB or a myriad of other brands. The KYB shocks are extremely stiff and are best for the track and Bilstein sports are by far, the most popular brand among E-Class owners. Depending on the shop, you may be surprised by a bill of up to $2,000 just to replace the fronts. Save yourself from bill shock and replace your own shocks. This is a very easy job that doesn't require any special tools, not even a spring compressor, as these springs are not heavily compressed on the Mercedes cars.

Materials Needed
- Hydraulic floor jack
- Jack stands
- Socket set and 13, 16 and 21 mm sockets
- Rubber mallet or large hammer
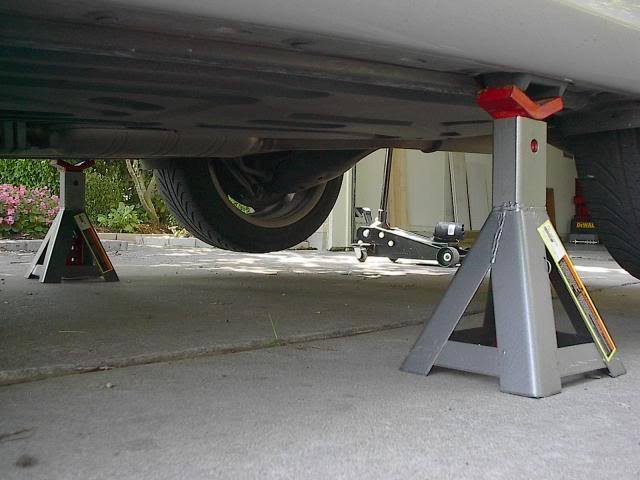
Step 1 – Raise the front end and set on jack stands
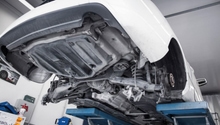
Use a hydraulic floor jack to raise the car at the proper jacking locations and set it on jack stands in the proper locations as well. Remove the tires (loosen the lugs before you jack the car). Turn the steering wheel about half way in the direction of the shock you are working on. If you turn it all the way in that direction, it may be difficult to remove the shock assembly from the wheel well.
Pro Tip
Always use jack stands when working underneath your E-Class. Block the rear wheels to make sure it doesn't roll.
(Related Article: How to Jack up Your Car - MBWorld.org)
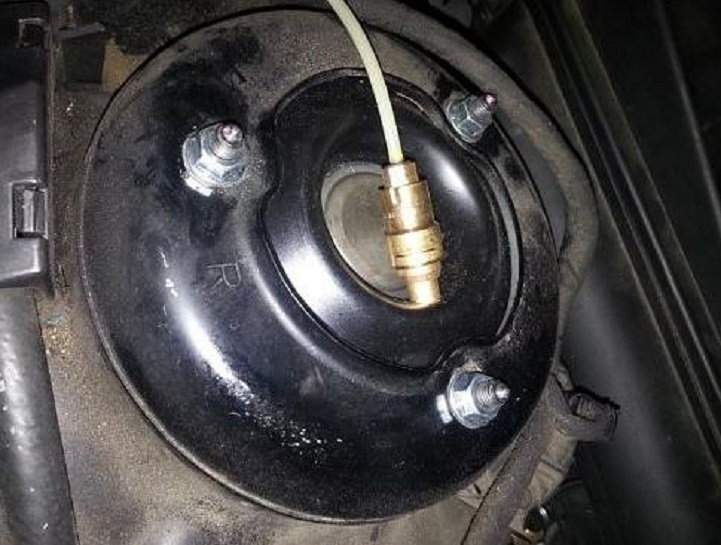
Step 2 – Disconnect air line from top of air strut (If applicable)
Open the hood and disconnect the air line from the top of the air strut on the side you are replacing (if you have front air suspension).
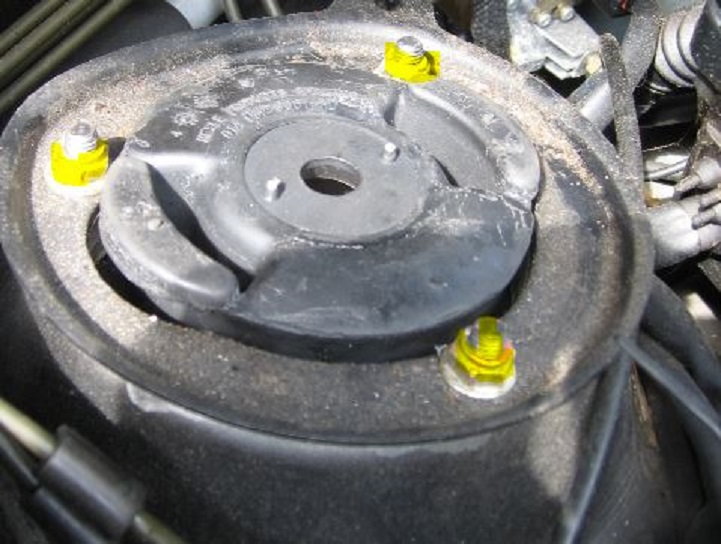
Step 3 – Remove tower bolts
Use a ratchet and a 13 mm socket to remove the three 13 mm bolts from the top of the strut tower.
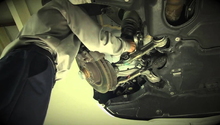
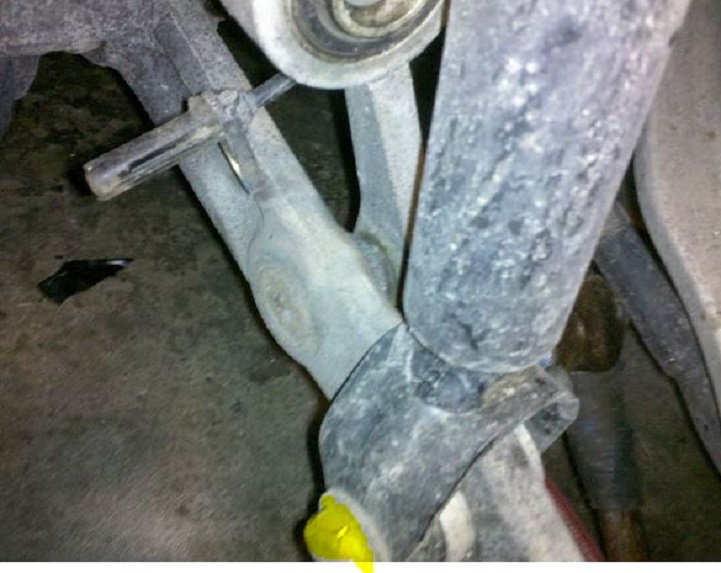
Step 4 – Remove lower mounting bolt
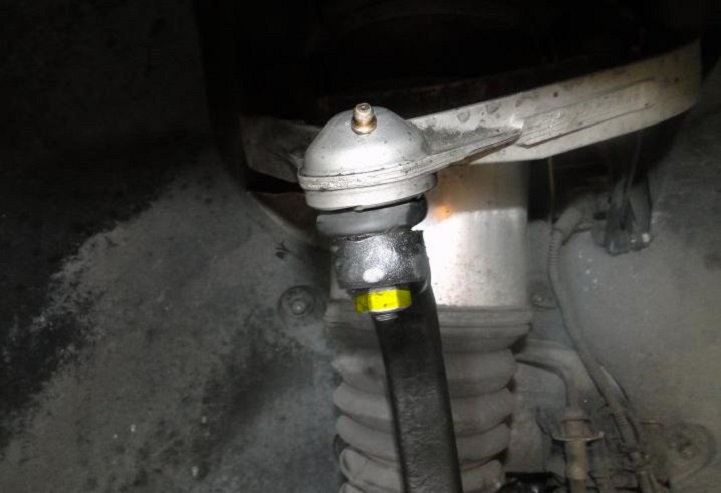
Use a ratchet and a 21 mm socket to remove the mounting bolt that holds the strut to the lower control arm.
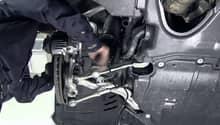
Step 5 – Remove spindle
Loosen the 16 mm nut that attaches the spindle to the upper control arm. Use a large hammer (rubber mallet preferably) and strike the spindle where the upper ball joint passes through. Only loosen the nut to protect the threads from getting mashed. This might take a few whacks and is the most difficult part of this whole process.
Step 6 – Remove shock assembly
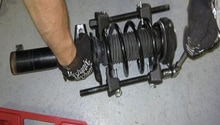
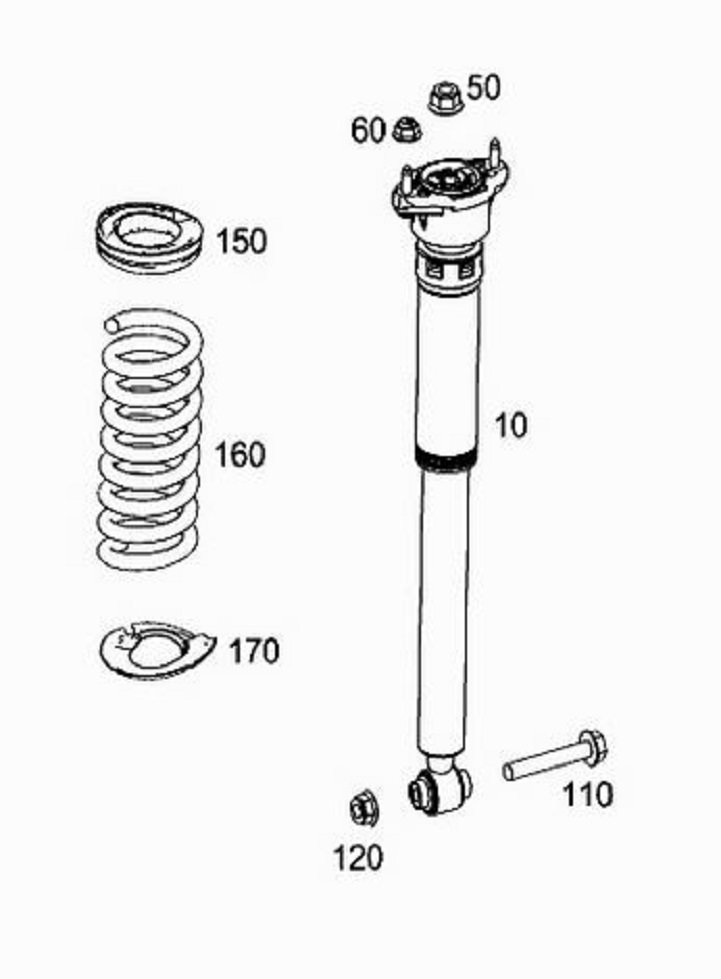
Pull out the shock assembly (it will take some contortion to remove from the wheel well). Once this is out, you will need to compress the springs, remove the tower mounting assembly, and swap out the shocks if you are not installing a lowering kit. Ideally, you would use a spring compression tool to do this, but these springs are not loaded heavily and some zip ties or ratcheting straps should work just as well. Once the new shock is replaced, the entire strut assembly is re-installed in reverse order as easily as it was removed.
Related Discussions and Sites
- How to Replace Shock Absorbers - MBWorld.org
- W210 Shock Replacement Photos - Benzworld.org
- How to Replace Front Shock with Air Suspension - MBWorld.org
- Strut Replacement - MBWorld.org
- Front Strut Replacement DIY with Pictures - Benzworld.org