Mercedes-Benz E-Class: How to Replace Engine Air Filters
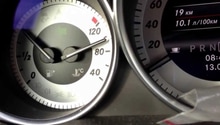
Hesitation, stumbling under wide open throttle, and reduced power are all signs of clogged engine air filters in your Mercedes-Benz E-Class. The air filters are easily accessible and can be replaced in about 30 minutes in your own driveway.
This article applies to the Mercedes-Benz E-Class (2002-2009).
Your Mercedes-Benz E-Class' engine is an efficient and powerful air pump. It draws cold outside air through inlets in the front grill, mixes that air with gasoline and then compresses and burns the volatile mixture. The vigorous combustion force drives the wheels, and the hot air/gas mixture is cleaned of contaminants and pumped out the dual exhaust.
To protect your engine, the outside air is filtered, and when those filters begin to clog, they choke off the some of the incoming air. The combustion force is reduced and the car loses power. The Mercedes Maintenance Manual recommends changing the engine air filters at 40k miles. The air filter change may also show up on a B2 Service Reminder.
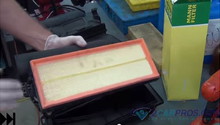
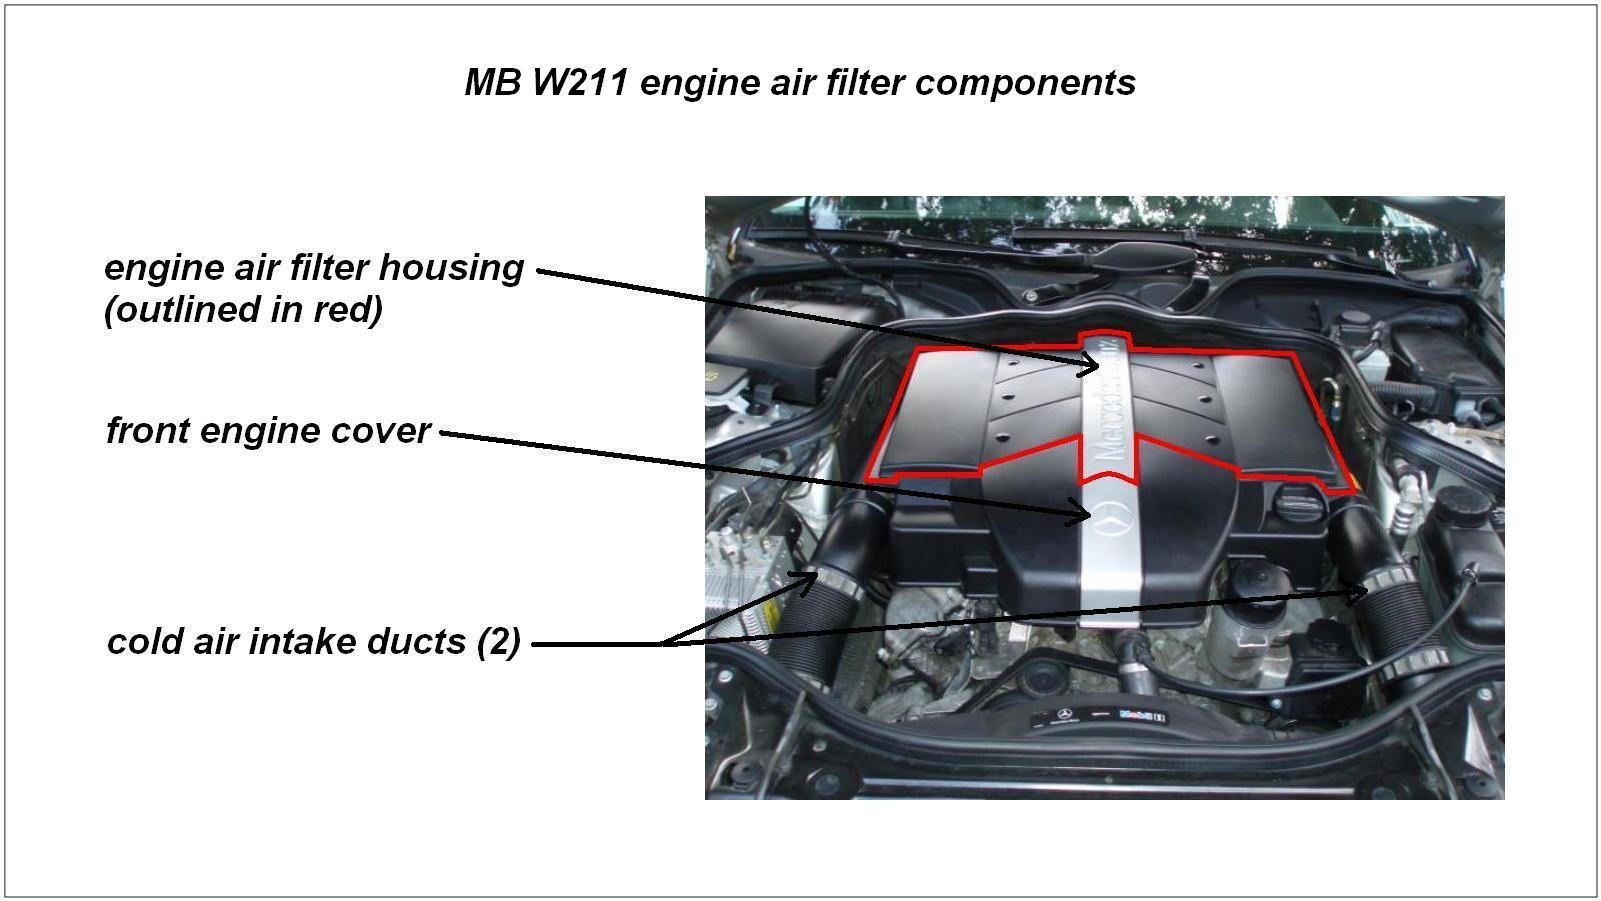
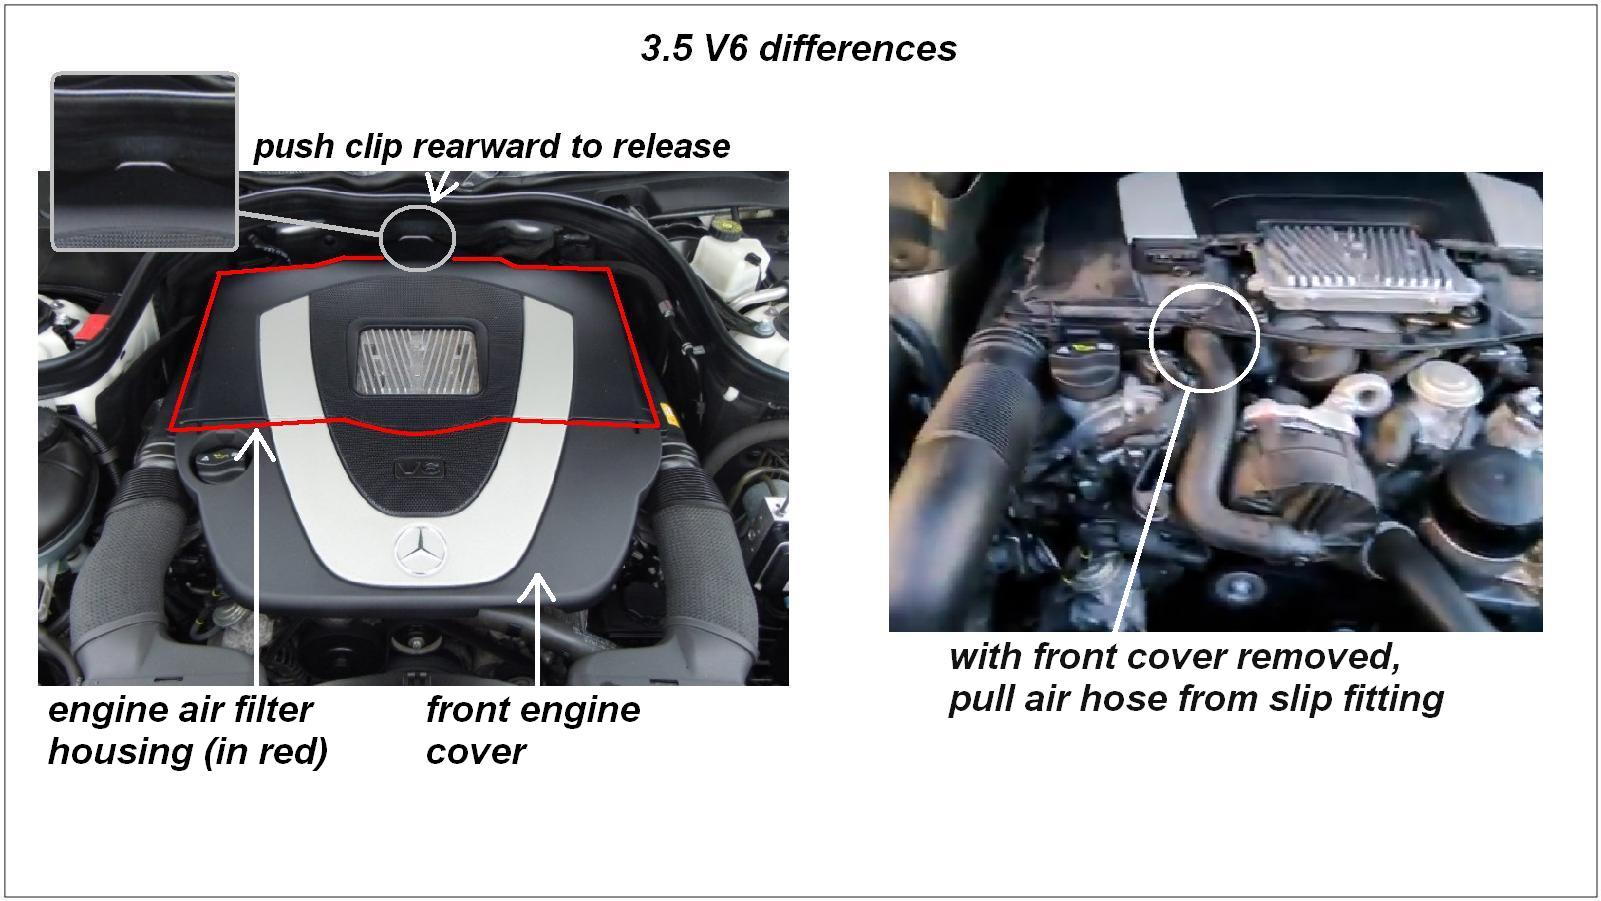
The engine air filter components are in plain sight and easy to work with. The dual air intake ducts carry outside air from the grill to the air filter housing on top of the engine. The housing is outlined in red below (Figure 1) and is separate from the front engine cover. The housing contains two rectangular air filters, one on each side.

Materials Needed
- Two engine air filters as verified for your car (MB part 273-094-04-04) or equivalent
- Naphtolen H lubricant (MB part 000-989-01-60-01, about $90) OR Gold Eagle 303 Aerospace Protectant (about $10)
- Torx T-25 driver
- Mechanic's gloves
- Blanket
Step 1 – Remove the intake ducts
Warning
Do this when the engine is cold.
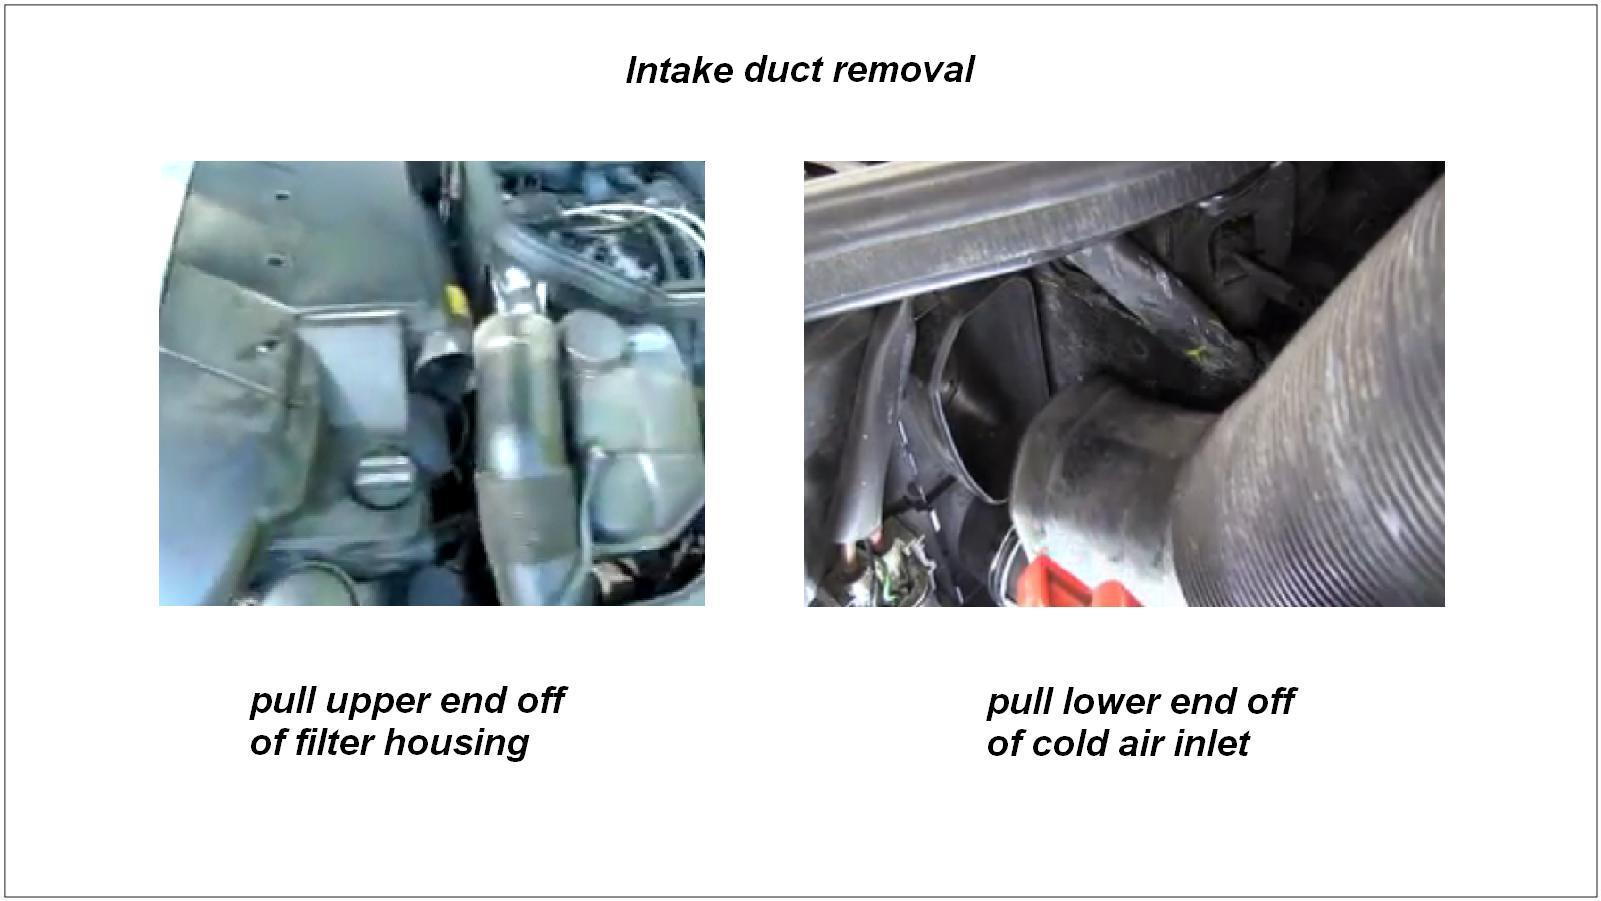
The ducts are slip-fit (friction-fit) at both ends. The accordion pleating makes the duct flexible. Pull one duct off the upper fitting on the filter housing. Then pull the duct off the lower fitting beside the radiator. Repeat with the other duct. Keep track of the left and right ducts.
Pro Tip
Always wear mechanics's gloves or work gloves to protect your hands when working under the hood.
Step 2 – Remove the front engine cover
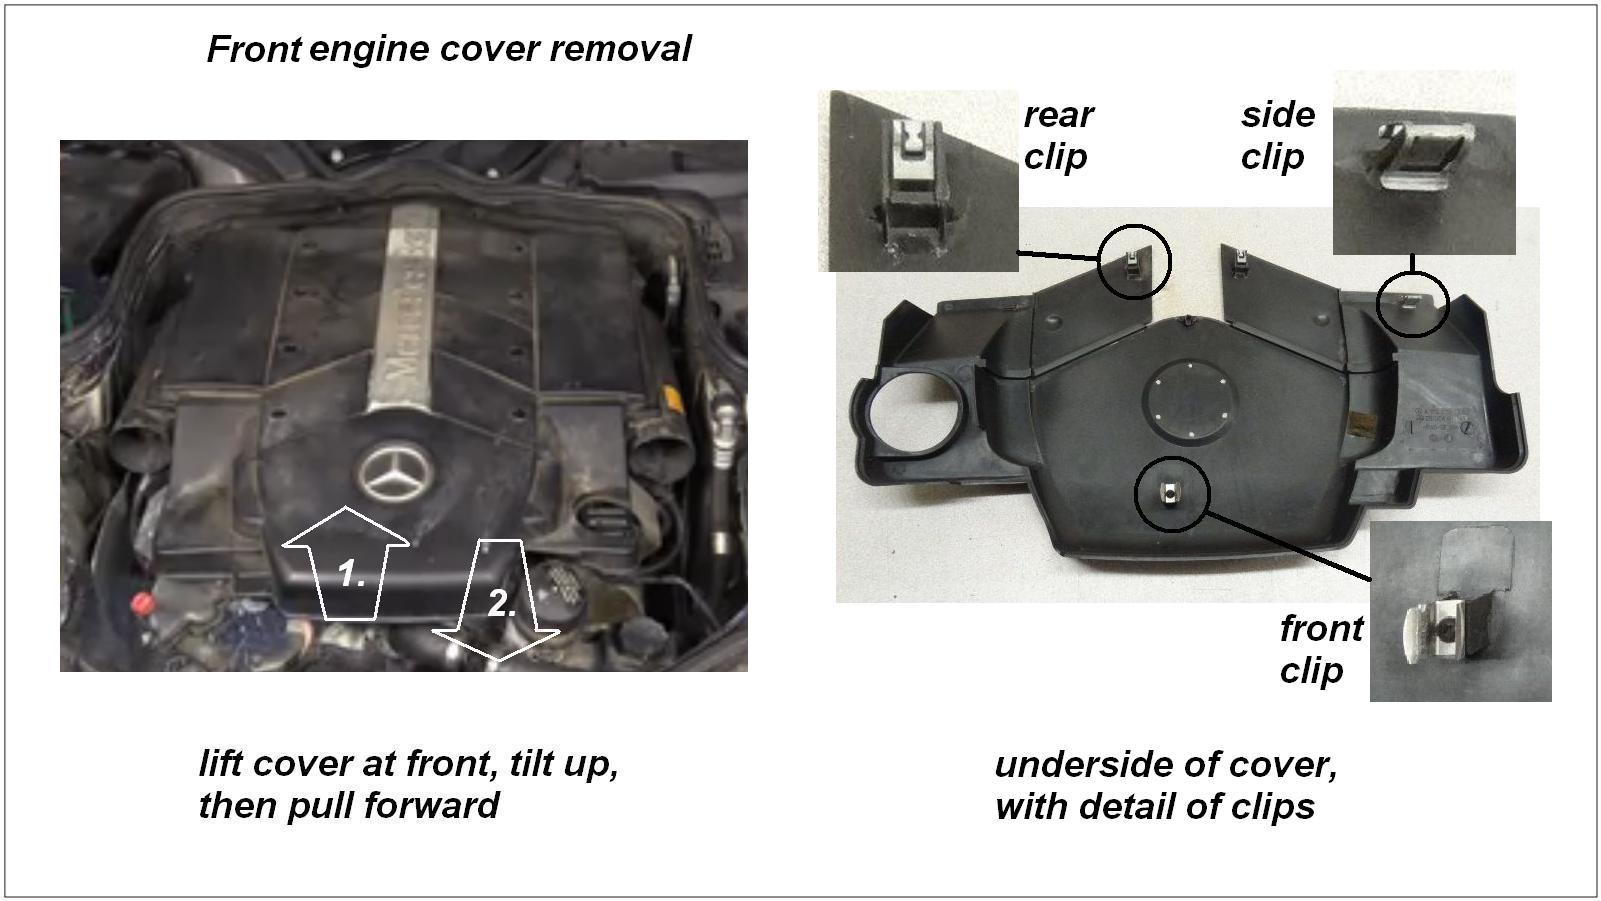
Grasp the cover under the front edge and lift to unclip the front clip. Tilt the front of the cover up, while lifting along the sides, to unclip the side clips. Then pull the cover forward to release the rear clips and remove the cover. Lay the cover on a blanket to protect the finish.
Note
The front clip is metal, while the side and rear clips are plastic. Be sure to work gently with the engine cover. Note that the side clips are straight, while the rear clips are angled 90 degrees to the rear.
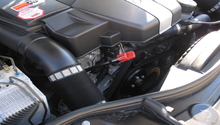
Step 3 – Remove the engine air filter housing
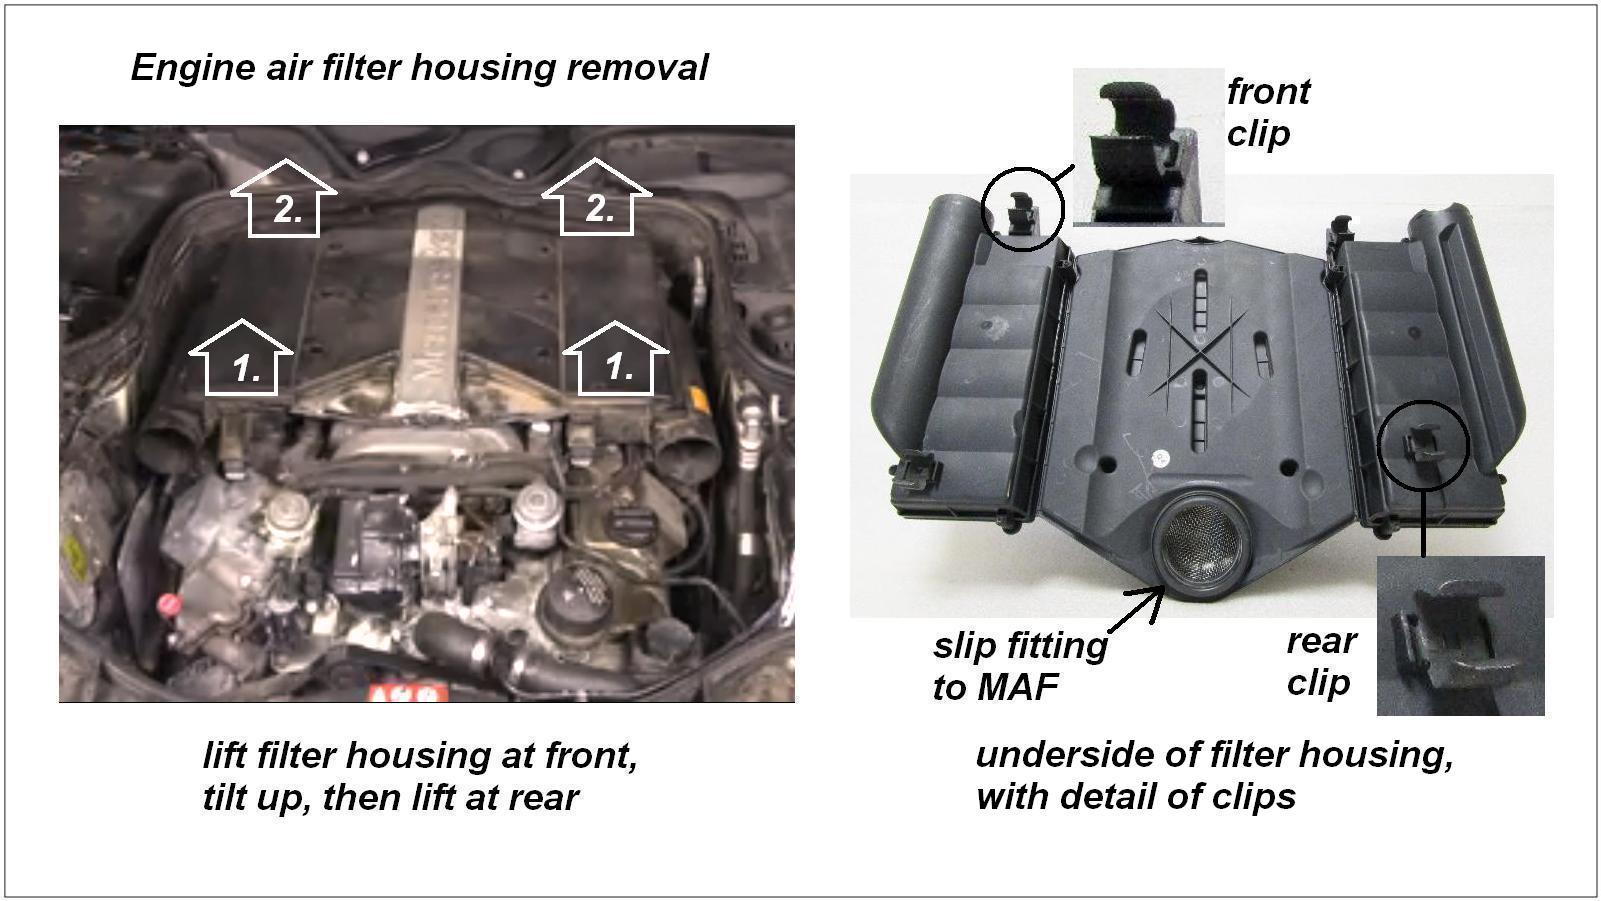
The housing is clipped in place and slip-fit over the mass airflow (MAF) fitting. Grasp the housing along the front sides and lift to unclip the front clips. Tilt the front up and lift at the rear to unclip the rear clips. Gently work the housing up off the MAF fitting and remove it. Lay the housing on a blanket to protect the finish.
Note
3.5 V6 owners: see "Important Note for the 3.5 V6" (below Figure 7) and Figure 8.
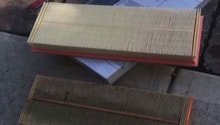
Step 4 – Remove the old filters
Place the housing upside down on the blanket. Use the T-25 Torx driver to loosen the four Torx screws on the right-side housing; the screws are captive and will not come all the way out. Pull off the right-side filter cover and remove the filter. Clean up any dirt and debris left in the housing and cover.
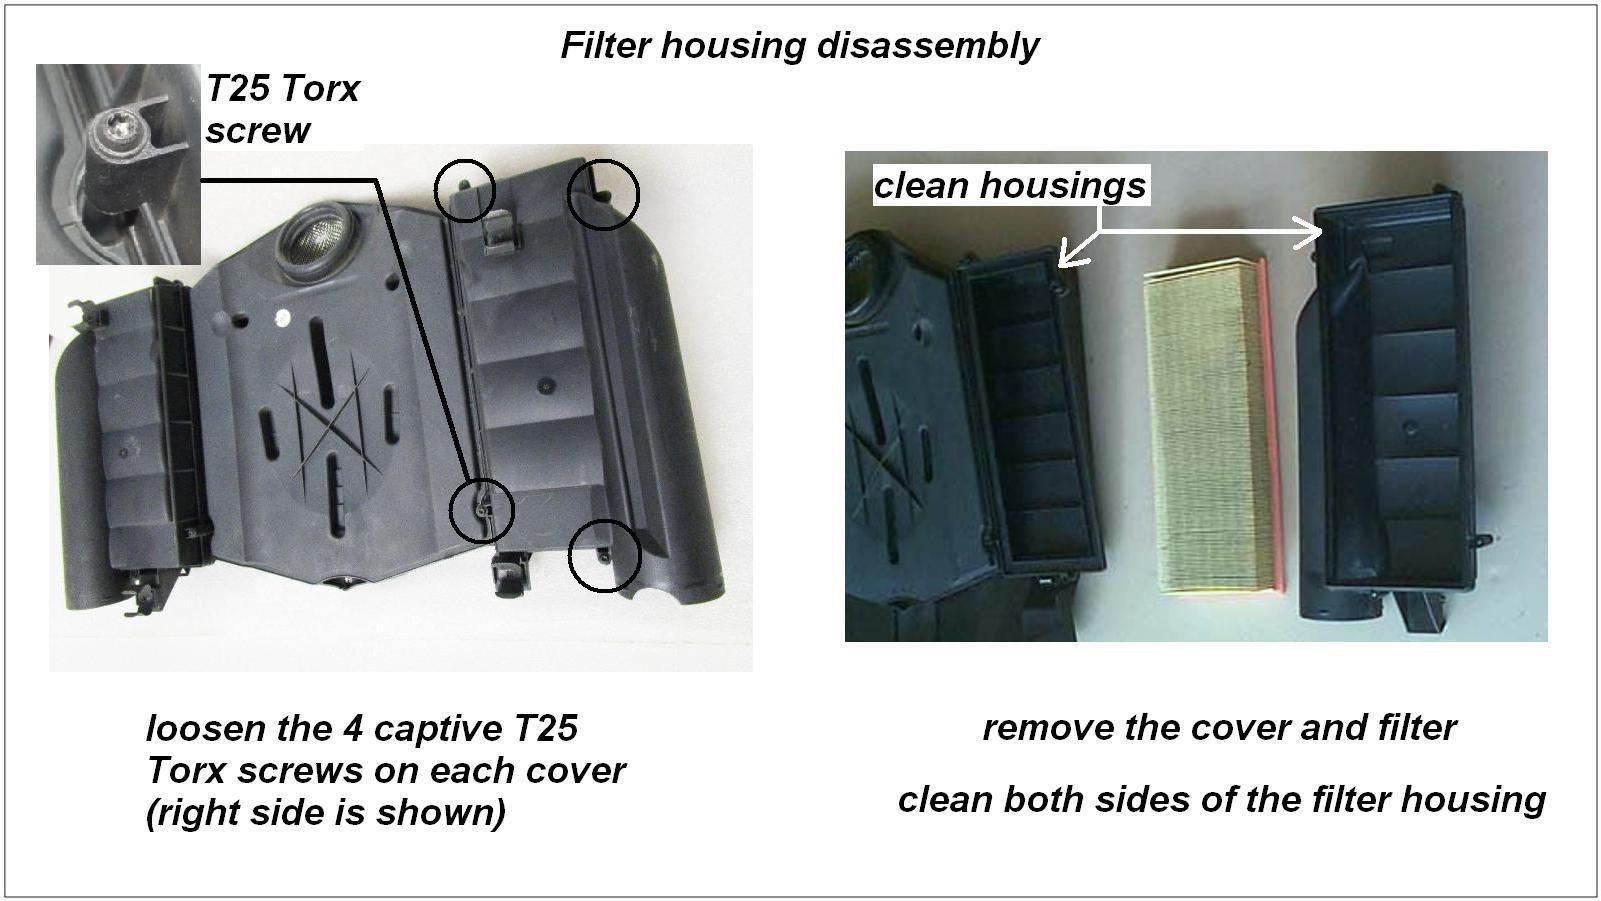
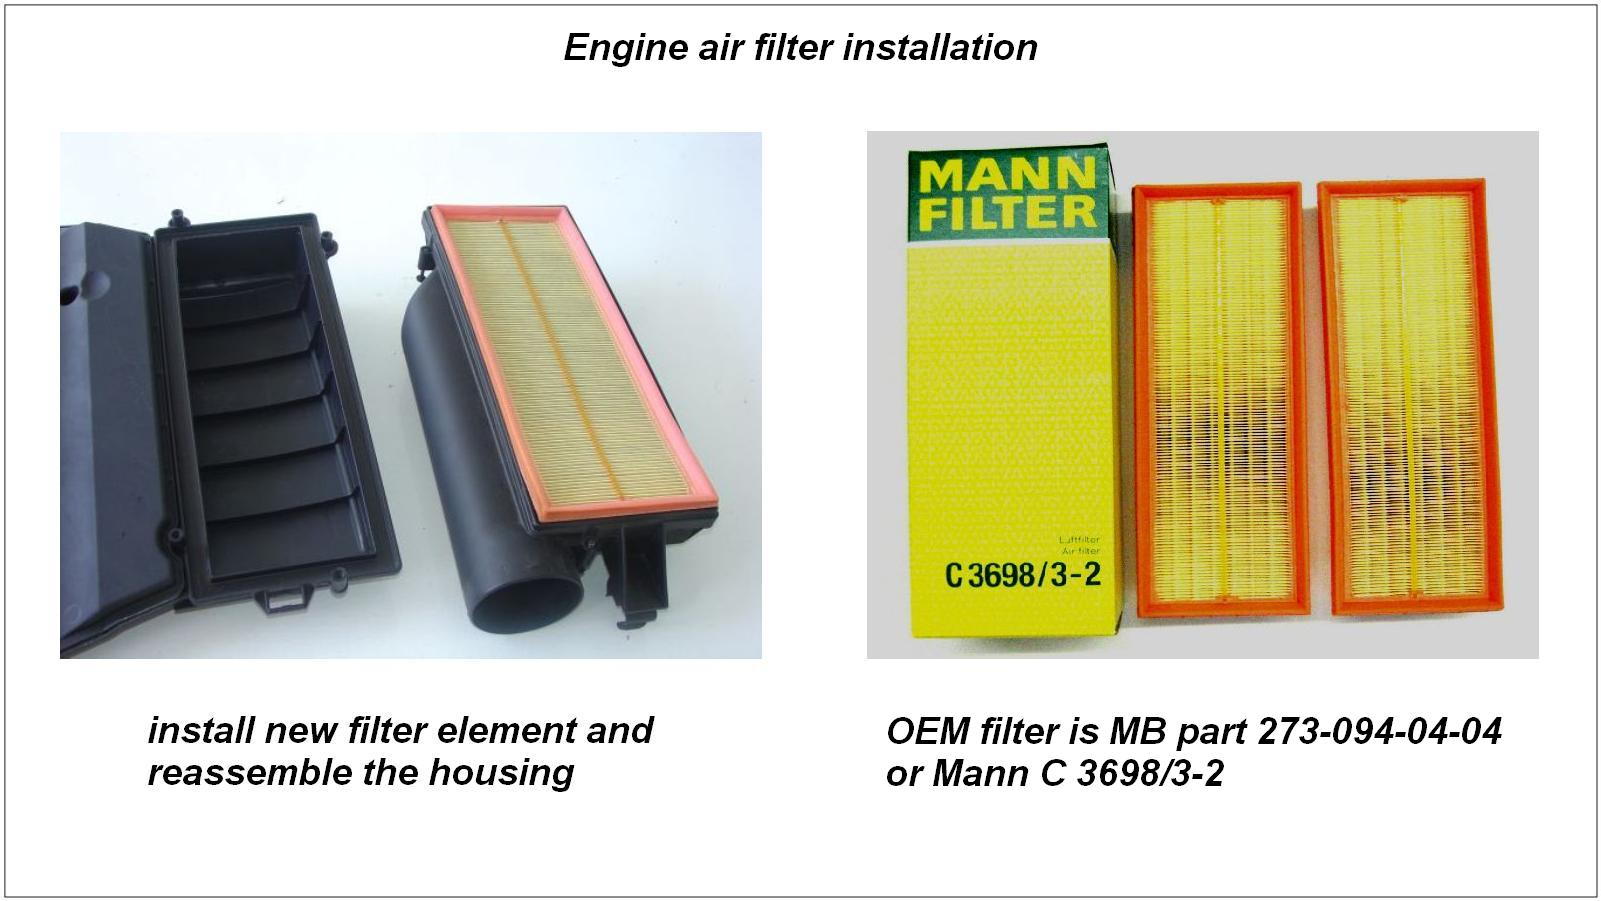
Step 5 – Install the new filter
Pro Tip
Some models use different filters. Always verify the filter part number for your car before you purchase.
The Mercedes-Benz filter part number is 273-094-04-04 (this is a revision to the older number 112-094-06-04). The OEM filter is a Mann C3698/3-2 (this a revision to the older C3698-2). Many aftermarket filters are also available at auto parts stores.
Place the filter into the cover with the pleated vanes inside the cover as shown. Then place the cover back on the filter housing. Tighten down the four Torx screws. Repeat Steps 4 and 5 on the left-side filter.
Note
Keep in mind that the filter housing is plastic. Do not over tighten the Torx screws.
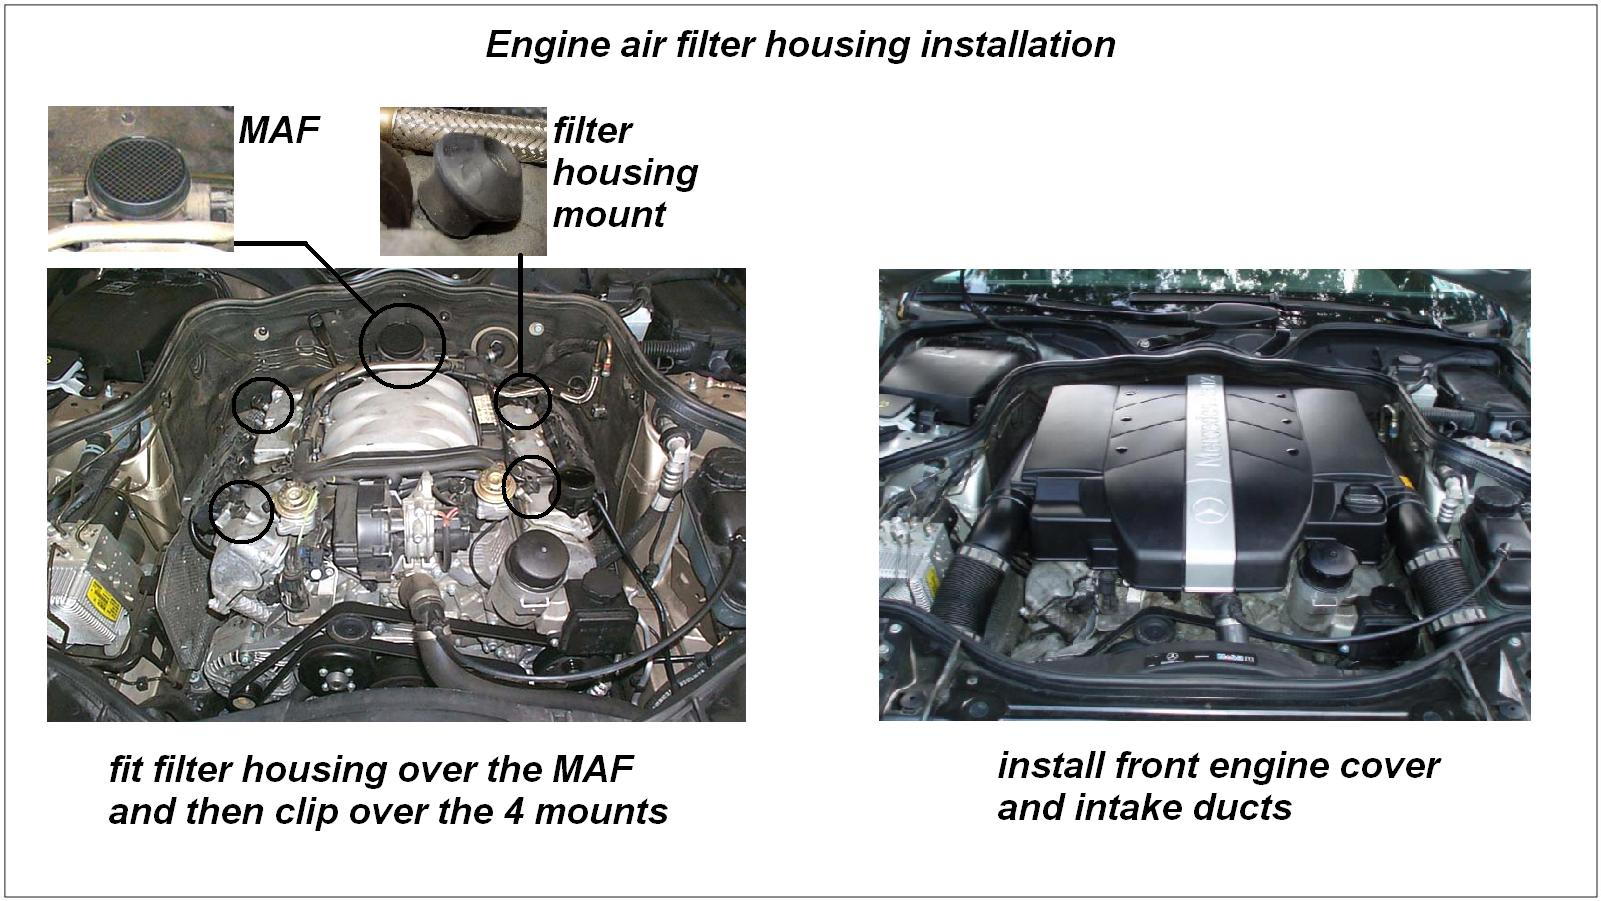
Step 6 – Install the air filter housing and related components
- Apply a light film of Naphtolen H or 303 Aerospace Protectant to the inside of the MAF sealing ring on the air filter housing. Note the locations of the MAF fitting and the four rubber housing mounts on the engine. Hold the housing tilted up at the front and gently push the filter housing down over the MAF fitting. Then push the rear of the housing down on the two rear clips and push the front of the housing down on the two front clips.
- Hold the front engine cover tilted up at the front and slide the rear clips into place. Then tilt the cover down while pushing the side clips into place, and lastly, push the front clip into place.
- Push the two intake ducts onto the front fittings and flex the ducts enough to slip them over the rear fittings onto the filter housing.
Pro Tip
It may be helpful to apply a thin coating of silicone grease to the various clips to facilitate removal the next time.
Important Note for the 3.5 V6
The Step 3 removal procedure is the same, except that:
- There is a spring metal clip on the rear of the air filter housing, which must be unclipped. Push the clip rearward to unhook it.
- There is a slip-fit injection air hose on the front of the air filter housing, which must be removed. Simply pull the hose off the fitting.
- During reassembly, ensure that the rear clip is attached and the air hose is installed.
Related Discussions
- How to Replace Air Filter - MBWorld.org
- Air Filters - MBWorld.org
- Change Air Filter - MBWorld.org