Mercedes-Benz C-Class: How to Install Lowering Springs
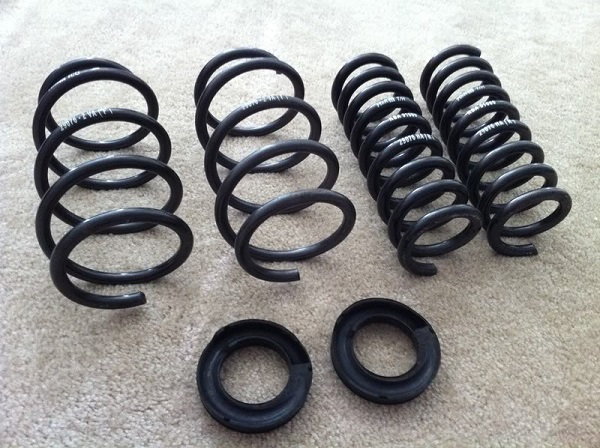
Few modifications have the visual impact as lowering your car. Arguably, one of the best modifications for the w204 C-Class, a set of lowering springs, is an affordable upgrade that can drastically improve the ride height of your car.
This article applies to the Mercedes-Benz C-Class w204 (2007-2014).
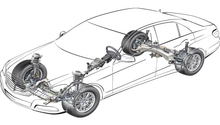
Many Mercedes C-Class owners are perfectly happy with their vehicle, and have never questioned the ride height of their car. For other owners, who are car enthusiasts and auto aficionados, the factory ride height of the w204 just doesn't cut it. In a perfect world, everyone who was looking to lower their car would simply install a set of adjustable coilovers. In reality, coilovers can be expensive, which feature a few too many bells and whistles that many owners will never take advantage of on the street. An affordable alternative to dropping the ride height of your car is a set of lowering springs. Several manufacturers have various springs available that offer a moderate to aggressive reduction in ride height. These lowering springs work in conjunction with the OEM shocks and are the perfect choice for individuals on a budget. This article will walk through the installation of a set of lowering springs on the C-Class w204 Mercedes-Benz.

Materials Needed
- Floor jack and jack stands
- Female and male Torx sockets
- T40 Torx bit
- Metric sockets
- Ratchet and extensions
- Screwdriver
- Spring compressor
- Torque wrench
Step 1 – Lift the car and remove wheels
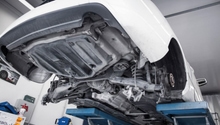
In order to gain access to the car's suspension components, the car must be lifted and supported by jack stands.
- Jack up the car at the specified jacking points, and support it with jack stands.
- With the car supported, remove the wheels.

(Related Article: How to Jack Up Your C-Class - MBWorld.org)
Step 2 – Remove front struts
-
Disconnect the stabilizer links using an 18mm socket and T40 Torx bit.
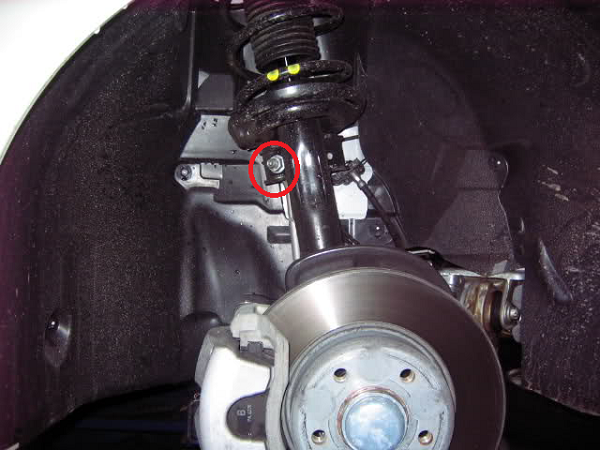
Figure 2. Stabilizer link mounting point. 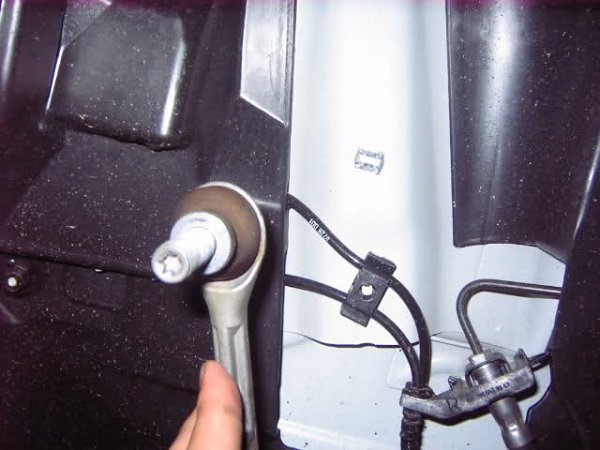
Figure 3. Close-up of disconnected stabilizer link.
- Remove the three fasteners securing the strut body to the steering knuckle.
- The large bolt has an external Torx head that will require a female Torx socket for removal.
-
The two smaller bolts require male Torx bits for removal.
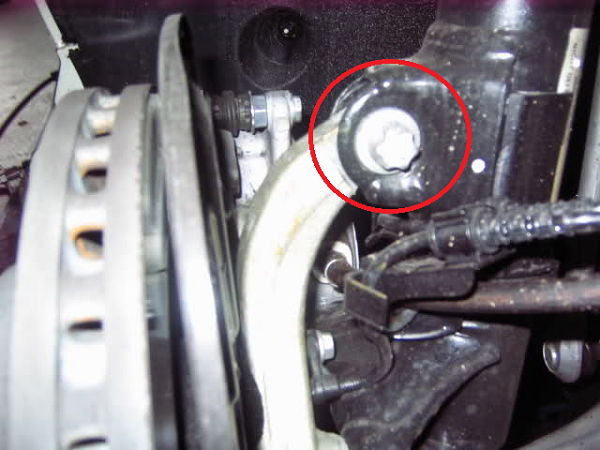
Figure 4. Large Torx bolt at top of steering knuckle. 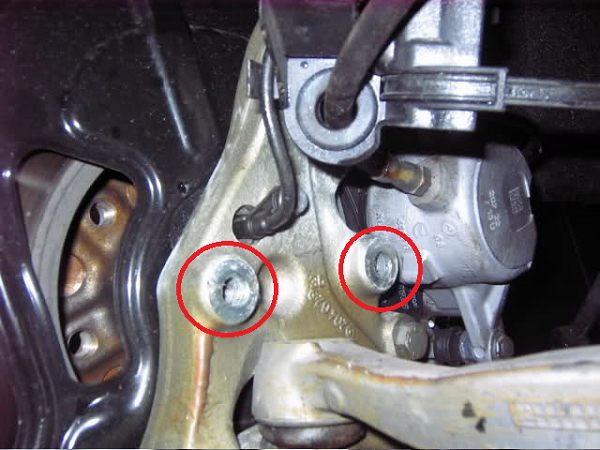
Figure 5. Torx fasteners on lower side of knuckle.
-
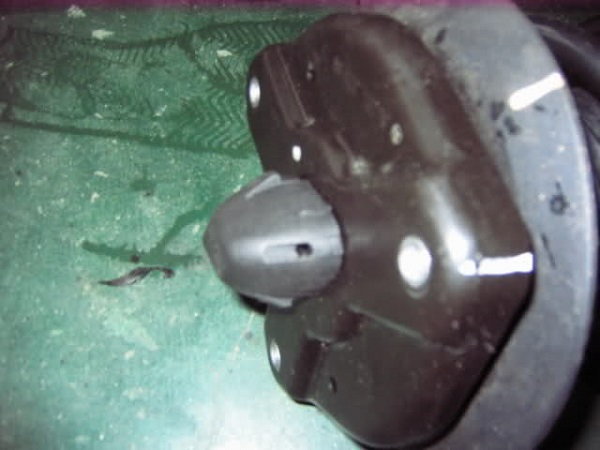
Remove the plastic crescent-shaped bracket from the strut body. This bracket holds the brake line and wheel speed sensor wiring. It simply slides off of the strut body.
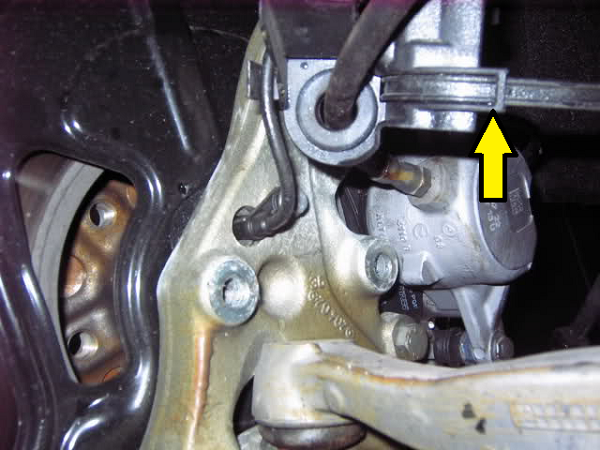
Figure 6. Plastic bracket securing brake line and wiring. - In the engine bay, remove the three male Torx bolts securing the strut to the strut tower.
- While supporting the strut, collapse the plastic locking tabs with a screwdriver, or similar tool, to allow the strut to drop out of the tower.
-
The strut can now be removed from the vehicle. Repeat the procedure on other side.
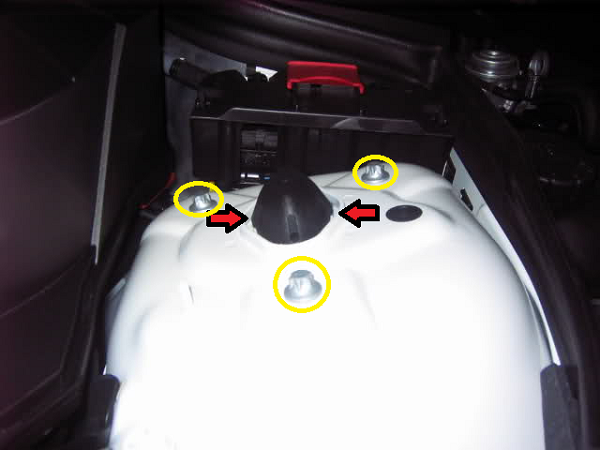
Figure 7. Fasteners at strut tower. 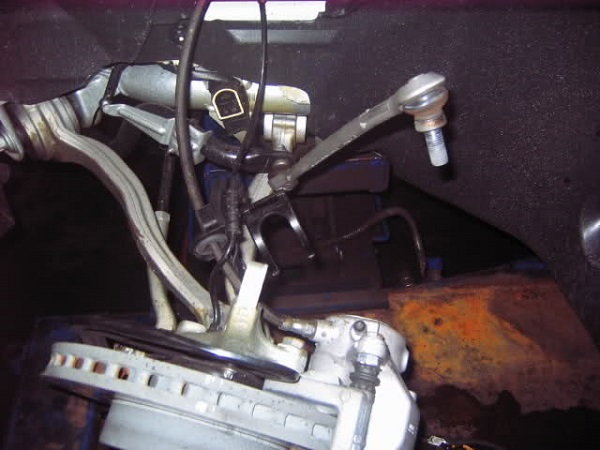
Figure 8. Strut removed from vehicle.
Pro Tip
For cars equipped with all-wheel drive (4MATIC), be aware that the half shafts will slightly slide out of the transfer case during front strut removal. Take note of their orientation for correct installation during reassembly.
Step 3 – Install new springs on front struts
- Remove the plastic cap from the strut top hat. This can be accomplished with a small screwdriver or small metal pick.
- Using a spring compressor, compress the spring to allow for removal of the top nut.
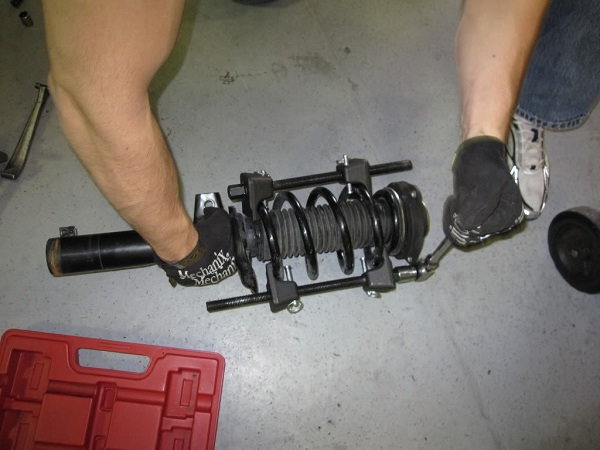
- Remove the top nut using the correct size Torx bit and a 21mm wrench.

- With the top mount removed, the new lowering spring can be installed on the strut. Be sure the bottom of the spring is properly seated on the strut.
- Re-install the top mount as it was previously positioned. Compress the spring and install the top nut. Torque to approximately 55 ft-lbs.
Step 4 – Re-install front struts
With the new springs installed on the struts, they can now be re-installed on the car.
- Replace the plastic top nut cover.
- Slide strut into place, and install the three strut tower bolts to hold the strut in place (Figure 7).
- Attach the strut body to the steering knuckle using the three fasteners (Figures 5 and 6).
- Install plastic crescent bracket to the strut body.
- Install stabilizer link onto strut body.
With all fasteners installed, they can now be securely tightened.
Step 5 – Removal and installation of rear springs
The rear spring replacement has fewer components compared to the front.
- Place a floor jack under the lower control arm, and lift until there is minimal pressure on the control arm.
- With the control arm supported, remove the control arm pivot bolt.
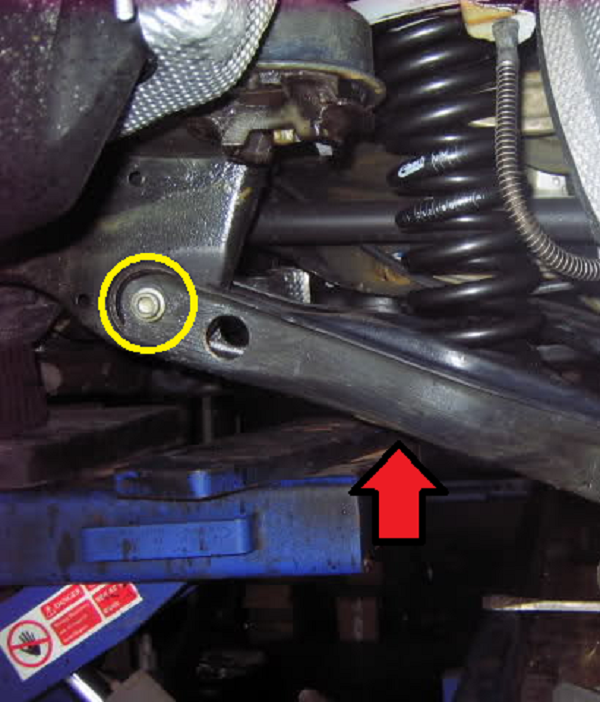
- With the pivot bolt removed, the floor jack can be slowly lowered until pressure is relieved from the spring.
- Remove the spring and rubber hat at the top of the spring.
- Grease the rubber hat and place it on the new lowering spring.
- Install the spring and rubber hat onto the control arm. Make sure the top as well as bottom of the spring are properly aligned and seated on the control arm and chassis when lifted. If going for a more aggressive drop, be sure to install the additional spring pads during this time.
- With the spring in place, lift the control arm with the floor jack until the pivot bolt can be re-installed.
- Install pivot bolt and tighten.
Pro Tip
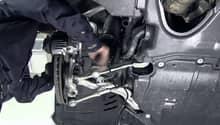
For V6 models, the rear section of the exhaust needs to be removed to get the pivot bolt out of the control arm. An alternative method for removing the spring without removal of the exhaust simply involves removing the three bolts securing the spindle, and loosening the control arm pivot bolt.
Step 6 – Install wheels and alignment
With all of the new springs installed, the wheels can be re-installed and the car lowered off of the jack stands. It is highly recommended that the car now be driven to an alignment shop after the suspension has settled to set the correct wheel alignment, and prevent premature tire wear.

Related Discussions
- Coilover Install - MBWorld.org
- Official W204 Lowering Spring Thread - MBWorld.org
- W204 Lowering Springs - MBWorld.org