Mercedes-Benz E-Class AMG: How to Replace Oxygen Sensor
Modern vehicles use a series of oxygen sensors to monitor the function of the catalytic converters as well as the air-fuel mixture of the engine. A faulty oxygen sensor can cause a host of problems, including reduced performance and poor driveability.
This article applies to Mercedes-Benz E-Class AMG (2002-2009).
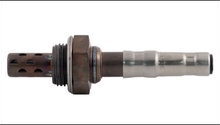
Oxygen sensors are some of the most important components in modern fuel injection systems. The oxygen sensors located before the catalytic converters constantly monitor the air-fuel mixture in the engine and relay this information back to the ECU to ensure optimal fueling needs are met. The sole function of the post-catalytic converter oxygen sensors are to monitor that the catalysts are functioning properly. While oxygen sensors do not often outright fail, they do age and are unable to monitor exhaust gases as efficiently as a new sensor. The result can be poor engine performance, poor driveability, and decreased fuel mileage. Eventually the sensors will fail to operate within their specified range and illuminate a check engine light. Whether you have a check engine light, or your car is feeling a bit lazy, replacement of the oxygen sensor(s) are a straightforward task that can improve the performance of your car.

Materials Needed
- Floor jack & jack stands
- 8mm socket & ratchet
- 7/8" or 22mm wrench/O2 socket
- Anti-seize paste
- Penetrating oil
Step 1 – Lift vehicle
To access the oxygen sensors, the front of the car must be lifted and supported by jack stands.
- Set the parking brake.
- Using a floor jack, lift the front of the car at the designated lift point after the steering rack. (You may be required to drive the car onto 2x4's to allow enough room for your floor jack to be placed under the vehicle).
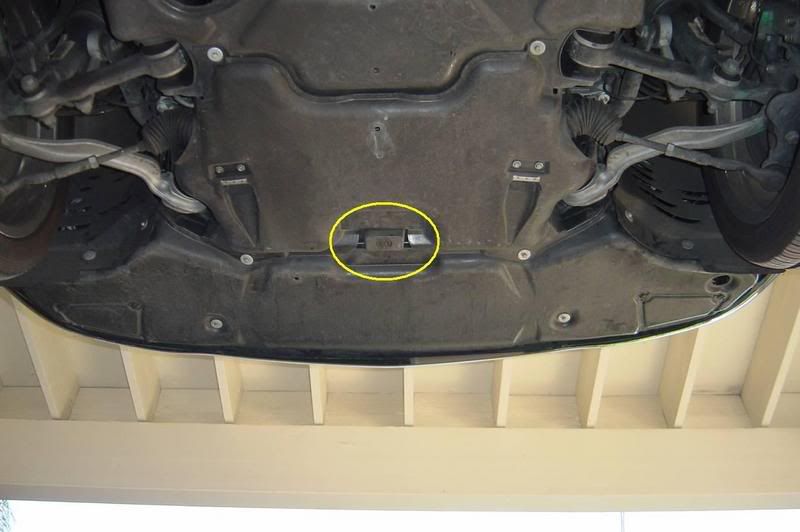
Figure 1. Front lift point. - With the vehicle raised, place jack stands under the jack points located behind the front wheels. It is recommended that a rubber jack pad be used to prevent damage to the jack points.
- Similarly, the car can be supported by blocks or ramps placed under the front tires.
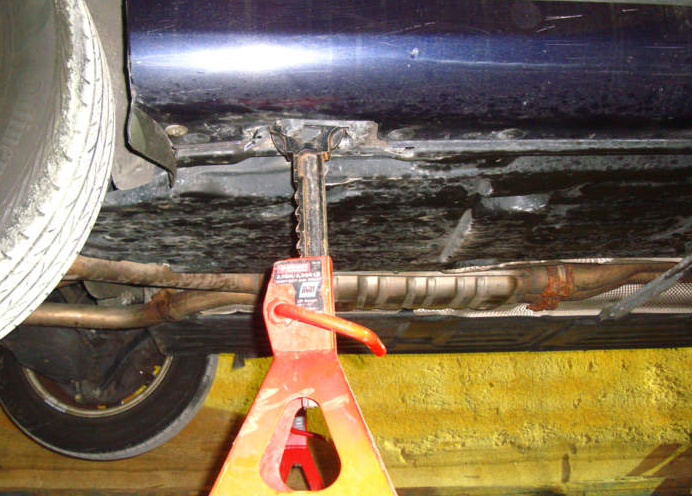
Figure 2. Vehicle supported with jack stands.
Step 2 – Remove rear undertray
With the car supported, remove the rear undertray.
- Remove the 6 fasteners supporting the rear undertray.
- Slide undertray rearward and remove from car.
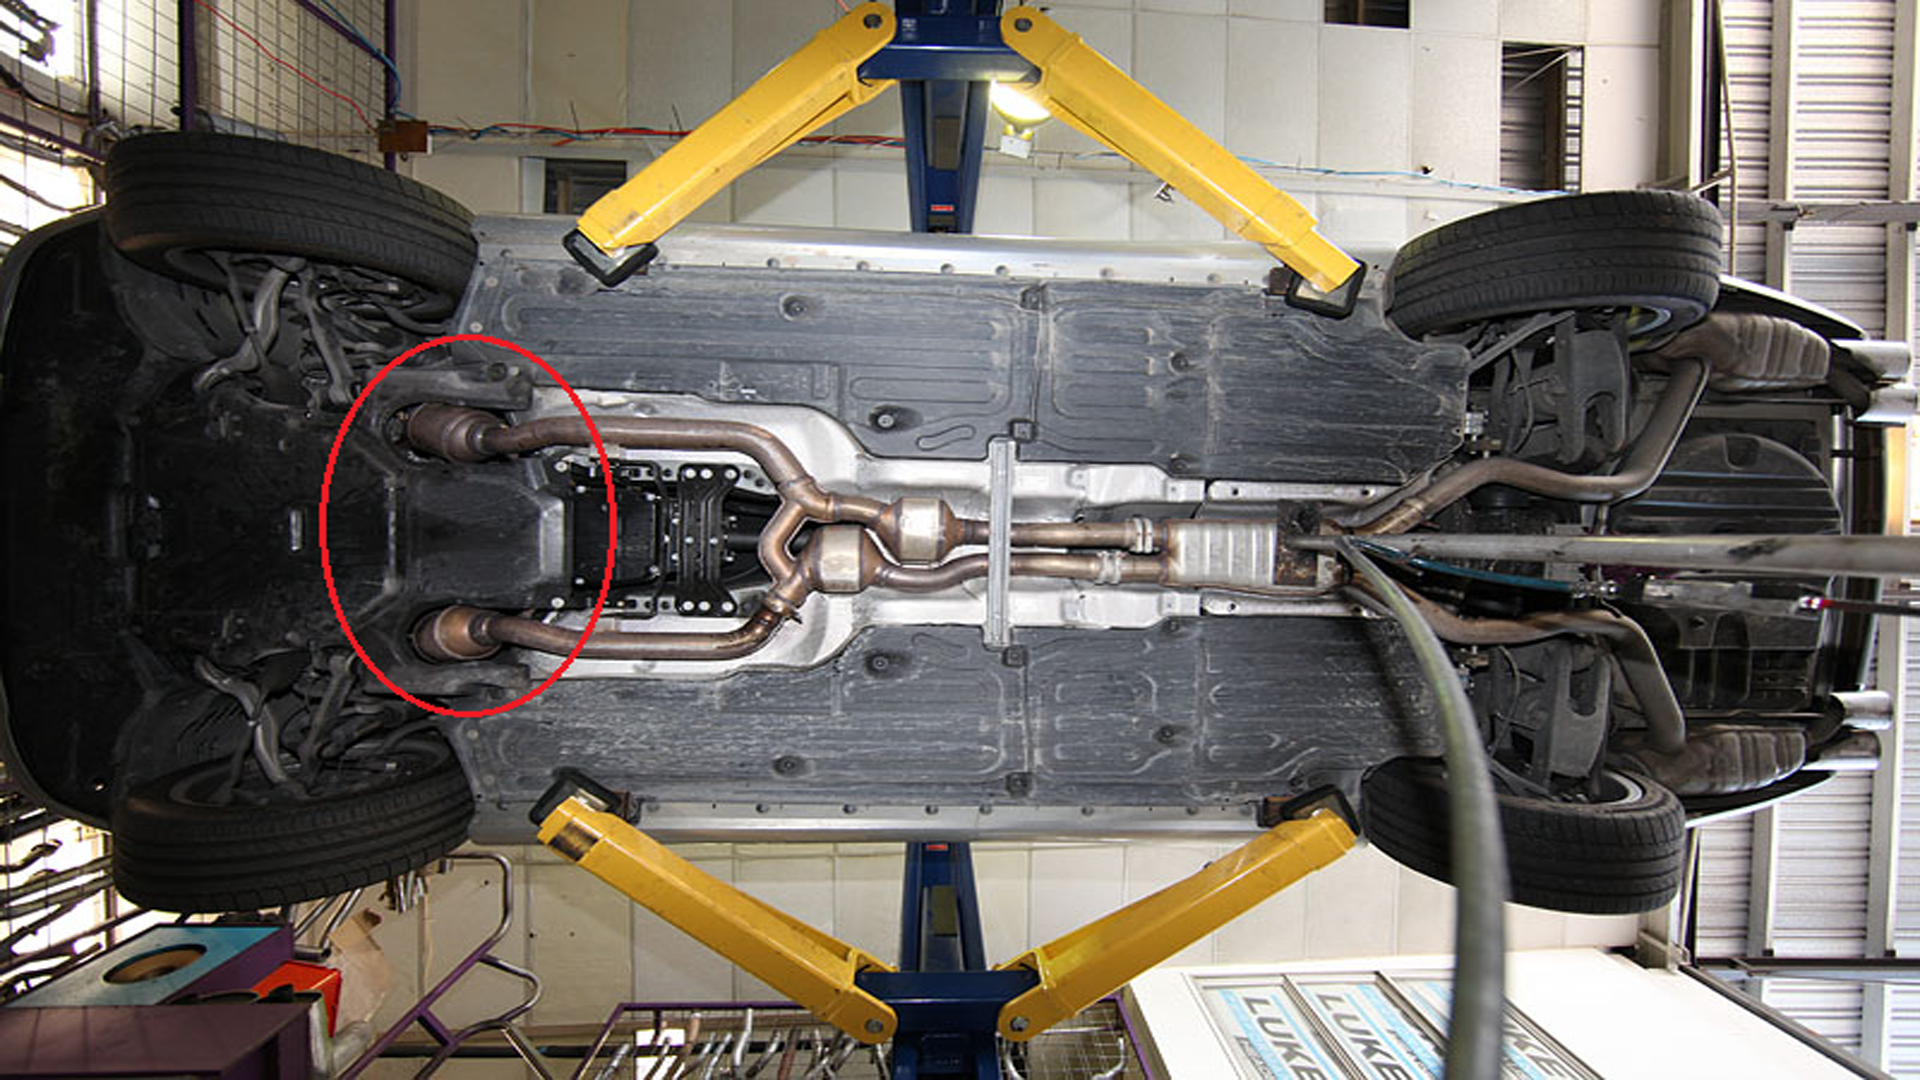
Figure 3. Undertray location. 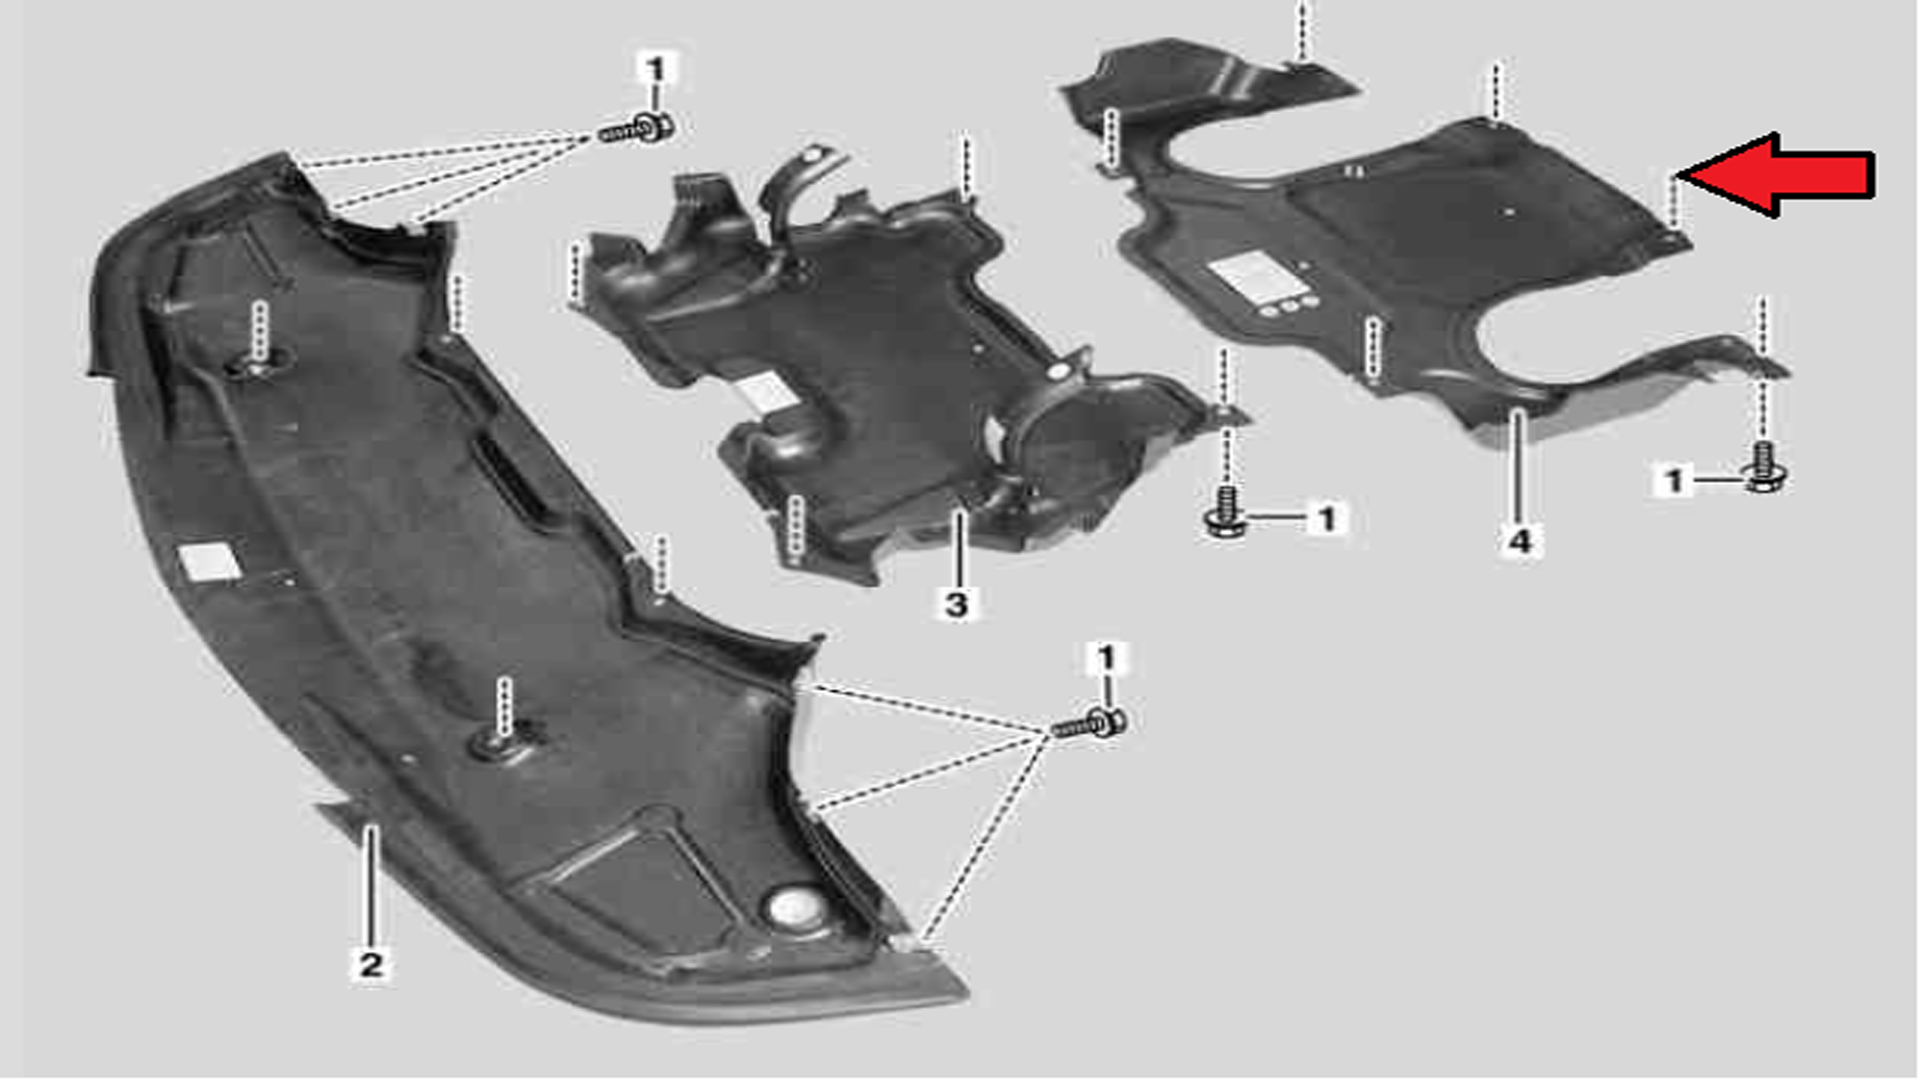
Figure 4. Undertray and fasteners.
Step 3 – Remove oxygen sensors
With the undertray removed, the oxygen sensors and their wiring are now visible.
Disconnect each oxygen sensor plug from the wiring harness. The wiring harness and connections run along the bell housing. Take note of where each oxygen sensor connects for proper reassembly.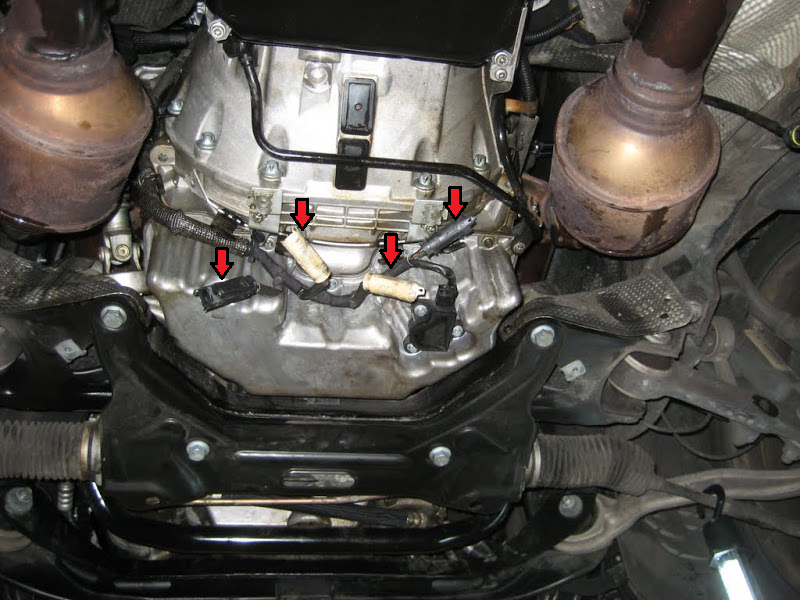
- The oxygen sensors can now be removed with a 22mm (7/8") wrench or specialty oxygen sensor socket. It is typically easier to remove the post-cat sensors first to allow for more room to access the pre-cat sensors.

Figure 6. Post-cat oxygen sensor removal. 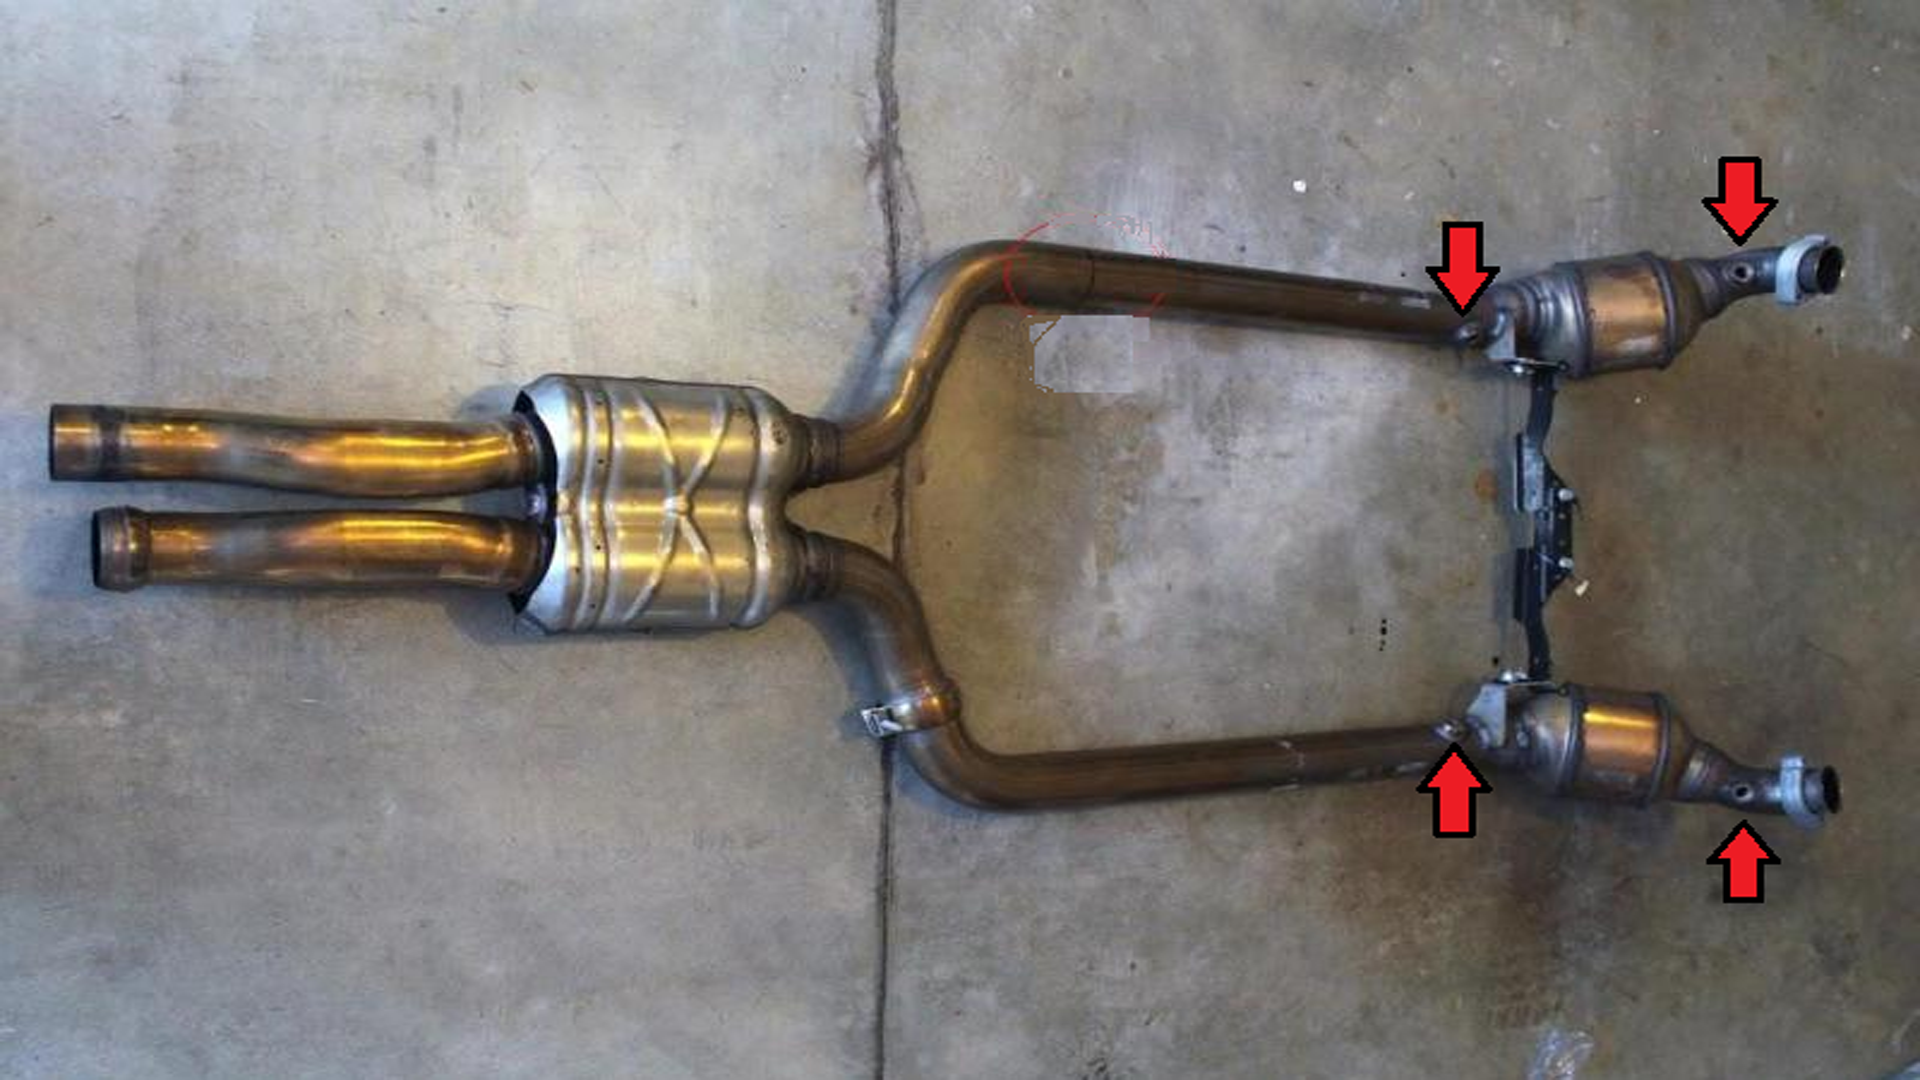
Figure 7. Oxygen sensor locations (Exhaust removed from car).
Pro Tip
Applying penetrating oil to the oxygen sensor bungs can aid in removal.
Step 4 – Install new oxygen sensors
- Before installing the new oxygen sensors, apply a small amount of anti-seize to the threads. Do not allow any anti-seize to contact the sensor element as it can damage the sensor.

Figure 8. Apply anti-seize lubricant. -
Thread new oxygen sensors into the bungs located in the exhaust. Torque the sensors to approximately 25 ft-lbs, or tighten a 1/2 to 3/4 turn after the crush washer has bottomed out on the bung.
-
Reconnect sensors to their corresponding plugs on the wiring harness.

Figure 9. Oxygen sensor plugs reconnected to wiring harness.
Step 5 – Reassembly and testing
- With the new oxygen sensors installed, the undertray can be reinstalled and the vehicle can be let down off of the jack stands.
- Start the car. Any faults in the new oxygen sensors will illuminate the check engine light. If this happens, inspect each sensors connection at the wiring harness to ensure each sensor is connected to the correct plug.
- If your check engine light was on prior to replacing the sensors and you do not have a scan tool to clear the light, it will typically take 40 drive cycles for the light to go out if the problem has been fixed. For reference, a drive cycle is when the engine is started from cold and driven long enough for it to reach full operating temperature.

Figure 10. Driving the car can clear the check engine light.
Related Discussions
- O2 Sensor Placement Problems - MBworld.org
- Jacking Points E63 AMG - MBworld.org
- Replacing O2 Sensors - MBworld.org