Mercedes-Benz E-Class: How to Remove Side View Mirror Covers
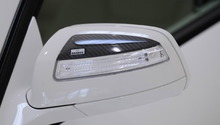
The side view mirror cover is a simple piece that protects all the inner working of the power mirrors and side marker functions. This article explains how to remove the cover, so the mirror can be accessed and maintained in the Mercedes-Benz E-Class.
This article applies to the Mercedes-Benz E-Class w212 (2010-Present)
The side view mirrors are one of those parts on a car that is often overlooked. Although there are some rare instances where the side marker bulb burns out, many car owners do not pay any mind to their mirrors. However, as every enthusiast knows, drivers who pay attention to the details get recognized the most. Customizing the side view mirror covers is an excellent way to add a final touch to your car. However, before you can paint them, they need to be removed from the side view mirror assembly. The following instructions explain the simple process of removing the side view mirror covers, so you can easily replace and maintain those side view mirrors.

Materials Needed
- Flat head screwdriver
- Flashlight
- Replacement bulb (if needed)
Step 1 – Line the mirror up with the housing
This is one of the most important parts of the replacement procedure. Make sure the mirror is lined up and parallel with the cover housing. Use a flashlight on the cover as a reference to get the mirror as straight as possible.

Step 2 – Pull out the front tab
The cover is held in place by a series of tabs. The first few are located in front of the assembly, underneath the mirror. Use your fingers to pull the cover forward until the tabs are released.

Step 3 – Release the rear tabs
There are two large tabs positioned behind the cover. Use a flat head screwdriver to push them down. Once they are released, grip the cover and pull up.

Figure 3. After releasing the tabs, pull the cover up. 
Figure 4. Cover removed.
Step 4 – Flip the cover over
Flip the cover over, and inspect the inside. Here you will notice a small wire clip that is used for the side marker inside. If the light needs to be replaced, you would remove this piece and replace the bulb. The cover can also be painted. To re-install the mirror cover, it has to be properly aligned with the mirror housing.
- Firmly grip the cover.
- Align the cover with the tabs located on the mirror housing.
- Slide the cover onto the housing.
- Press down firmly.

Figure 5. Side marker plug on the mirror cover. 
Figure 6. Cover re-installed.
Pro Tip
Do not worry about the side marker connection. Its plug will naturally slide into the cover plug as long as everything is properly aligned.
Featured Video: Mercedes-Benz Mirror Cover Removal
Related Discussion
- Power Folding Mirrors W212 E-class- MBWorld.org


