Mercedes-Benz E-Class and E-Class AMG: How to Replace Side Marker Bulb
Learn how to replace the side marker bulbs in your E-Class or E-Class AMG in a few easy steps.
This article applies to the Mercedes-Benz E-Class and E-Class AMG (2002-2009).
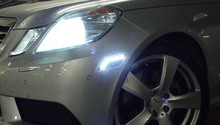
Most vehicles have some things in common when it comes to lighting. For example, all cars have headlights and tail lamps. Replacing or servicing these components is nearly identical across many manufacturers with some slight variations. Some vehicles, like the Mercedes-Benz E-Class and E-Class AMG, are equipped with "side marker" lights. These lights are typically affixed to the side of the fender or near the wheel well. They often illuminate when the headlights are turned to the "on" position. Some manufacturers even have them setup to repeat blinking when turn signals are activated for either side. Even further, some vehicle manufacturers have built their side markers to do both. So what do you do when one of the side marker lights on your E-Class or E-Class AMG is out? Learn how to replace the bulbs here.

Materials Needed
- An awl
- Replacement side marker bulbs
- Narrow flat tip screwdriver
- Narrow medium tip flat tip screwdriver
- Electrical tape to protect paint around trim
Step 1 – Remove side marker light
In order to change the bulb, the side marker light will need to be carefully removed.
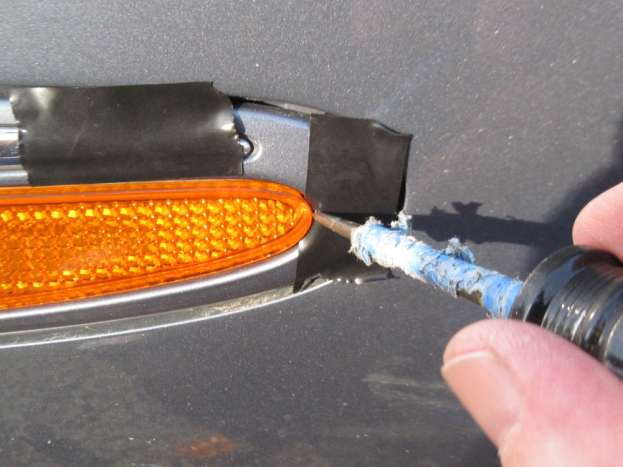
- Use electrical tape and cover areas around edge of trim.
- Using awl or narrow flat blade screw driver, pry on outer edge to lift the side marker up.
Pro Tip
Covering the screwdriver with either microfiber cloth or applying the tape directly to the tip works as well.
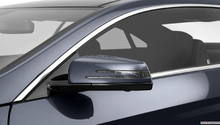
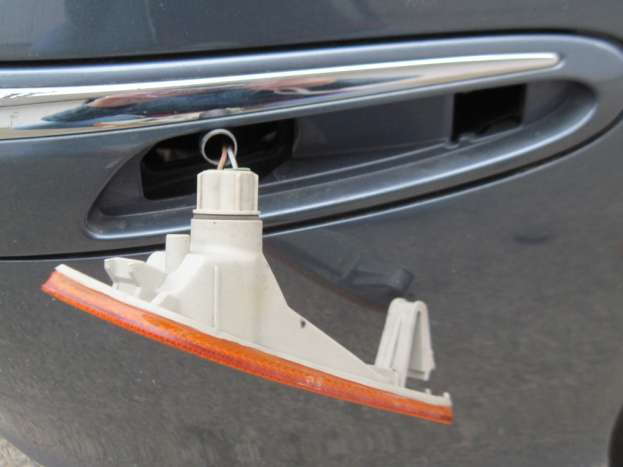
Step 2 – Release side marker clip
There is a bent clip that hides behind the side marker which keeps it in place. This clip must be released in order for the side marker assembly to come out of its recess.
- Using your other narrow medium flat tip screw driver, pry from above to make room for your awl.
- Using the awl in our other hand, push against the clip with light to medium pressure to release the clip.
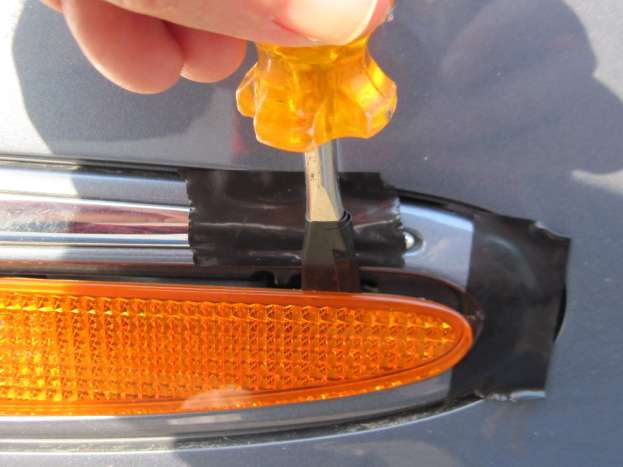
Figure 2. Release the clips securing the side marker. 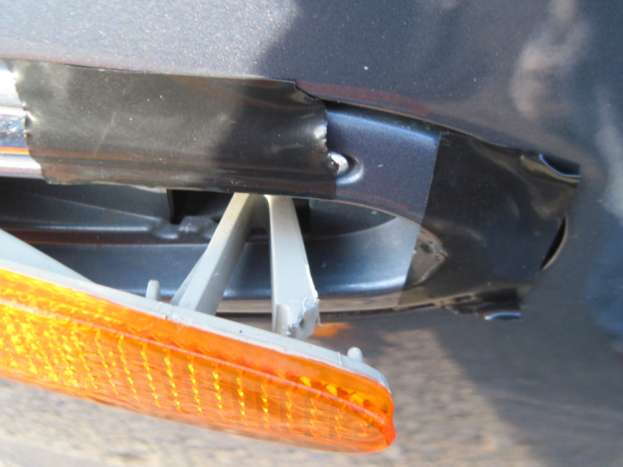
Figure 3. Pull the cover off.
Pro Tip
Only pry the top edge of the side marker no more than an inch or else you can risk cracking the expensive lens.
Step 3 – Remove side marker assembly
Now that the clip has been pried free from the recess, there are two tabs on the leading edge of the side marker lens that affix the unit to the recess.
- Remove side marker assembly.
- Disconnect harness.
Pro Tip
The harness is usually a twist and pull type of action to disconnect from the assembly.
Step 4 – Replace bulb
Now that the assembly is out, the bulb can be replaced. Installation is reverse of removal.
- Remove and discard old bulb.
- Replace new bulb.
- Attach harness to side marker housing.
- Insert two prongs on leading edge first.
- Gently push side marker back into recess until the clip snaps into place.
- Test the light out by turning the lights on.
Note
Avoid touching the bulb(s) with your bare skin. Oils on your fingertips will cause the bulb to short out.
Pro Tip
If the light bulb does not illuminate, you will need to remove and rotate it 180 degrees.
Related Discussion
- DIY: Front Side Marker Bulb Replacement - MBWorld.org