Mercedes-Benz E-Class: How to Install Illuminating Door Sill
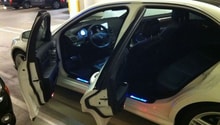
Show off the luxury of your Mercedes-Benz E-Class with extra lighting and detail. Installing illuminating door sills will have passengers and passersby know that your w212 isn't just a regular car.
This article applies to the Mercedes-Benz E-Class w212 (2009-Present).
Door sills are installed on most cars as covers to keep dirt and grime out of the carpet. And, in a standard Mercedes-Benz E-Class, they also serve as decorative covers that accent the interior trim. Since several modern vehicles come fitted with illuminating door sills, there's no reason why your w212 shouldn't have them. Continue reading below to add a brighter and more distinct 'Mercedes-Benz' logo in your doors' steps.
Materials Needed
- T25 Torx screwdriver
- Flat head screwdriver
- Pliers
- Circuit tester
- 4 GB tap splice connectors 18-14 AWG
- 4 GB tap splice connectors 20-22 AWG
- 4 GB butt splice connectors (optional)
- Cable ties or electrical tape
Step 1 – Expose the door sill wiring
- Use a flat head screwdriver to pry out the edges of the door sill.
- Gently pull up on sill to release it from the clips.
- With the flat head screwdriver, pry out the small cover on the driver's side kick panel.
- Use a T25 Torx screwdriver to remove the screw.
- Then, remove the kick panel.
- Lift up the rubber edges to the front of the door sill. There are two yellow clips along the black channel.
- Pull back on the clips to remove the black channel that holds all the wiring.
- Repeat this process for the front and rear passenger door sills.
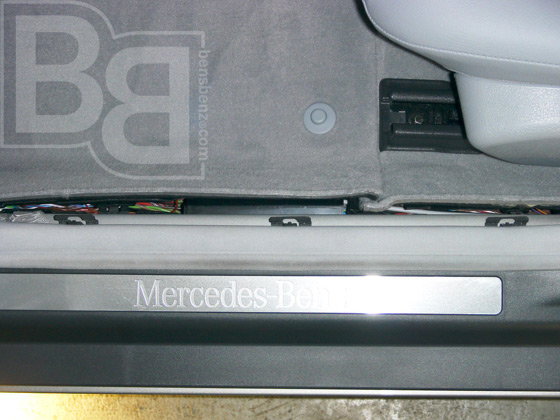
Figure 1. Stock w212 E-Class door sill logo. 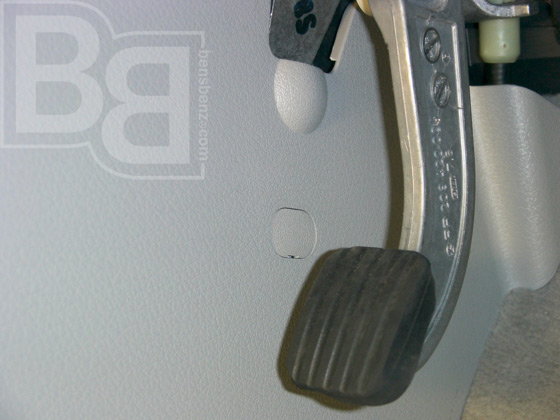
Figure 2. Remove cover from the driver's side kick panel. 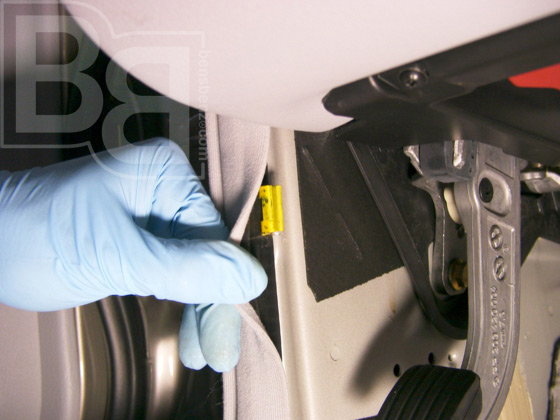
Figure 3. Un-clip and remove the black channel.
Step 2 – Power the illuminating door sill
- With the black channel removed, locate the black connector. It should be next to a blue connector.
- Ground a circuit tester on any metal part of the frame, and probe each wire for constant 12v power. It should be the red/white striped wire.
- Splice the red wire from the new door sill transformer to the red/white 12v power wire. Use the larger splice connector.
- Repeat for the passenger's door sills.
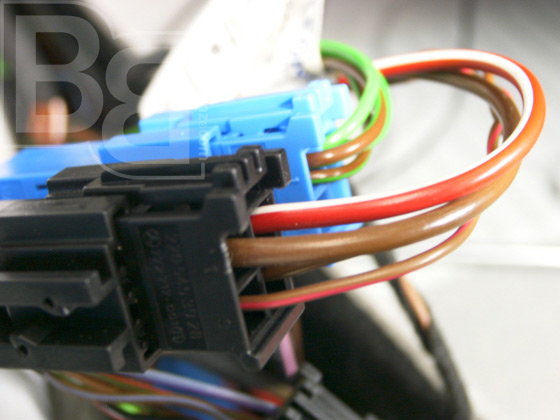
Figure 4. Red/white striped 12v power supply wire. 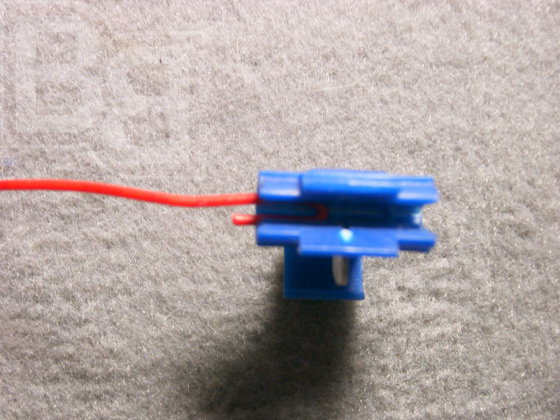
Figure 5. Spliced transformer wire from new door sill. 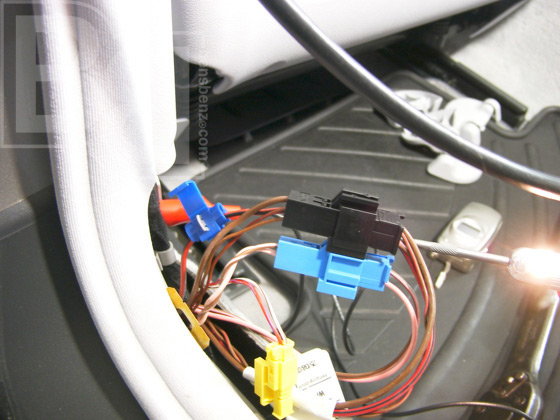
Figure 6. Spliced power and transformer wires.
Pro Tips
- Make sure the ignition is off before testing.
- Some E-Class models have a red/yellow striped power wire, while others have a red/white striped wire. For the rear passenger door sills, the power wire is red/black.
Step 3 – Connect the door switch
Another functionality of the illuminated door sills is that they will turn on when the door opens and turn off when the doors are closed. Therefore, the door switch circuit will have to be tapped into.
- With a flat head screwdriver, pry off the center pillar located to the rear of the door sill. All of the wires to the door switch are routed underneath.
- Use the circuit tester to locate the power supply wire. It should be the brown/pink striped wire.
- Splice the black wire from the door sill transformer to the brown/pink wire of the door switch. Use the smaller splice connector.
- Then, use cable ties or electrical tape to secure the wires together.
- Repeat for the passenger's door sills.
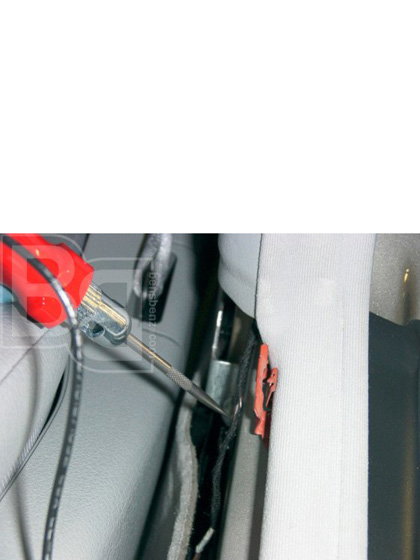
Figure 7. Test the door switch circuit. 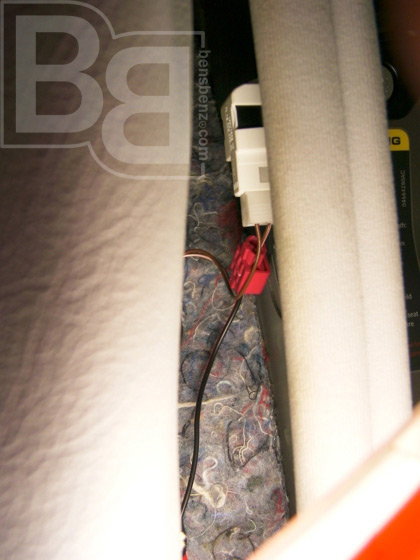
Figure 8. Splice the black transformer wire to the brown/pink door switch wire.
Pro Tip
It may be necessary to extend wires to the passenger's side door sills because the power source may be too far away. If necessary, butt connectors may be used.
Step 4 – Install the illuminating door sills
- Ensure that all wires are concealed and not obstructing any of the clips.
- Re-install the center pillar, black channel, and kick panel.
- Pull up on the upper door sill to un-clip it from the frame.
- Then, slide out the lower door sill.
- Remove the stock logo of the lower door sill, and insert the new illuminating logo in its place.
- Line up and insert the lower door sill underneath the rubber edge. Make sure it is properly leveled with the frame, and no wires are exposed.
- Line up and press down on the upper door sill until it clips into place.
- Repeat for all passenger door sills.
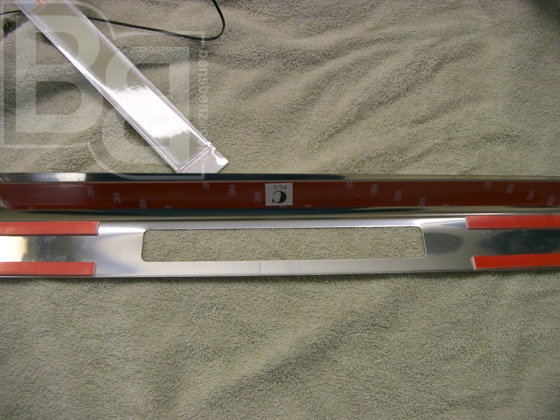
Figure 9. Remove the stock door sill logo. 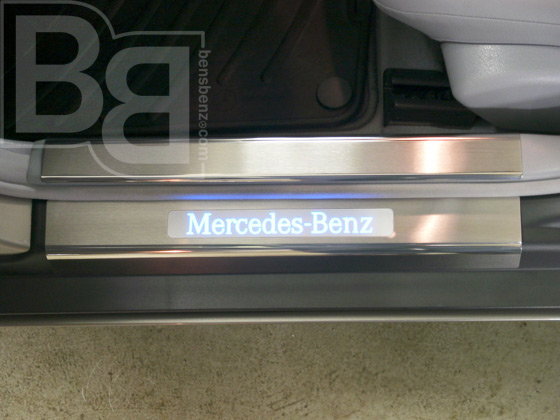
Figure 10. Install the illuminating door sills.
Related Discussion and Site
- Door Sills Installed - MBWorld.org
- Door Sill Install - IsynergyInc.com