Mercedes-Benz C-Class: How to Install Amplifier
This how-to will guide you through the installation of an aftermarket amplifier. So continue reading to add better sound to your Mercedes-Benz C-Class.
This article applies to the Mercedes-Benz C-Class w204 (2007-2014).
The amplifier is what powers your entire stereo system, and gives volume to the sound coming from your speakers. Without a decent amplifier, you won't be satisfied by the sound quality of your stereo. Installing a new amplifier and getting all the wiring set up isn't going to be easy. But if you're looking for a great do-it-yourself project, then this is it. You'll find everything you need to know about the installation in the steps below.

Materials Needed
- Amplifier
- Hi to low adapter
- Power wire
- Speaker wire
- Ground wire
- Butt connectors
- Ring connectors
- Torx screwdriver
- Wire cutter/stripper
- Cable ties
- Electrical tape
- Heat shrink wrapping
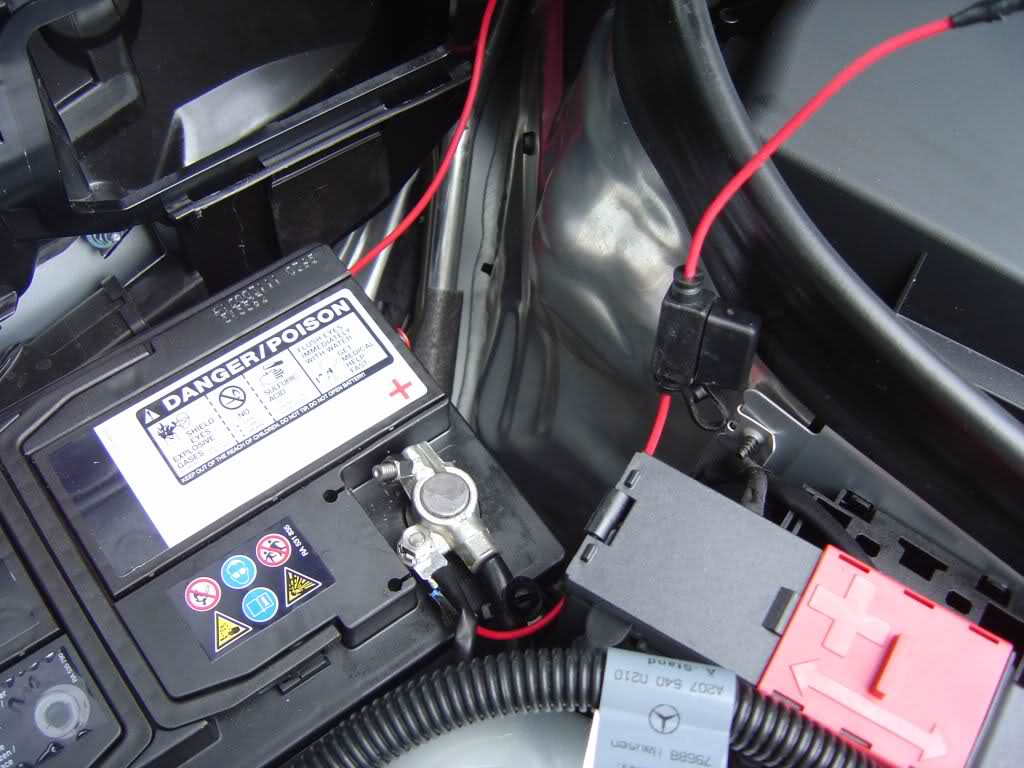
Disconnect your battery before you modify any wiring. Make sure that the wires you get are appropriate for your amp. You can find amp installation kits that come with most of the wires and connectors you'll need.
Step 1 – Connect the power wire to a power source
There are many places where you can get power to your amplifier. If you're installing a large amplifier, then you'll have to route your power wire directly to the battery, but this takes a lot of time and effort. Another place that commonly gets tapped is the power going to the SAM module in the trunk. This is where you'll likely mount your amp anyway, so that's a good place to get your power.
Step 2 – Route speaker wires to the trunk
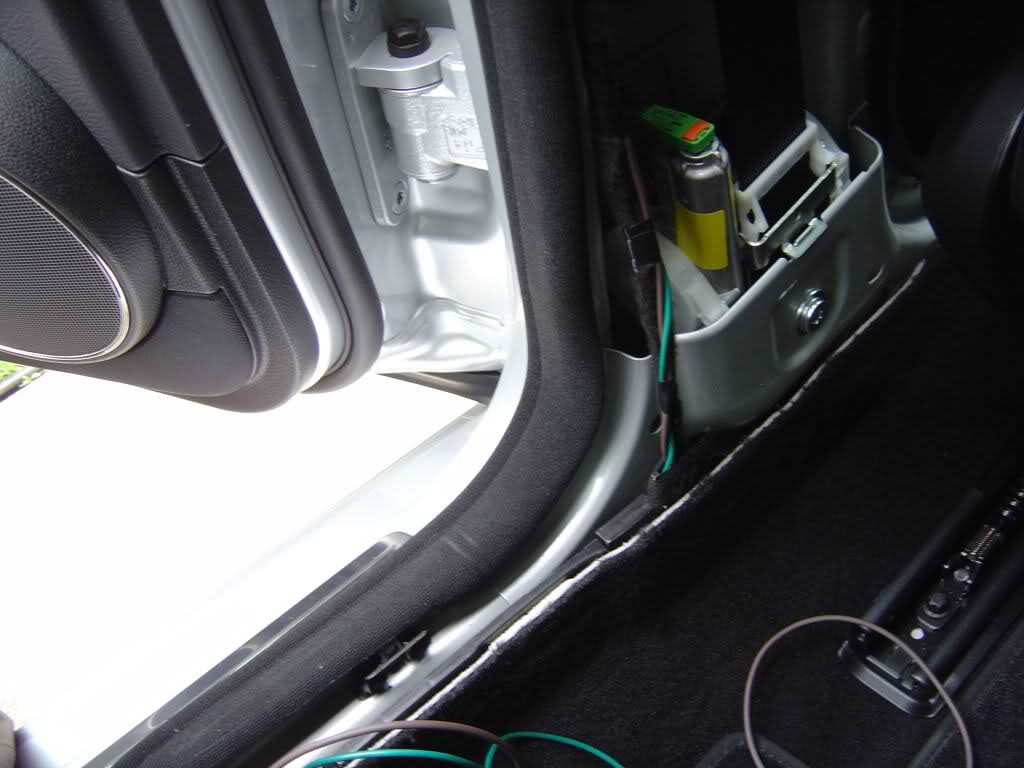
Get access to the rear speaker wires by removing the B-Pillar covers. You'll find a large wire harness. Look for the pink and pink/brown wires on the passenger's side, as well as the white and white/brown wires on the driver's side. Cut these wires, and crimp your new speaker wires using butt connectors. Return the wires back to their original harness, and plug in the harness. Route your new speaker wires to where you'll be installing your amplifier.
Step 3 – Mount amplifier in the trunk
There is a space behind the left side panel in the trunk where you can hide the amplifier. Otherwise, you'll want to mount it somewhere towards the back of the trunk.
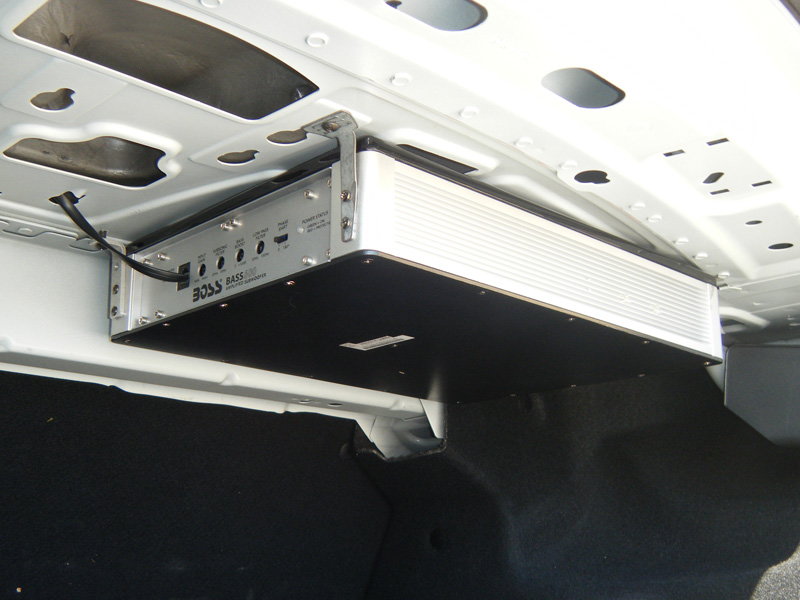
Figure 3. Amplifier mounted to the roof of the trunk.
Pro Tip
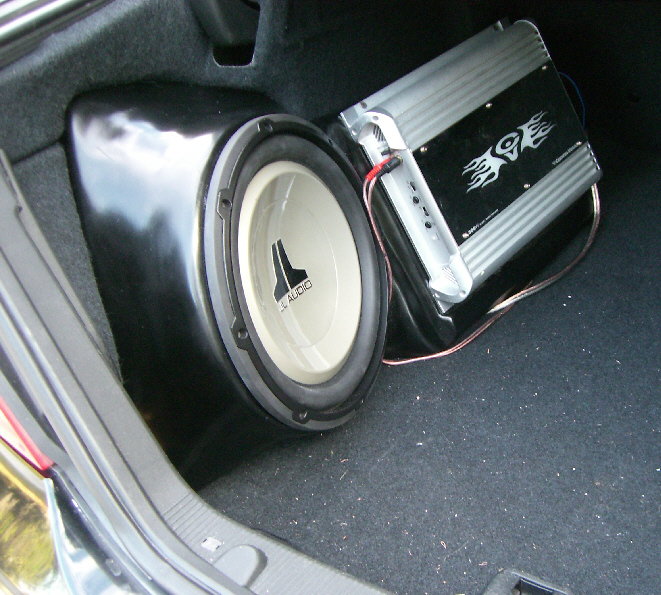
If you're installing a subwoofer, remember to leave plenty of space for an enclosure.
(Related Article: How to Install Subwoofer - MBWorld.org)
Step 4 – Connect the wires
Connect the speaker wires to the hi to low converter, and plug the RCA connectors to the amplifier. Attach a ring connector to your ground wire, and secure it to the nearest grounding point. Then, connect your ground wire to the amplifier. After that, all that's left is to connect the power wire. Reconnect the battery, and turn on the amplifier to adjust it. Test the audio in your car to make sure that the amplifier is getting enough power.
Pro Tip
Some amplifiers you can directly connect speaker wires. In this case, you won't need the hi to low converter.
Related Discussions
- DIY: C300 Amplified Subwoofer Install - MBWorld.org
- DIY: C63 External Sub/Amp Installation - MBWorld.org
- Sub Install on a W204 - MBWorld.org