Mercedes-Benz E-Class: How to Install Rear View Camera
A "luxury" vehicle isn't luxury without the most useful amenities and features. For example, a rear view camera is a necessity when it comes to owning a Mercedes-Benz E-Class. But if somehow your w212 didn't come with one, the following instructions will show you how to install a rear view camera yourself.
This article applies to the Mercedes Benz E-Class w212 (2010-Present).
Most enthusiasts would agree that rear view cameras should have been a standard feature on the Mercedes-Benz E-Class. Although many models were manufactured without this option, there is still a way to install one onto your w212. Dealerships often take the liberty to charge thousands for an aftermarket rear view camera, but you can do it yourself for far less. This feature makes parallel parking a breeze, prevents you from bumping the car behind you, and, more importantly, scraping your bumper in the process. Use the step-by-step instructions in this article to guide you through the installation process.

Materials Needed
- Rear view camera kit
- Drill and rotary tool kit
- Trim removal tool
- T20 Torx screwdriver
- Wire tap connectors
- Fakra cable
- RCA to Fakra cable (6 to 12 feet)
Step 1 – Enable camera function on the head unit
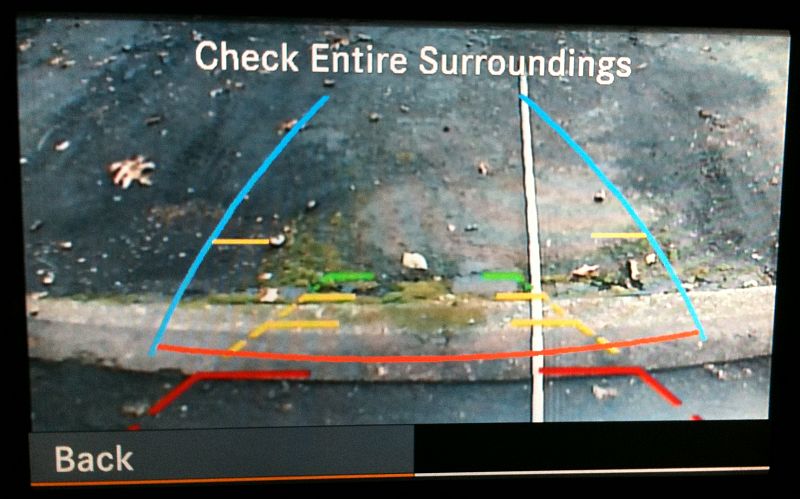
To allow the rear view camera function to turn on, you must first enable the engineering mode.
- Hold down the "hang up," "1," and "#" buttons on your head unit. Doing so will put the console in engineering mode.
- Scroll down to the list of available options, and choose the "enable back-up" option.
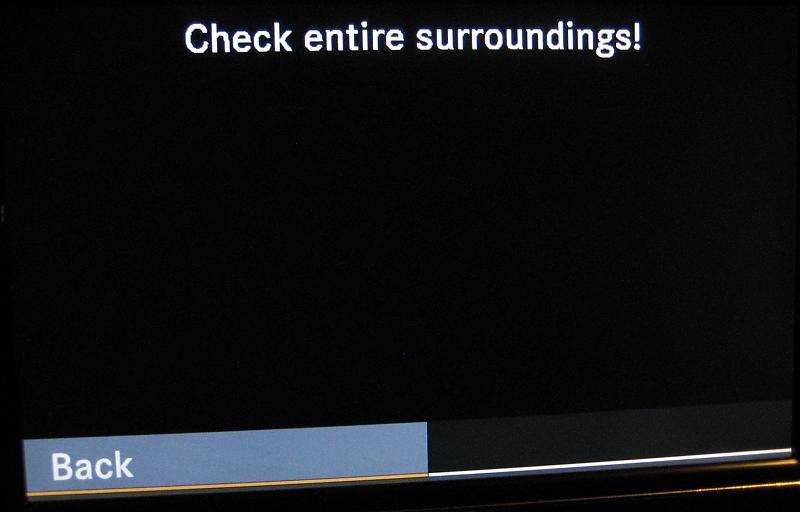
- The screen will turn black with the phrase "Check entire surroundings!" at the top.
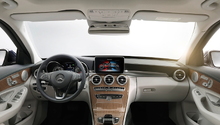
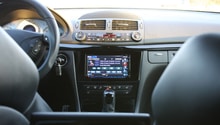
Step 2 – Remove the center console head unit
The command head unit must be removed to access all the necessary rear view camera connectors.
- Turn off the car, and disconnect the negative lead (black) from the battery terminal.
- Pry out the center air vents with a trim removal tool.
- Use a T20 Torx screwdriver to remove the center console mounting screws.
- Gently pull out the head unit.
- Use a pick to detach the connector clips attached to the air vent unit. There are three connectors that must be removed.
- Then, pull out the radio and detach one connector clip on its bottom-right side.

Figure 2. Disconnect the A/C vent's electrical connectors. 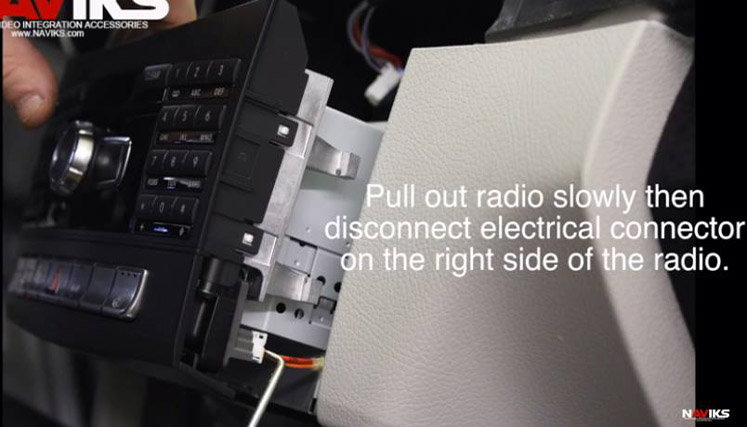
Figure 3. Remove the head unit connector.
Step 3 – Create a camera mount
Although there is a standard camera mounting location on the rear plastic trim, some people find it too far off center. You can fit the camera whichever way you want by cutting into the trim piece using a rotary tool.
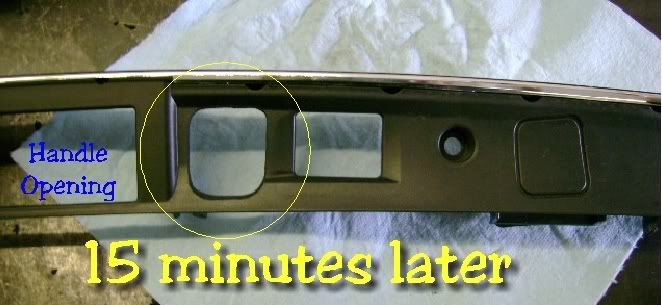
- Remove the plastic trim from the trunk.
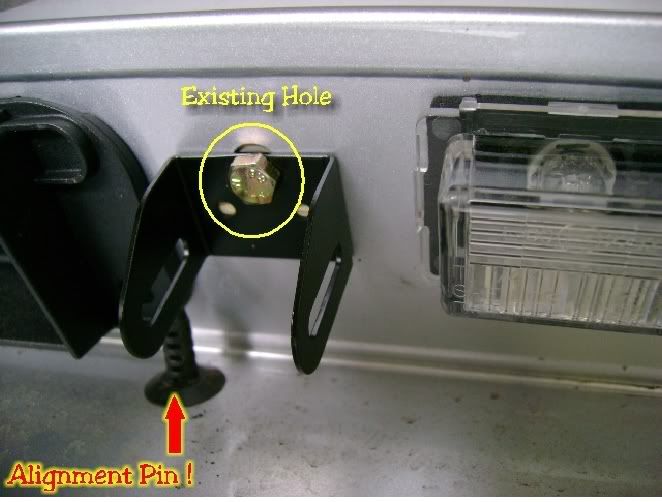
- Choose the location for your camera. Avoid areas that have alignment pins, and find a spot close to the center.
- Drill a pilot hole in your desired location.
- Use a rotary tool to widen the hole. Make sure not to sand too close to the edges of the trim as it may crack.
- Find a location on the trunk to mount the camera bracket. There is likely an existing hole to mount the bracket (refer to Figure 5).
- Bolt the bracket to the hole.
- Find a secure and concealed location inside the trunk to mount the modulator.
- Attach the camera to the bracket, and connect the wires to the modulator.
Step 4 – Connect and run the RCA wire
Once the camera bracket is properly mounted, you can begin wiring the head unit.
- Connect the Fakra cable of the modulator connector to the pink/green clip located behind the head unit.
- Connect the RCA extension wire to the Fakra cable, and run it from the headliner to the trunk.
- Connect the RCA wire to the modulator.

Step 5 – Wire ground and power for the camera
- From the driver's side tail harness, tap the ground wire and attach it to any metal bolt of the car body.
- From the modulator wire, tap the reverse light wire coming from the tail harness.
- Run the wires from the head unit to the modulator, and plug in the connector.
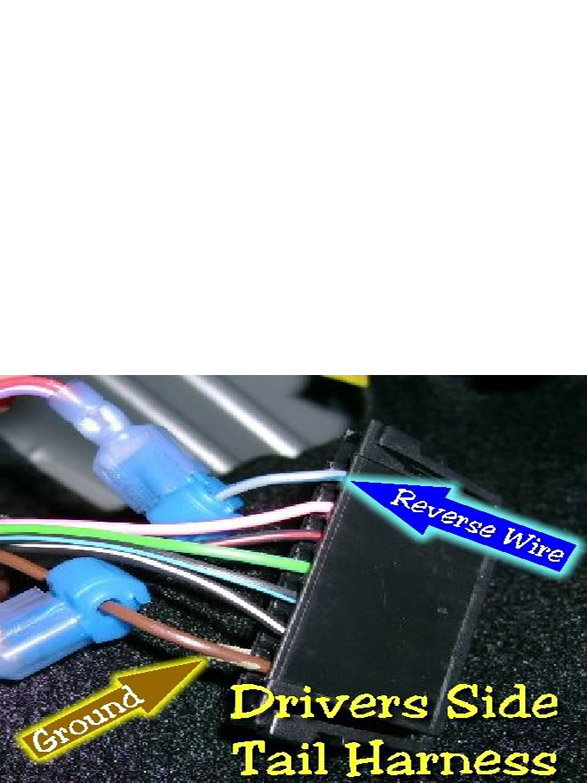
Figure 7. Tap the tail light wire harness. 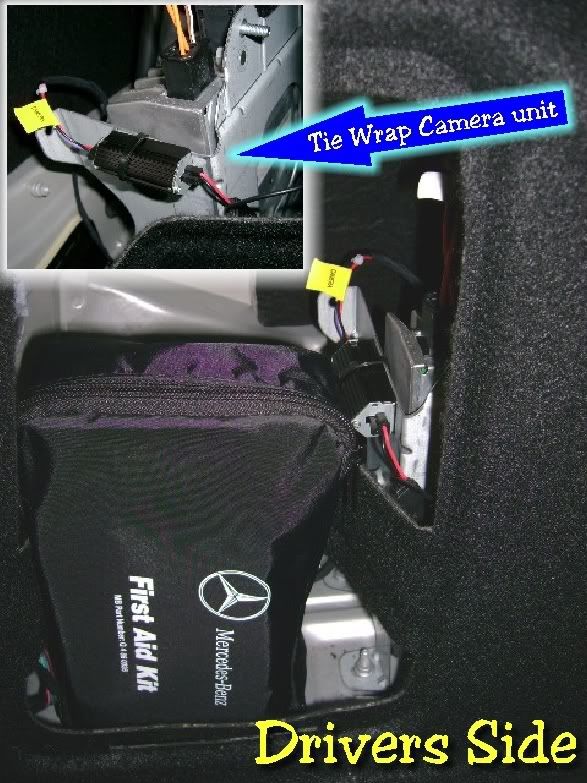
Figure 8. Mount the camera modulator.
Step 6 – Test the rear view camera
- Reconnect the battery, and start the car to test the system. The rear view camera should activate when the car is shifted into reverse.
- Lastly, re-install the head unit, air vents, and trim pieces.
Related Discussions
- DONE and working! Install rear view camera? - MBWorld.com
- DIY: Rear-View Camera under $200 - MBWorld.com
- *DIY Rear Camera install w/Pics - Centered Location - MBWorld.com