Mercedes-Benz C-Class: How to Install Rear Diffuser
Installing a rear diffuser on the C-Class w204 isn't as difficult as you may think. As a matter of fact, after reading this, you may run out and order a new one.
This article applies to the Mercedes-Benz C-Class w204 (2007-2014).
A new rear diffuser can be that little extra touch that makes all the difference to someone who just got beat off the line by you. Ok, well it may of course have a more functional purpose rather than making the back end of your car look better. The properties of the diffuser, in regards to aerodynamics and downforce, can be left for another article. This article will explain how to remove your factory diffuser and install a new one. A carbon fiber perhaps?

Materials Needed
- T20 Torx head screwdriver and ratchet
- Flat head screwdriver
- Lubricating grease
- #10-32 x 3" bolts and nuts
- #10 stainless steel washer
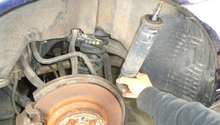
Step 1 – Removal of the existing diffuser
There are two Torx screws that have to be removed. They are not easy to reach. The screws connect the diffuser's tabs to the inner side of the bumper. The screws are located near the base of the exhaust tips on standard optioned cars. Once removed, you can move on to the next step.

Figure 1. Location of one of the Torx screws next to the exhaust tips. The other is on the opposite side. 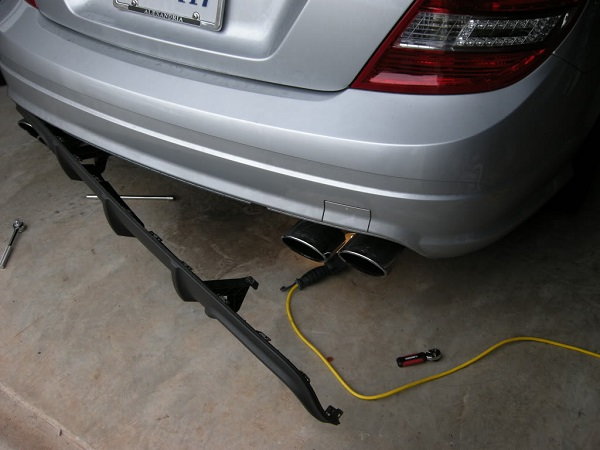
Figure 2. Stock diffuser loosened.
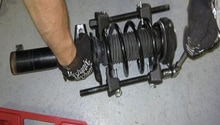
Step 2 – Diffuser brackets
Once the diffuser is removed, you should have a good view of the brackets that hold it in place. The brackets bridge the gap between the middle of the diffuser and the support arms underneath the body of the car. You are going to want to remove the Hex bolt from the bracket located near the exhaust tips under the car. These are not the rivets that attach the diffuser to the bracket, leave those on. Note the two rivets on each plastic bracket. You can either remove or leave them with new screws to reattach to the support arms under the car. Or, you can just leave them intact on the stock diffuser and not mess with the rivets. For this example, it will be left in.
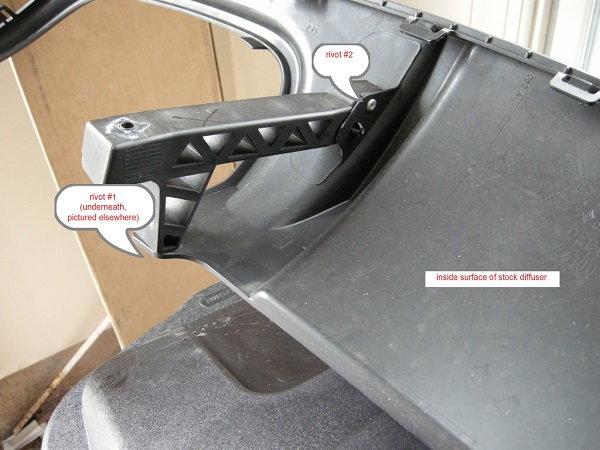
Figure 3. Bracket attachment points. 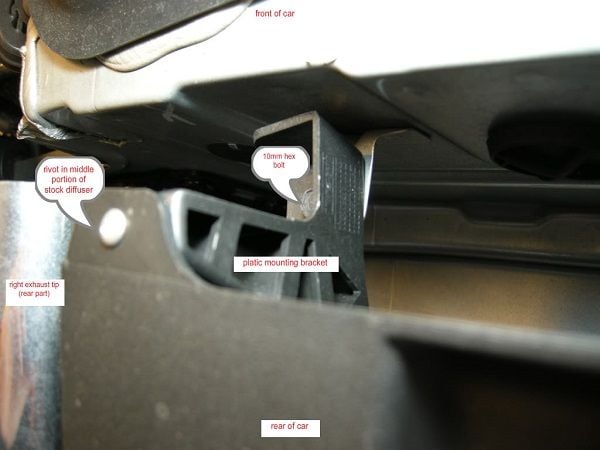
Figure 4. Additional mounting points.
Step 3 – Installing the new diffuser
Conventional wisdom says that you'll want to make life easier for yourself with the installation. That's the same idea here. Suggestion would be to lube up the portion that will be going in to the existing ports/tabs. Use some grease to help make your life easier. Line up the diffuser and start at one end, slowly pushing the the lip of the new diffuser back into the tabs that help hold it in place. A few things will let you know the tabs are in. One, you'll feel/hear a little pop. Two, the upper edge of that part of the diffuser should be flush with the bumper. Three, the outermost tabs of the diffuser should line up with the inside tabs of the bumper cover.
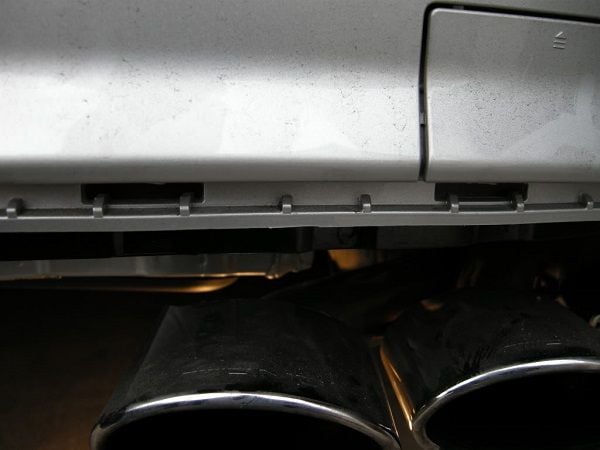
Figure 5. Body mounting points where clips go. 
Figure 6. Lining up clips for new diffuser.
Step 4 – Securing the diffuser
The final step will take some small hands and climbing underneath the car. The bolts and washers mentioned above are going to come into play now. You are going to use these to help secure the middle portion of the diffuser to the metal support arms to the underbody. Going this route will help save time with transplanting new brackets. The long bolts will help with making this task easier. The bolts leave a large gap when secured. As you tighten them, they should pull and put tension on the bracket as well as the diffuser. The tension should keep the bolts secure.
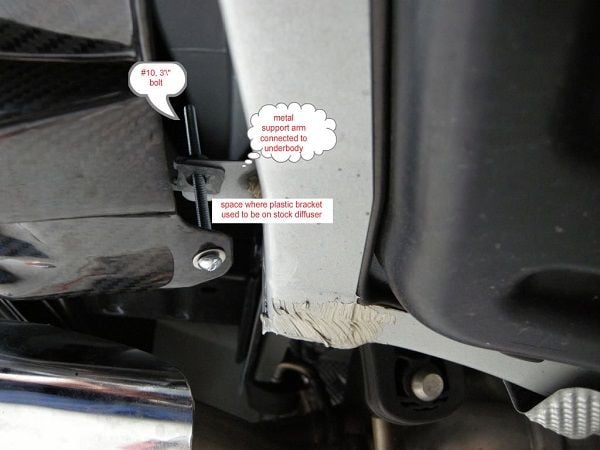
Figure 7. Diffuser-to-body mounting solution. 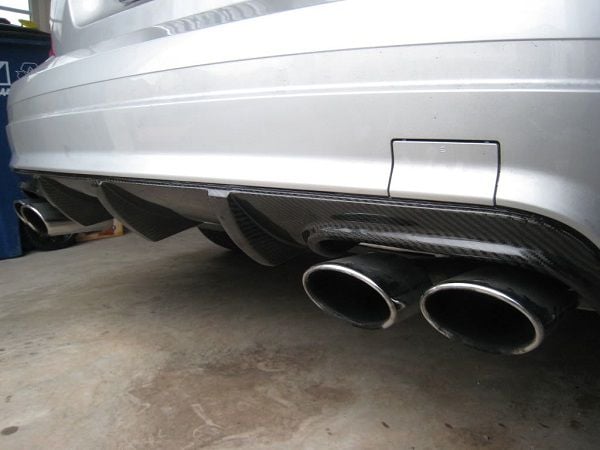
Figure 8. Finished product.
Related Discussions
- DIY: Carbon Fiber Diffuser Install - MBWorld.org
- Rear Diffuser DIY - MBWorld.org
- C63 Rear Diffuser - MBWorld.org
- C63 Diffuser on C350 - MBWorld.org