Mercedes-Benz E-Class: How to Replace Shock Absorber
As bad as that message sounds, it's not all that difficult to fix the problem that's causing it. Here's how to make sure your car gets back to the ride height it needs to be at.
This article applies to the Mercedes-Benz E-Class w211 (2002-2009).
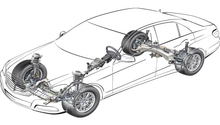
With this generation of E-Class starting to show its age, there are bound to be parts and components that are going to start to need replacing. One common component on these cars that tends to fail is the shock absorbers. There isn't a specific mileage that they tend to go out, but it is quite common since some of these E-Classes are going on almost 10 years of service. If you look under your vehicle at the shock absorber and notice that it looks dark as well as wet, then you probably need to replace it. This means that its fluid has escaped from inside the shock absorber and without the proper amount of fluid inside, it will not work correctly. Another way you can tell is if you notice that your car keeps bouncing after you drive over some rises or bumps on the road. This is another easy indication that it is time for a shock absorber change.

Materials Needed
- Jack and jack stands
- Millimeter socket set sizes 8mm-21mm
- Millimeter wrench set sizes 8mm-21mm
- Ratchet
- Torque wrench
- T40 Torx bit
- E14 external Torx socket
- Flat head screwdriver
- Vise grips
It's not incredibly difficult to change out shock absorbers, but you do have to be quite careful because you will be lifting the vehicle off of the ground and doing most of the work under it.
There are many options when it comes to shock absorbers. Your choice will most likely be determined by price. OEM replacement shocks are usually the most expensive. Bilstein makes a great shock and the cost is definitely a bit more easy on the wallet. Forum users have been completely satisfied with Bilstein shocks in the past, and would recommend them to anyone looking for a great replacement that won't break the bank.
Also, keep in mind that it is best to change your shock absorbers in pairs. So if you are going to have to change one due to it being blown out, then it is a good idea to just go ahead and replace the other one also. Not doing this could cause your car to be difficult to control due to the different dampening on each side.
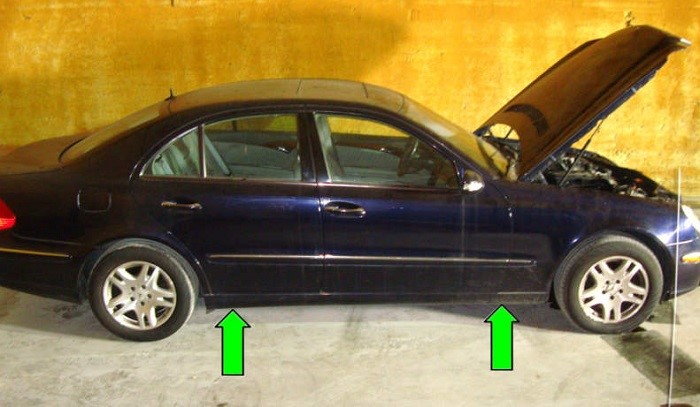
Step 1 – Elevate the vehicle
You want to elevate the vehicle off the ground so that the wheel and suspension can hang freely. The Mercedes E-Class is equipped with two jacking points per side. They are identified by the green arrows in the image below. It is best to use these points to support the vehicle when elevating it off the ground. Alternatively, you can lift the front end of the vehicle by the engine crossmember (there is usually a specific spot for lifting), or the rear of the vehicle by the differential housing. Set the vehicle on stands, and give it a good shake to ensure that it is hoisted securely. The shake test saves lives.
You do not have to remove the rear wheels to complete this repair, but it will definitely make it easier to gain access.
Step 2 – Remove left and right side panels inside trunk
In order to gain access to the top of the shock absorbers on each side of the vehicle, you will have to remove the side panels that line the inside of the trunk. The panels are held in by plastic rivets at the top and by the tie-down brackets at the bottom. You can use a flat head screwdriver to remove the plastic rivets, and the tie-down brackets are held in with T40 Torx bolts.
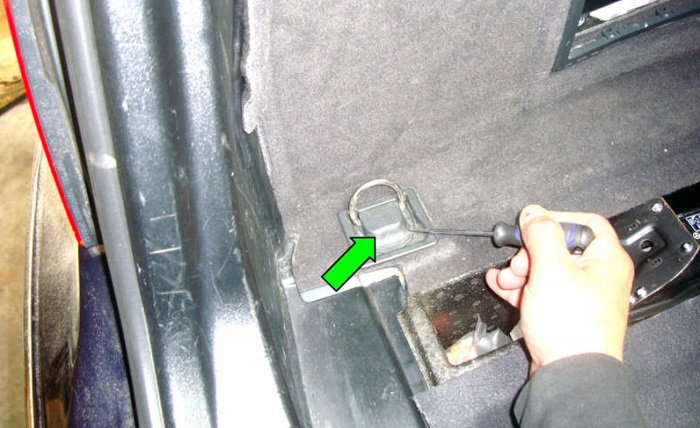
Figure 2. Tie-down must be unbolted and removed. 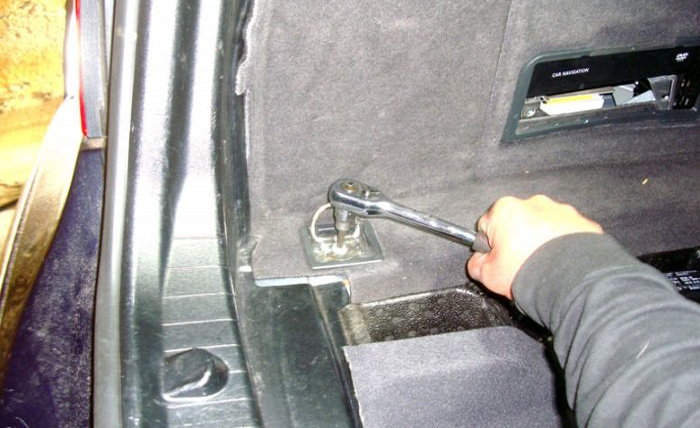
Figure 3. Unbolt tie-down using T40 Torx bit. 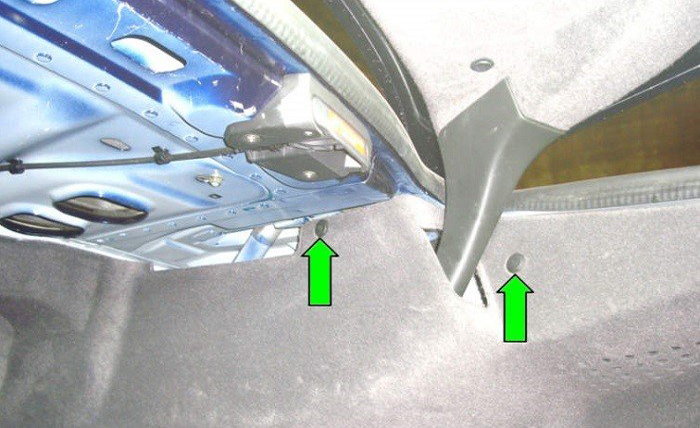
Figure 4. Plastic rivets that secure top of panel to trunk. 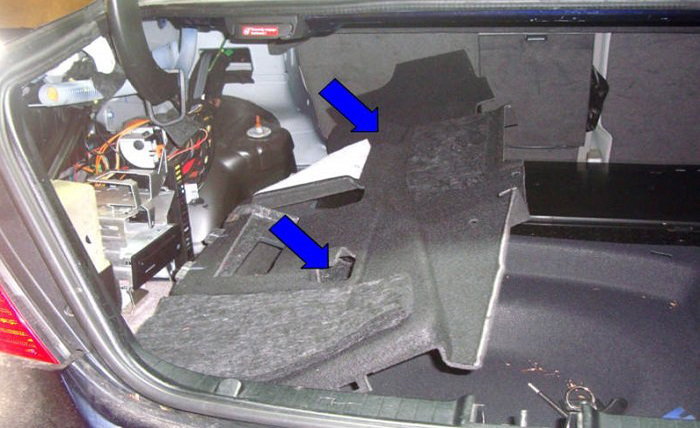
Figure 5. This is what the removed panel will look like.
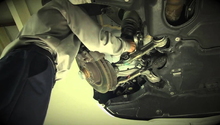
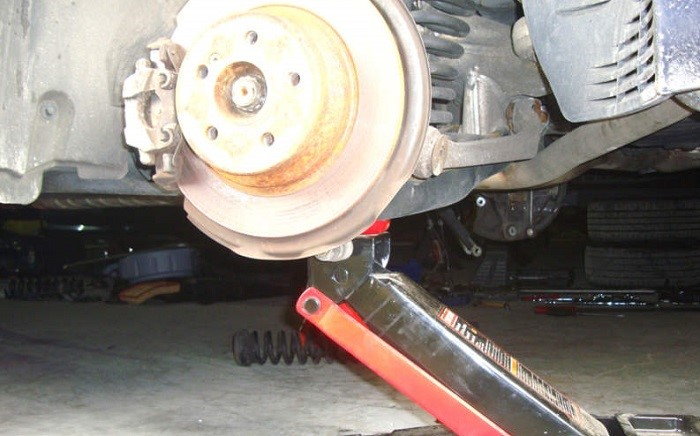
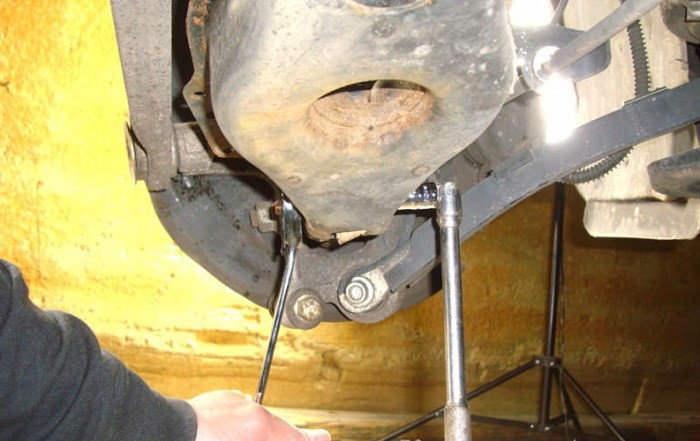
Step 3 – Place jack under control arm
After you have the panels removed, you can now begin the process of removing the shock absorber. First thing you will want to do is place your jack under the control arm of the shock you are removing. Put just enough pressure on the control arm to take the weight of the assembly off the shock absorber. This will make it easier to remove the bolts.
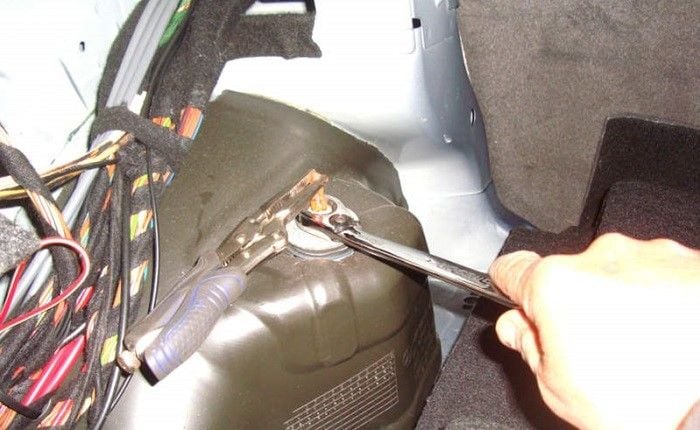
Step 4 – Loosen the top fastener of the shock absorber
Now you must loosen the top fastener of the shock absorber. It should be a 16mm nut. It also might be necessary to hold the shaft of the shock absorber that the nut is threaded onto. You can hold the shaft with a pair of vise grips.
Step 5 – Lower jack that is supporting the control arm
Slowly lower the jack that is supporting the control arm. This will allow the top of the shock to pull down through the body of the car, and will free it up.
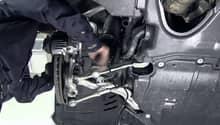
Step 6 – Remove cover on bottom of control arm
There is a cover attached to the bottom of the control arm to keep debris out of the suspension. You will need to remove this cover to gain access to the bottom bolt of the shock absorber. The cover is held on the control arm by plastic rivets similar to the ones used to secure the top of the panels inside the trunk.
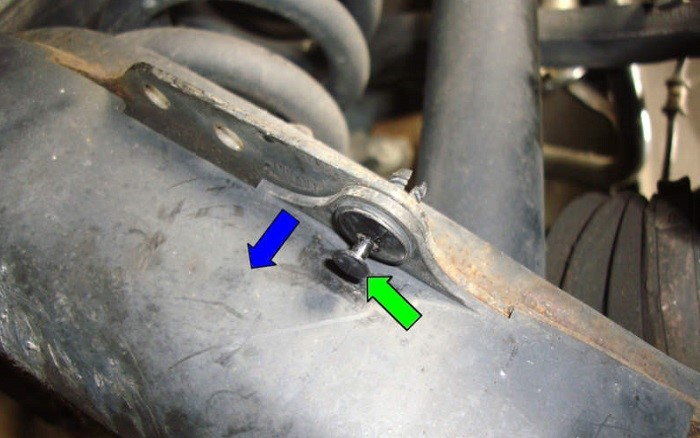
Step 7 – Loosen lower shock absorber bolt
The lower bolt that secures the shock absorber to the lower control arm is an E14 external Torx bolt with a 16mm nut. You must loosen these to free up the shock absorber and complete the removal.
Step 8 – Remove shock absorber
You may now remove the shock absorber. It has a very tight fit inside the control arm, so some effort might be required to get it out.

Step 9 – Install new shock absorber
- Place the new shock absorber in the control arm with lower E14 bolt, and tighten.
- Replace the control arm cover.
- Raise the control arm with a jack.
- Guide the top of shock through the body.
- Place the 16mm nut on the top stem of the shock, and tighten.
- Put the trunk panels back into place.
- Finally, place the car back on the ground.
Related Discussions
- DIY Replacing Shock Absorber - MBWorld.org
- Front Shock Replacement Cost - MBWorld.org