Mercedes-Benz E-Class AMG: How to Flush Your Radiator Coolant
Flushing the radiator in the Mercedes-Benz E-Class AMG is a piece of maintenance that is often overlooked. Learn how to do it to keep your engine as cool as it can be.
This article applies to the Mercedes-Benz E-Class AMG (2002-2009).
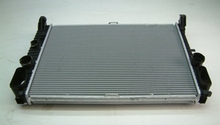
Mercedes-Benz deems their engine coolant to be a "lifetime" coolant; however, experts unanimously agree that it is a good idea to occasionally replace the coolant as it does eventually break down and loses the ability to properly protect your engine. If you are taking on the task of replacing a water pump, swapping out a radiator, or simply wanting to replace your aging coolant, a cooling system flush can help rid the system of any accumulated debris and impurities. A cooling system flush will help prolong the life of any new parts installed as well as allow the new coolant to cool and protect your engine at its best. This DIY article will focus on how to flush the cooling system in the E-Class AMG models.
Materials Needed
- Floor jack and jack stands
- Drain pan
- Funnel
- 1/4" rubber hose
- 3/8" drive ratchet and extensions
- Metric socket set
- Antifreeze
- Distilled water
- Water hose with water on tap (or additional distilled water)
- A helper (optional)
Warning
Do not attempt to work on the vehicle's cooling system when the engine is hot, as severe injury can occur. Wait until the vehicle has cooled down before beginning any work.
Step 1 – Lift the car and support with jack stands
Draining of the cooling system requires work to be completed underneath the car. Lift the car with a floor jack and support it with jack stands on level ground to ensure a safe working environment.

(Related article: How to Jack Up Your E-Class - MBWorld.org)
Step 2 – Remove engine undertrays
To best access the radiator and crankcase drain plugs, Mercedes-Benz recommends the removal of the engine undertrays. On the E-Class AMG models, these typically consist of three pieces. Remove the fasteners and slide the undetrays out of the way. There are 20 fasteners in total (six for the rear tray, four for the middle tray, and ten for the front tray).
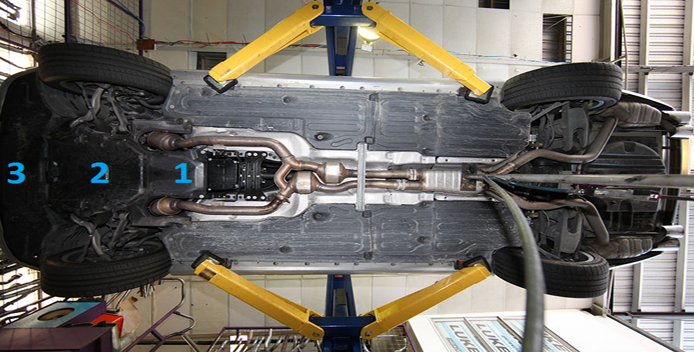
Figure 2. Location of three undertrays. 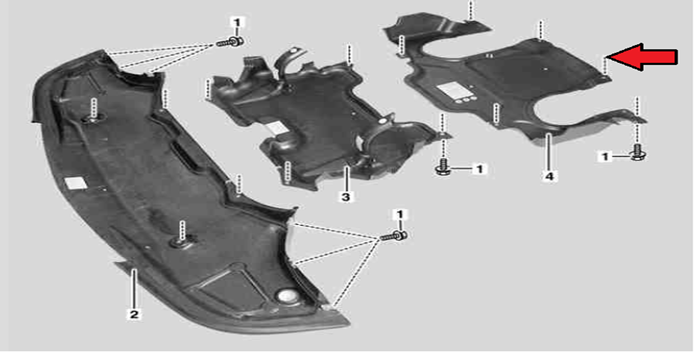
Figure 3. Exploded view of undertrays and fasteners.
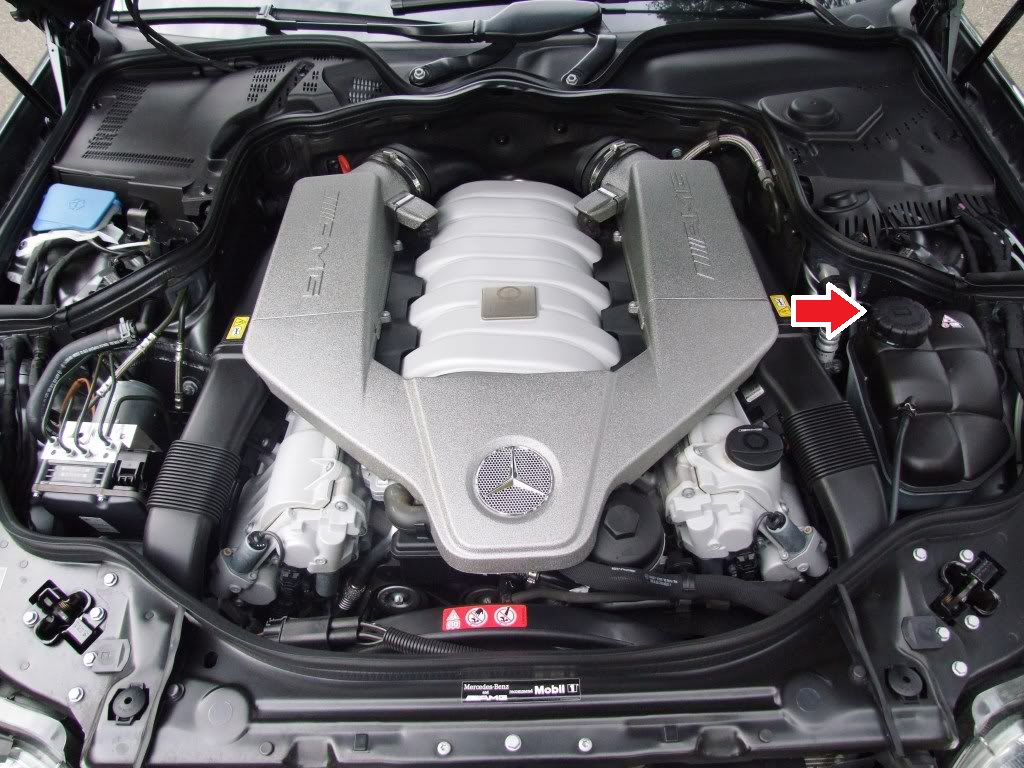
Step 3 – Remove expansion tank cap and flush system
- In the engine bay, locate the coolant expansion tank and remove the cap. This will allow the coolant to drain freely once the radiator drain plug has been opened.
- Underneath the vehicle, locate the radiator drain plug. Mercedes uses a bright red plug that can easily be identified. Have a suitable catch container ready and remove the drain plug.
- While the radiator is draining, place a water hose in the coolant expansion tank and fill it with water. It's recommended you use distilled water to flush your cooling system. Start the engine and keep filling the expansion tank while simultaneuosly allowing the water to circulate and drain out of the radiator. Continue this until the water is clean and clear before turning off both the engine and water hose. Allow the radiator to completely drain all of the water.
Pro Tip
Aftermarket heat exchangers installed on E55 AMG models typically have a separate drain valve to drain coolant in addition to the radiator drain plug.
Step 4 – Drain coolant from engine block
After the radiator has completely drained, you can reinstall the drain plug and move onto the engine block.
- To do a complete coolant flush, the engine crankcase must be drained of coolant as well. The engine drain plug is located on the side of the engine block, just underneath the exhaust manifold. With an appropriately-sized wrench, loosen the engine drain plug, but do not completely remove it. A rubber hose can be attached to the drain nipple to prevent spilling excess water. Drain the remaining water from the block into a catch pan and tighten engine drain plug to approximately 20 ft/lbs.

Step 5 – Fill and bleed cooling system
- With the cooling system drained and the radiator drain plug in place, make sure the engine block drain plug is tight. The cooling system can now be filled with a 50/50 mix of fresh coolant and distilled water. Using a funnel, pour the coolant into the coolant expansion tank.

Warning
Be sure to only use distilled water for the antifreeze mix. Tap water/mineral water will corrode the inside of your radiator and engine with deposits that will eventually ruin your cooling system.
- With the engine reservoir full of coolant, the coolant system must be bled of any residual air trapped inside. For the normally aspirated E63 AMG, this can typically be accomplished by simply allowing the engine to heat cycle several times. This would allow the engine to reach operating temperature, then cool back down. Afterwards, top off the coolant expansion tank as necessary.
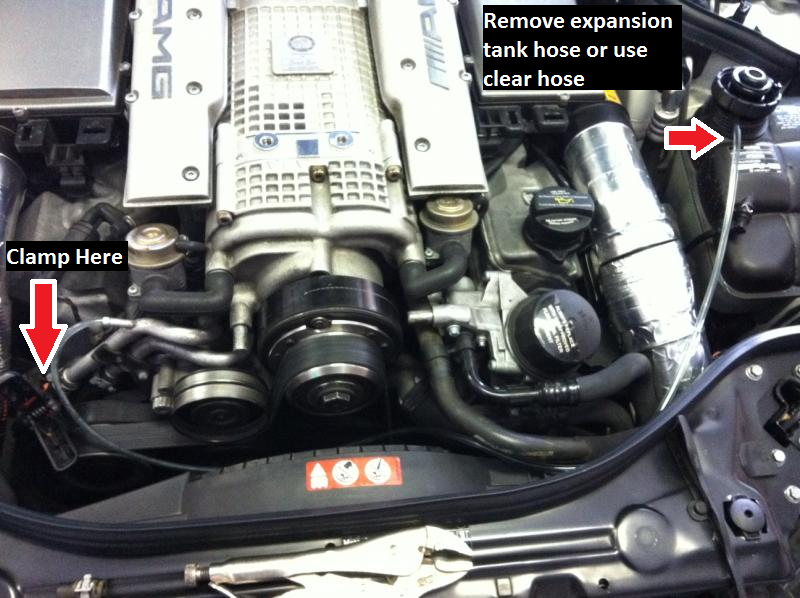
- For the supercharged E55 AMG, the bleeding process is a bit more in-depth because of the heat exchanger. First, clamp off the heat exchanger fluid return line as shown in Figure 8. Next, remove the direct vent hose from the expansion tank and place into a suitable catch container. With the help of a friend, start the car and have him hold the revs at approximately 3,000 rpm to engage the supercharger. Watch the fluid being discharged, and when it flows without any air bubbles, you are all set. Shut the car off, unclamp the return line and install the vent line back onto the expansion tank. The tank can now be topped off with coolant as necessary.
Pro Tips
- Some E55 AMG owners have opted to replace the expansion tank vent line with a suitable clear hose that allows air bubbles to be seen. This allows for a one-man bleeding process.
- It is highly recommended that the coolant level be checked and topped off for the next couple of days to ensure all air is bled out of the system.
Step 6 – Reinstall undertrays and lower car
Reinstall the undertrays in the reverse order of removal and lower the car off of the jack stands using your floor jack.
Related Discussions
- Coolant Bleed Question- MBWorld.org
- Need Help Draining LET Heat Exchanger - MBWorld.org
- Coolant Flush DIY - MBWorld.org