Mercedes-Benz E-Class: How to Install HID Lighting
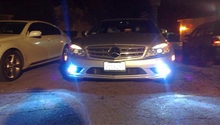
Everyone wants to see better on those dark nights. Brighter HID lights make driving safer and are just plain cool looking. Choose the color temperature to suit your style, and start modding your W212 E-Class.
This article applies to the Mercedes-Benz E-Class (2009-Present).
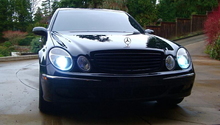
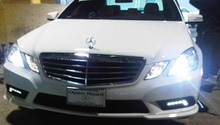
For the W212 generation of the Mercedes-Benz E-Class model, two types of headlights are available from the manufacturer. The P1 package comes with traditional halogen style lights, and the P2 package comes with the more modern Xenon bulbs. So what if your vehicle has the P1 package, but you want to upgrade to brighter headlights? There are aftermarket kits available to swap your current headlight bulbs with HID lamps, giving you the light output of the P2 package and the flexibility to choose your own color temperature.

Materials Needed
- HID headlight conversion kit
- Power drill with 1 inch cone attachment
- Hydraulic jack and jack stands
- Clip removal tool
- Lug wrench
- Needle-nose pliers
- Flat head screwdriver
- Zip-ties and Velcro
Step 1 – Access the headlight housing
Accessing the driver's side headlight housing is easier done from the wheel well. Jack up your car and support it with jack stands. Then remove the wheel so there is more space to work in. Along the front inner wheel well and underneath the corner of the fender, there are a series of plastic retainer clips holding the fender liner in place. Use a clip removal tool to pop out the retainer clips and pull back the fender liner. You may also have to loosen the rear half of the liner to wiggle out the front half. The passenger's side headlight housing is easily accessible from inside the engine compartment so there is no need to remove the wheel or fender liner.

Figure 1. Headlight assembly is easier seen through the driver's side wheel well.
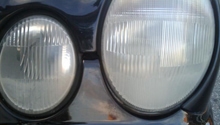
Step 2 – Modify the housing
Remove the headlight cover cap and use a cone attachment to drill a one inch hole in the center of the cap for the wires to go through. The wire harness of the HID lamp has a rubber grommet to seal the hole.
Next, use a flat head screwdriver to release the metal clips of the stock bulb socket and pull the bulb out. To allow the HID wire harness to pass through to the headlight socket, either cut a slit in the metal clips or purchase aftermarket clips that already have space for the wires. You may also need to bend the clips into shape using needle-nose pliers.

Step 3 – Install the HID components
Install the new HID lamps into the socket just as you would the stock bulbs. Rather than connecting the wire harness to the power supply, however, the harness must be attached to the ballast. Mount the ballast under the headlight housing and secure it in place with zip-ties and Velcro.
To install the passenger's side headlight housing, remove the headlight cover cap from inside the engine compartment. It's not necessary to remove the passenger's side wheel or fender liner. Follow the same procedure as with the driver's side wire harness and install the HID lamp. Mount the ballast underneath the headlight housing as well and make sure it's tightly secured.

Step 4 – Adjust the beams
Use alcohol cleaner to clean the HID lamp and secure the cap back into the headlight housing. Turn on the lights and shine them against a wall. Make sure they are centered and aimed straight, and adjust where necessary. Once the installation is complete, reattach the fender liner and wheel before lowering the vehicle.

Related Discussions
- My HID Install with DIY Instructions - MBWorld.org
- HID Conversion Question - MBWorld.org