Mercedes-Benz E-Class: How to Remove Rear Bumper
Cosmetic issues on cars are usually easy to fix and can drastically reduce the car's value. With a few simple tools and an afternoon's worth of time, you too can get your Mercedes-Benz E-Class back on the road looking immaculate.
This article applies to the Mercedes-Benz E-Class (2002-2009).
The bumper is made to sacrifice itself and save the car. So it's common for any car on the road today to have scratched up bumpers, sometimes even broken ones. Sometimes, a simple and easy process can make a world of difference on your Mercedes-Benz E-Class. Given the perils of daily driving, your rear bumper may have seen some bad times. Whether it needs to be repainted or completely replaced, this DIY will help you get the car back to its original glory.

Materials Needed
- 10mm socket
- Torx 20 Tool
- Flat head screwdriver
- Socket extension
- Wheel ramps
Step 1 – Remove the spare tire cover
Remove the spare tire cover by removing the two screws and two pins circled in red and blue in Figure 1. Then remove the T20 Torx scews circled in red in Figure 2.
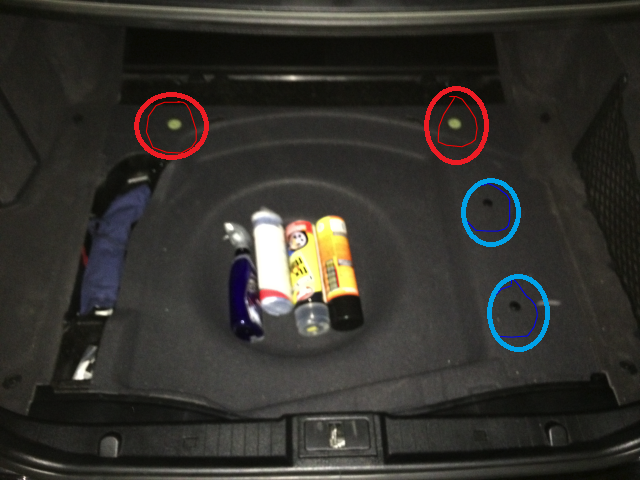
Figure 1. Removal of spare tire cover. 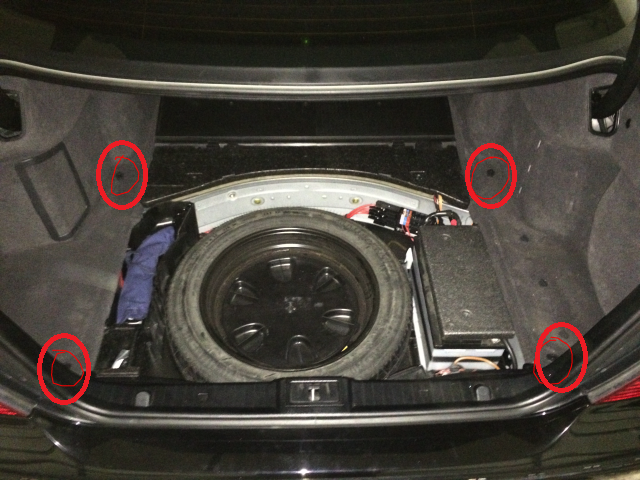
Figure 2. Removal of trunk carpet.
Step 2 – Remove the trunk carpet
There are only two pins on each side of the trunk's carpet lining that need to be removed. They are circled in red in Figure 3. Take your time and use a flat head screwdriver to pry up on the center of the pin to release the fastener.
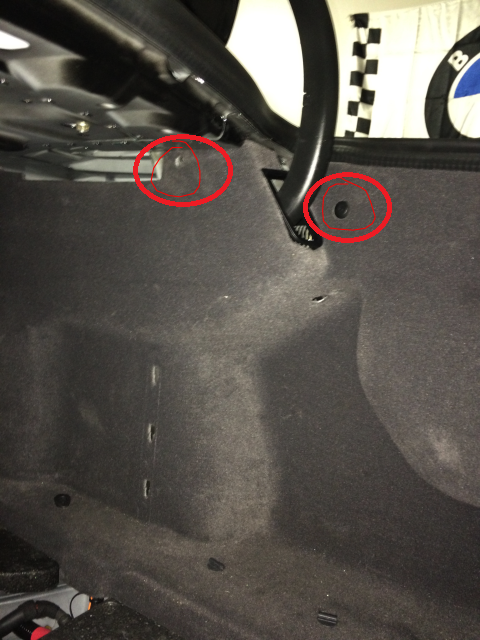
Pro Tip
These plastic fasteners can break easily and can be costly to replace. So be extra careful when removing them.
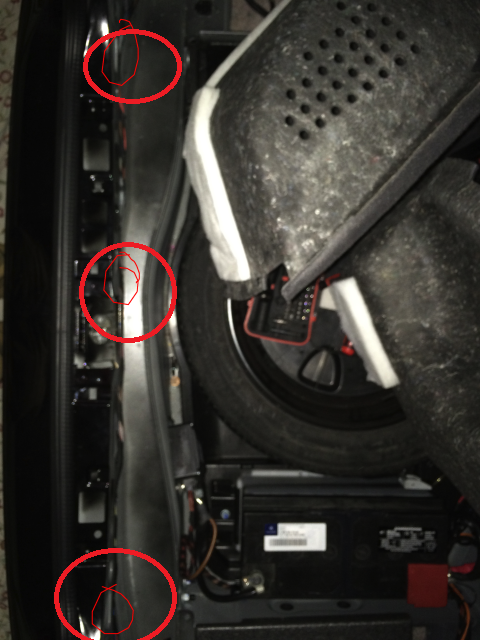
Step 3 – Remove square pins on plastic trim pieces
Remove the 6 square pins left in the trunk by gently prying up and releasing the fastener. Two are located on the trim piece on the base of the trunk. The other four are located near the taillights.
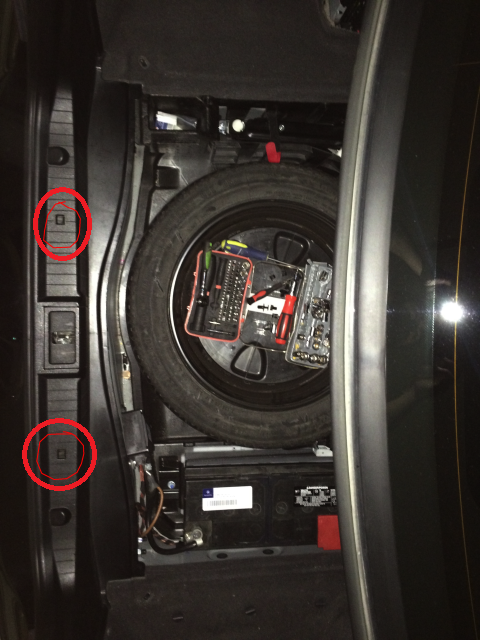
Figure 4. Removal of square pins at base of trunk. 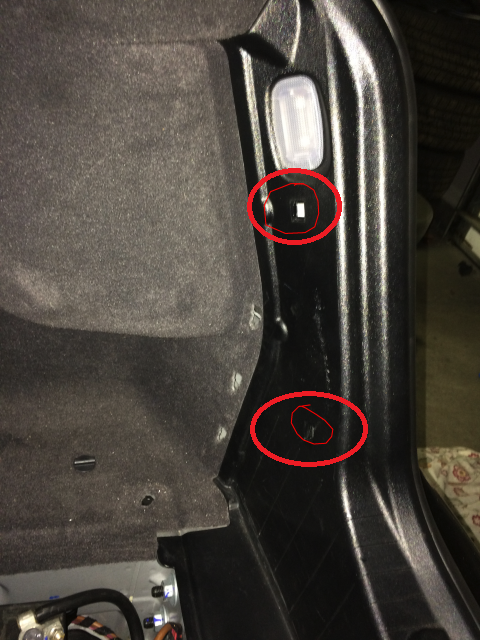
Figure 5. Removal of square pins near taillight.
Step 4 – Removal of base trim piece
Now that all of the fasteners that should've been taken out are out of the way, you can now remove the base trim. Remove the taillight connector before completely removing the trim piece.

Pro Tip
Do not forget to remove the taillight connector as it can break and cause other electrical issues.
Step 5 – Move the air tank
Move the air tank in the trunk by taking the carpet and moving towards the middle, which exposes it. The air tank can be moved by removing the three 10mm bolts on the black metal bracket circled in red in Figure 7. Move the tank aside but do not disconnect the air line. Now, four 10mm bolts can be accessed and removed as shown in Figure 8 and 9.
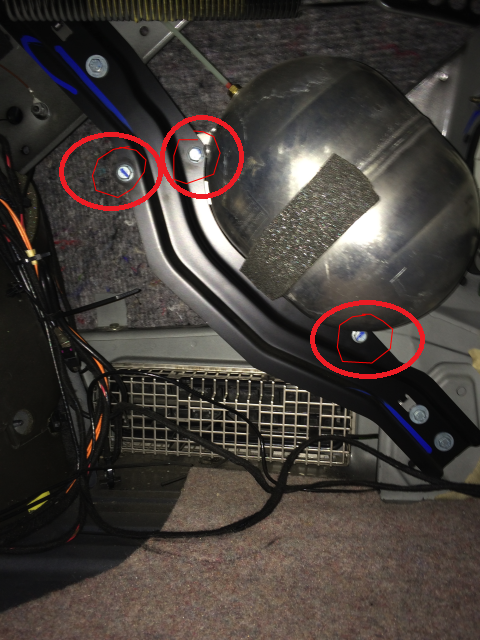
Figure 7. Air tank. 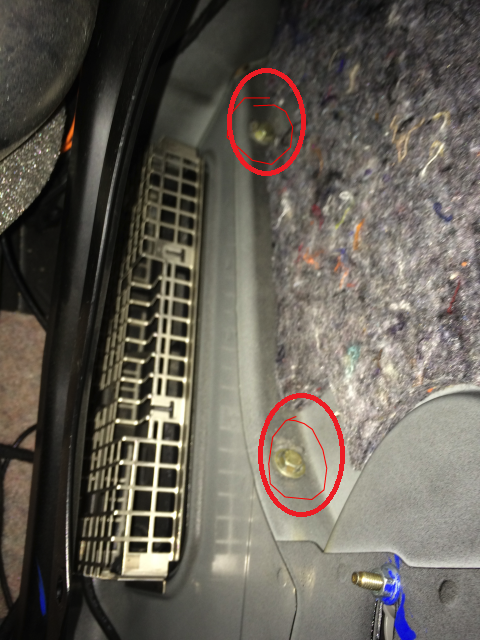
Figure 8. Bolt removal. 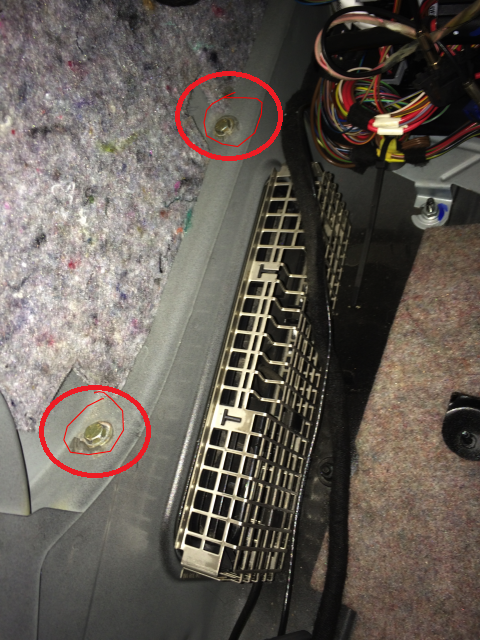
Figure 9. Bolt removal.
Step 6 – Remove nuts near base of trunk
Remove the three black 10mm nuts at the base of the trunk as shown in Figure 10. Only a few more bolts have to be removed and the rear bumper will come off.
Step 7 – Remove fasteners in wheel well
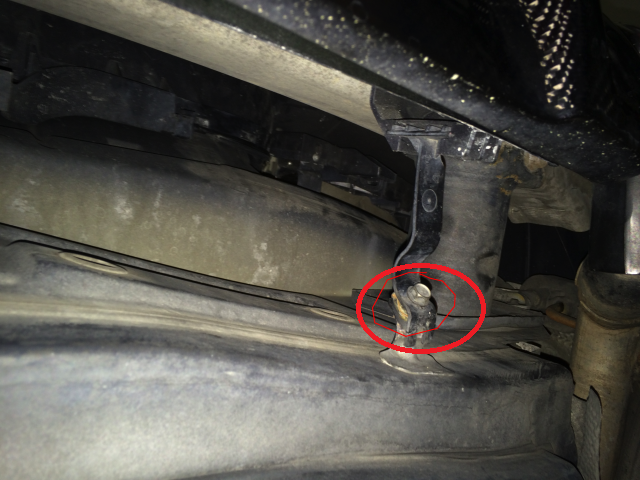
Remove the 10mm bolt and pin on the backside of the rear wheel wells to disconnect the wheel well liner from the bumper as seen in Figure 11. While pulling on the liner, you will see one bolt on each side of the car holding the bumper on. Remove that 10mm bolt as shown in Figure 12.
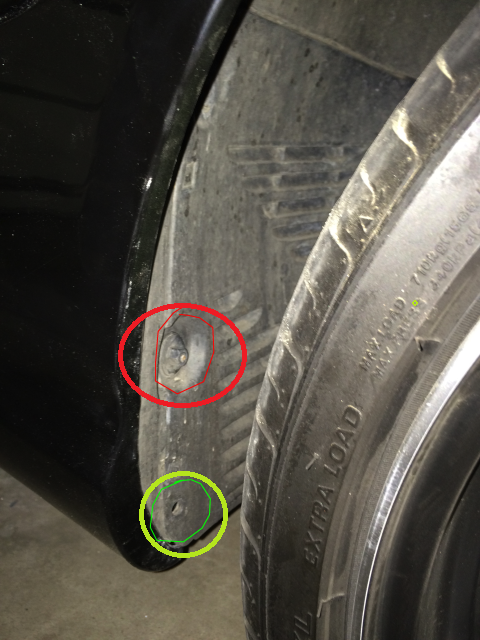
Figure 11. Removal of wheel well fasteners. 
Figure 12. Removal of bolt behind liner.
Step 8 – Remove bolts under bumper
Remove the two 10mm bolts under the bumper as shown in Figure 13. These bolts line up with the spare tire well if you are having a hard time locating them. That's it! The bumper should now be free. Gently slide the old bumper off and make sure you did not miss any bolts. Re-install new bumper in the reverse order of these steps.
Step 9 – Re-installation
The re-installation process for the bumper is just reversing the steps that you used to remove it. Be sure to take your time and make the bumper sit properly on the car. If the bumper is re-installed incorrectly, it could possibly come loose and be damaged.
- Tighten the two bolts under the new bumper.
- Install the fastners in the wheel well.
- Install the nuts near the base of the trunk.
- Move back the air tank to the proper position.
- Put back the base trim piece and the taillight connector.
- Put the square pins back in the trunk and near the taillight.
- Lay the trunk carpet back inside.
- Lastly, put the spare tire cover back inside.
Related Discussions
- W211 E55 Rear Bumper Removal- MBWorld.org
- DIY W211 Rear Bumper Removal- MBWorld.org
- DIY W211 E55 Rear Bumper Removal - MBWorld.org