Mercedes-Benz E-Class: How to Replace Rear Shocks
If you've noticed quite a bit more roll while cornering or if your E-Class Mercedes continues bouncing after you slam the trunk lid shut, it might be time to replace the OEM shocks with some stiffer shock absorbers. Learn how to replace the rear shocks here.
This article applies to the Mercedes-Benz E-Class (2002-2009).
Is your Mercedes-Benz E-Class wobbling around corners? Do you feel every bump and divot in the road right in the seat of your pants? Do you close your trunk lid and see the rear end bouncing – even when you're in your house looking through the front door?
Your trusty Mercedes-Benz needs a set of rear shocks, and the good news is that there are some great performance shocks available for these cars. While it won’t take all of the built-in “floatiness” away, it will definitely enhance the way the car handles tight corners, quick lane changes and high-speed chases from your local police (if so inclined). So if you’re the DIY type, take heart; swapping-in a set of Monroe, Bilstein or KYB performance shocks is not as daunting as you may think. It’ll save you hundreds over taking it to a Mercedes dealer or specialty garage.

Materials Needed
- 17mm deep socket
- 17mm open end wrench
- Jack stands
- Hydraulic floor jack
- Hardened steel pry bar
- Screwdriver
- Penetrating oil spray
- Elbow grease
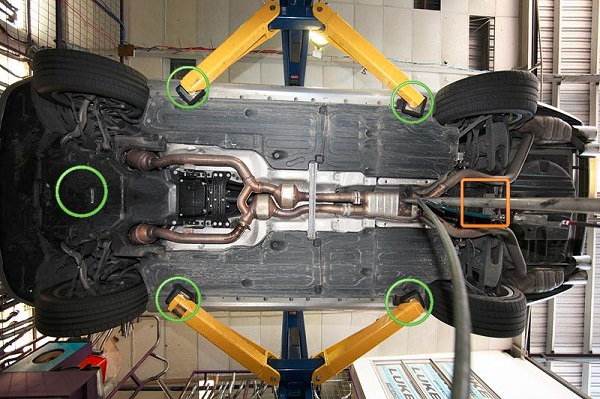
Step 1 – Jack-up the rear
Chalk the front tires for safety, then jack-up the rear and place jack stands under the reinforced points on the chassis.
(Related Article - How to Jack Up Your E-Class - MBWorld.org)
Pro Tip
You may want to remove the rear wheels to allow more light into your work area, but removing them is optional. If you choose to remove them, be certain to loosen the lug nuts before raising the vehicle.
Step 2 – Remove trunk carpet on each side
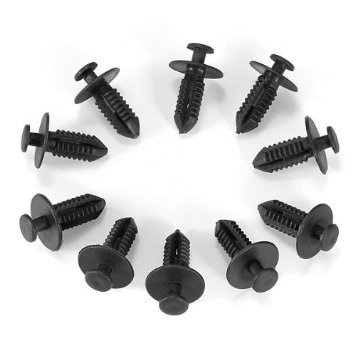
Remove the two top carpet fasteners on each side of the trunk by pinching the front and rear thumb washers together to release the fastener. Fold the carpet inward, exposing the top of the shock tower. The trunk trim is secured with plastic clips, as seen below. Use your plastic trim removal tool, or a handy flat-head screwdriver to remove the clips.
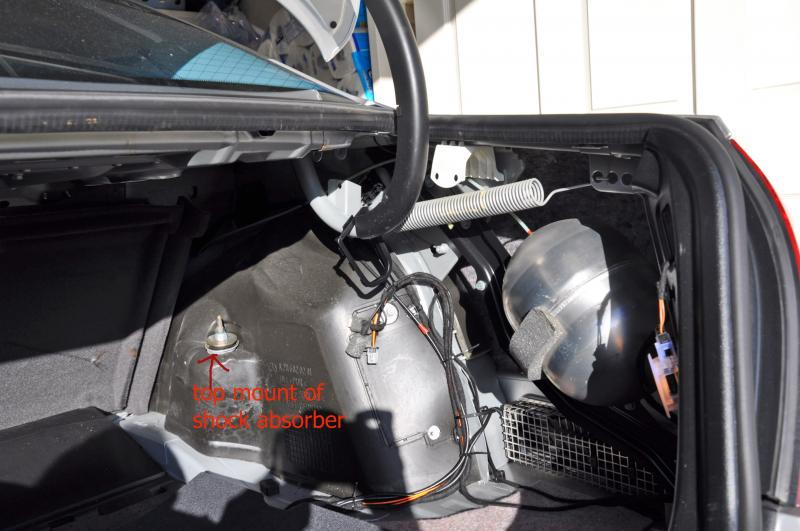
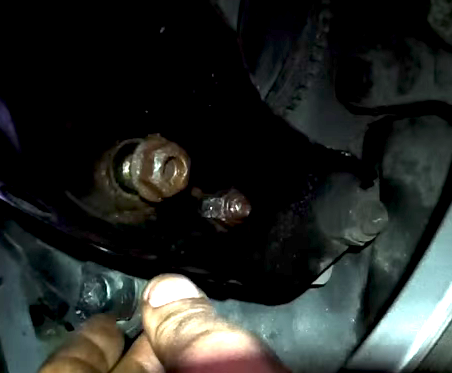
Step 3 – Remove upper shock nuts
Remove the two 17mm nuts at the top of the shock inside the trunk. Use your 17mm open end wrench to hold the lower nut.
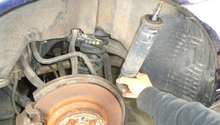
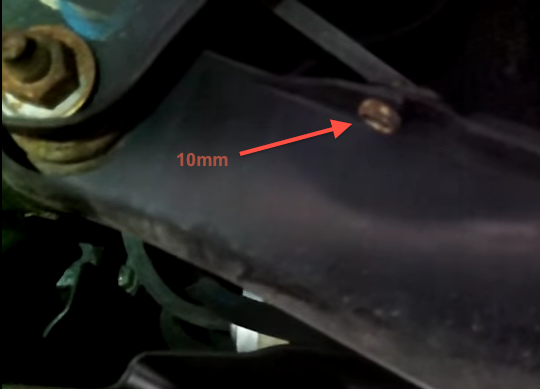
Step 4 – Remove lower suspension cover
Remove two 10mm bolts that hold the rear suspension arm cover in place.
Step 5 – Remove lower shock bolt
Remove the lower shock bolt with a 16mm socket on the nut and a 16mm wrench to secure the bolt on the opposite side of the suspension arm.
Pro Tip
You'll really want to spray penetrating oil on this nut and bolt assembly and give it time to work into the bolt threads. An impact gun would really change your life at this point!
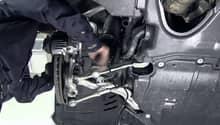
Step 6 – Remove rear shock
You'll need to wedge the lower end upward and out of the suspension arm. (The compression force is strong with this one!)

Pro Tip
A thin, but hardened steel pry bar will help pry the shock out of its seat.
Step 7 – Install new shock
Slide the new shock into the upper hole then place the rubber grommet and metal washer on loosely with one nut to “hang” the shock, which will make it easier to install the lower bolt. Push upward to compress the new shock far enough to allow you to slide it over the control arm.
Pro Tip
The following is very important. You will need some body strength or perhaps a helping hand in order to push up upon and compress the shock absorber enough to get it to slide over the suspension arm.
From here, installation is the reverse of the removal process.
- Secure the bottom mounting bolt form the shock to the suspension knuckle or upright.
- Lightly fasten shock to body top nuts, these require final torquing with the suspension loaded.
- Refit wheels, and lower car down off jack stands.
- Do final torque setting of shock top nuts to 33 ft./lbs (crawl under the car, and double check the lower nut while you're at it).
- Refit trunk carpeting and all interior bits.
Related Discussions
- How to Replace Shocks - MBWorld.org
- DIY Replacing Rear Shocks - MBWorld.org
- Changing Rear Air Springs - MBWorld.org