Mercedes-Benz E-Class and E-Class AMG: How to Replace Rear Shocks
A bouncy rear end can lead to loss of control in the Mercedes-Benz E-Class. Here's how to replace the rear shocks yourself and make sure your vehicle only goes where you want it to.
This article applies to the Mercedes-Benz E-Class and E-Class AMG (2002-2009).
Replacing the rear shocks on your Mercedes-Benz E-Class is not a cheap undertaking if you have a professional do the job. Take heart though, this maintenance procedure is rather simple job that you can do on your own. Even a very novice mechanic can do this in just a few hours at most, and that is going really slow and methodical. A minimum amount of tools are all that is needed to get this done and you will be proud of your achievement when the job is completed.
Materials Needed
Hydraulic floor jack
Jack stands
Ratchet and socket set (17 mm deep well, 10 mm, 5/8" socket), extensions.
Flat head screw driver
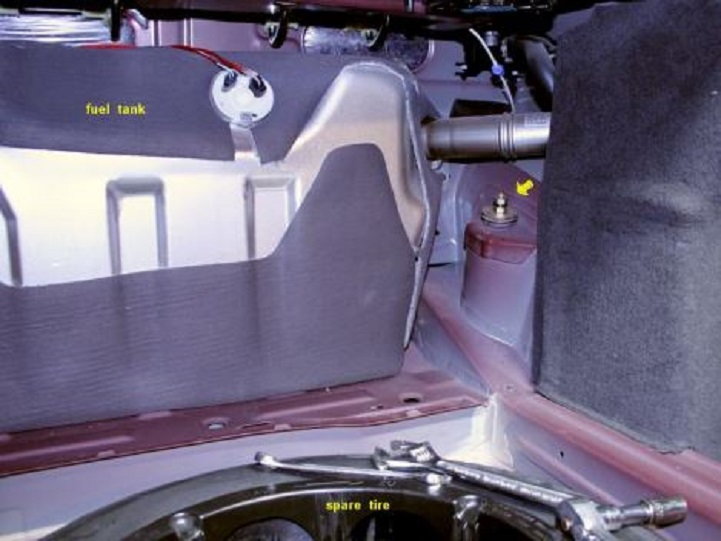
Step 1 – Open the trunk and remove liner
Pop open the trunk and remove the trunk liner. Use a flat head screwdriver to pop the center inserts of the plastic tabs that hold the trunk liner in place. The rest of the tabs will pop right out after the center plug is removed. Be careful when popping these plugs as they can easily break.
Figure 1. Remove the trunk's liner to gain access to the strut tower assembly bolts.
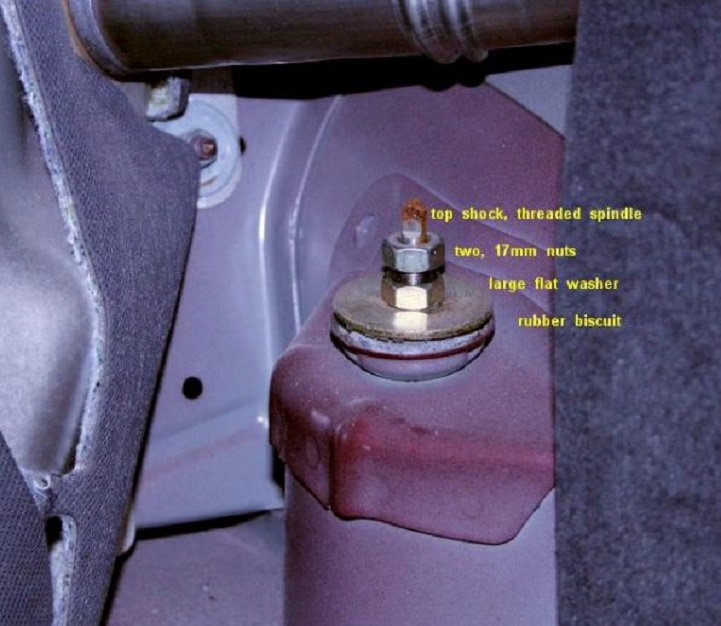
Step 2 – Remove rear strut from tower
While the suspension is fully loaded, remove the two 17 mm nuts holding the strut to the tower.
Figure 2. Remove the two nuts, washer and rubber biscuit to free the strut from the tower.
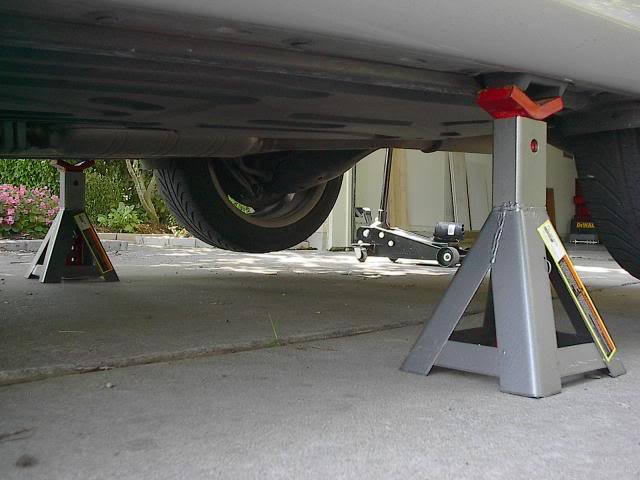
Step 3 – Lift car and set on jack stands
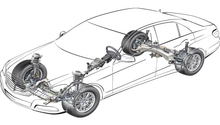
Loosen the lugs on the tires first before you lift the vehicle as you will have to wrench on them hard to break them free.Raise the rear of the car with a hydraulic floor jack and place it on jack stands. . When the car is lifted, the top of the shock should drop free from the fender. Remove the wheels.
Figure 3. Use the proper jack stand locations
Pro Tip
Never work on your car without using jack stands on level ground. Chock the wheels for additional safety.
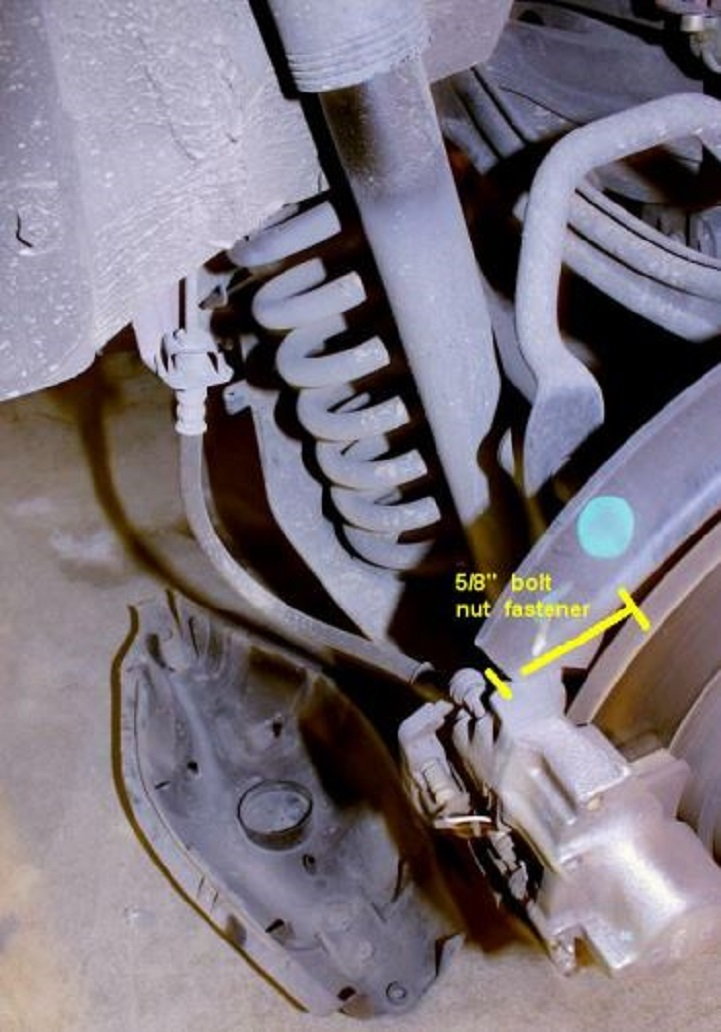
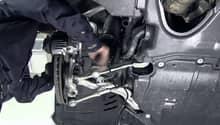
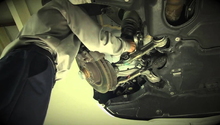
Use a 10 mm socket to remove the two bolts from the plastic cover beneath the rear axle. Pull the plastic cover and set it to the side. Remove the 5/8 inch bolt and nut combination from the lower shock to dismount it. Lift out the shock, it will likely need some contortion to remove it out of the wheel well.
Figure 4. Remove the lower shock bolts under the rear axle.
Pro Tip
Be sure not to damage the plastic dust cover over the rotors when removing the heavy strut assembly from the wheel well.
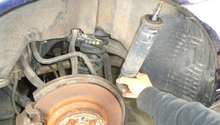
Step 5 – Install rear shock absorber
Before you can install the new shocks, you will need to compress the replacements to the size of the OEM shocks. Use twine or very long zip ties to secure the compressed length. Install the shocks at the lower end first. Put it in place at the bottom, line it up correctly at the top and snip the twine or zip ties allowing it to uncompress into position. Secure the lower end with the bolt and the 5/8 inch nut. Replace the plastic cover and replace the 10 mm bolts under the rear axle. Replace the rubber biscuit, washer and the two nuts at the tower assembly inside the trunk. Then replace the trunk rear wall liner.
Figure 5. Install the rear shock. Secure the bottom first.
How to Install Coilovers
Are you looking to turn your Mercedes-Benz E-Class into a world class sports car? Get a more aggressive stance and improve on your handling in one stroke.
This article applies to the ...
How to Replace Front Shocks
Changing front shocks on your E-Class is not as daunting as you think.
This article applies to the Mercedes-Benz E-Class (2002-2009).
The handling bug seems to have bitten everyone from ...
How to Install Lowering Springs
johnc510
Do you want to achieve that low, slick look with your Mercedes-Benz? Add some spice to your E-Class and start living the low life.
This article applies to the Mercedes-Benz ...
How to Replace Front Shocks
csumt76
Having bad front shocks on your Mercedes-Benz could have it going down the road doing an impression of a low-rider. A bouncy front end on a vehicle can lead to a disaster. Here's ...
How to Replace Rear Shocks
If your E-Class tends to dance around a tight corner rather than embrace it, your rear shocks might be the culprit.
This article applies to the Mercedes-Benz E-Class (2002-2009).
Is your ...
How to Replace Shock Absorber
pelicanparts.com
Got a "Stop, car too low" warning message? Don't panic.
This article applies to the Mercedes-Benz E-Class w211 (2002-2009).
With this generation of E-Class starting to ...