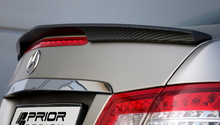
Mercedes-Benz C-Class: How to Install Spoiler
Adding a spoiler to your Mercedes Benz C-Class not only enhances the car's look, but also reduces drag while increasing fuel efficiency. Installing one to your Mercedes-Benz C-Class w204 is a very simple process, so read on to learn how.
This article applies to the Mercedes-Benz C-Class w204 (2007-2014).
Spoilers started to become popular in the 1970's when they were added to sports and racing cars. Since then, spoilers have been applied to almost all modern passenger vehicles. Not only for aesthetic appeal, but also as a practical application. If your Mercedes Benz C-Class is without a spoiler, you may want to add one for several reasons. It's a great way to make your w204 stand out from the rest, it reduces drag, improves braking stability, and enhances the car's traction on the road. More good news is that installation won't take up a large chunk of your day. Continue reading below for the steps to properly install a spoiler on your C-Class w204.

Materials Needed
- Rubbing alcohol
- Microfiber cloths
- Urethane adhesive
- 3M double-sided tape
- X-ACTO knife
- Masking tape
Step 1 – Clean the trunk lid
Wash and wipe down the portion of the trunk lid where the spoiler is going to be installed. Make sure every bit of dirt is removed as this may affect adhesion of the spoiler to the trunk. In addition to washing the trunk, apply rubbing alcohol to a cloth and further wipe down the area.
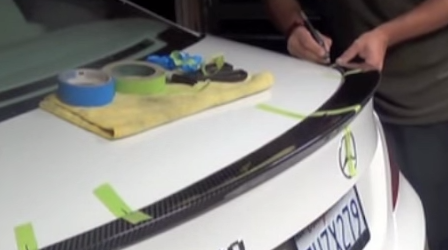
Step 2 – Mark the location of the spoiler
Place the spoiler on the rear trunk to position it in the proper and preferred spot on the trunk lid. Apply at least five pieces of masking tape horizontally along the spoiler, and secure it to the trunk lid. Tape the center of the spoiler first, and then evenly on the sides. Draw a line along the masking tape to mark the spoiler's location. Then, carefully cut the tape between the trunk lid and spoiler to separate them.
Step 3 – Apply double-sided tape to spoiler
Apply 3M double-sided tape throughout the bottom side of the spoiler. Make sure to apply enough tape to where the edges are covered, but make sure the tape is not hanging over the edges.
Step 4 – Apply urethane adhesive
Before installing the spoiler, apply beads of urethane adhesive along the sides of the double-sided tape. This adhesive ensures that the spoiler will tightly stick onto the trunk lid.
Step 5 – Place the spoiler down
Line up the spoiler directly above the trunk lid, and use the lines on the masking tape as a guide. Slowly place the spoiler onto the trunk lid, and press it down firmly. Make sure the marked areas line up perfectly.
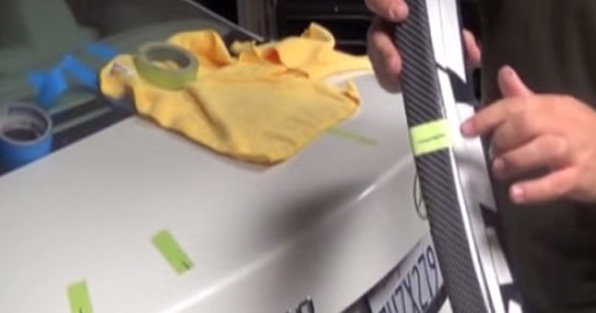
Figure 3. Align the marks on the spoiler and trunk. 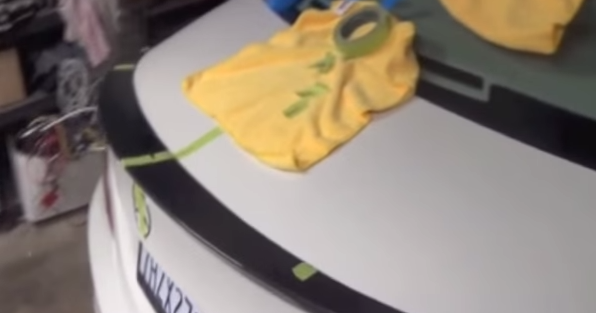
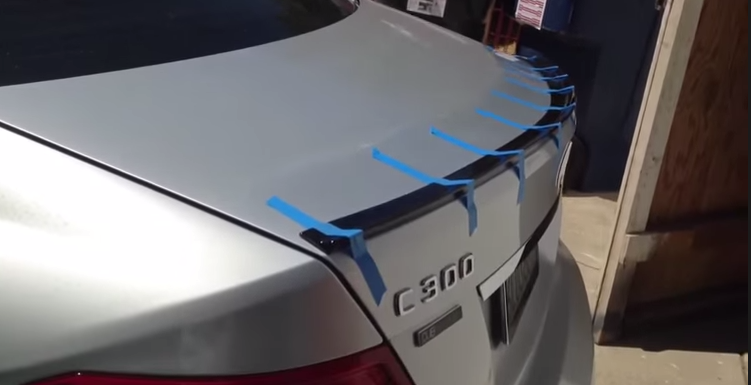
Figure 4. Spoiler properly set down and lined up.
Step 6 – Tape the spoiler
Once the spoiler has been installed and properly lined up, secure the spoiler to the trunk with several pieces of making tape. Make sure the spoiler is not able to move out of place. Allow the car to sit for at least a day before removing the tape.
Related Discussions
- How to Install a Spoiler - MBWorld.org
- Proper Way to Install Trunk Lid Spoiler - MBWorld.org
- W204 eBay Trunk Spoiler Experiences - MBWorld.org
- How to Remove Spoiler - MBWorld.org